NOTE: Do not touch the rear unit connector pins
(male connector) against any metal or other conductive
surfaces. This may short the batteries and cause
damage to the lock.
7
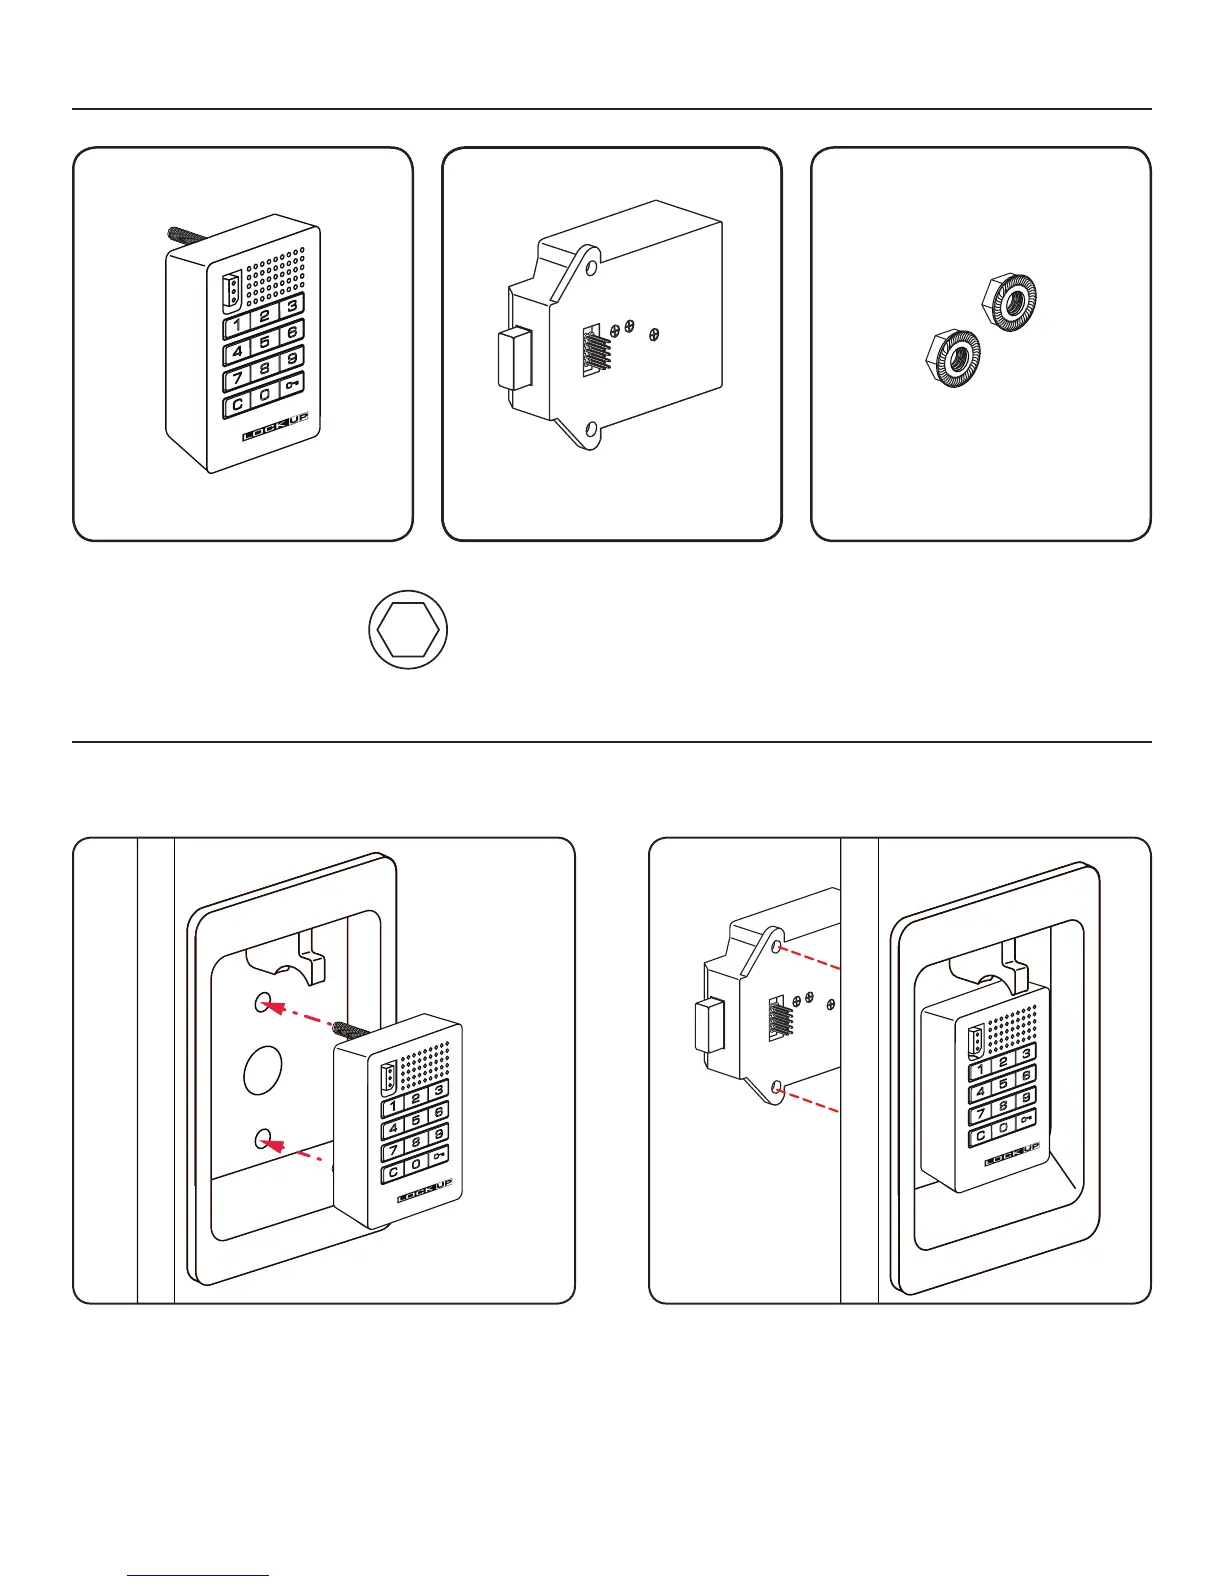
Recessed Cup Metal Door Installation Parts
Note: Prior to installation the door must be clear of any obstructions. See page 9 for door prep.
Recessed Cup Metal Door Installation Steps
A
1-Front Unit
C
2-Locking Nuts
B
1-Rear Unit
Required Tools
3/8” Socket
(deep socket required)
Place the mounting screw posts of the front unit (A)
through the lock mounting holes on the front of the
door.
Step 1
While holding the front unit (A) against the front of the
door, place the rear unit (B) against the rear face of the
door. Align the mounting holes with the mounting screw
posts from the front unit (A).
Step 2