9 English
Changing or removing a spring
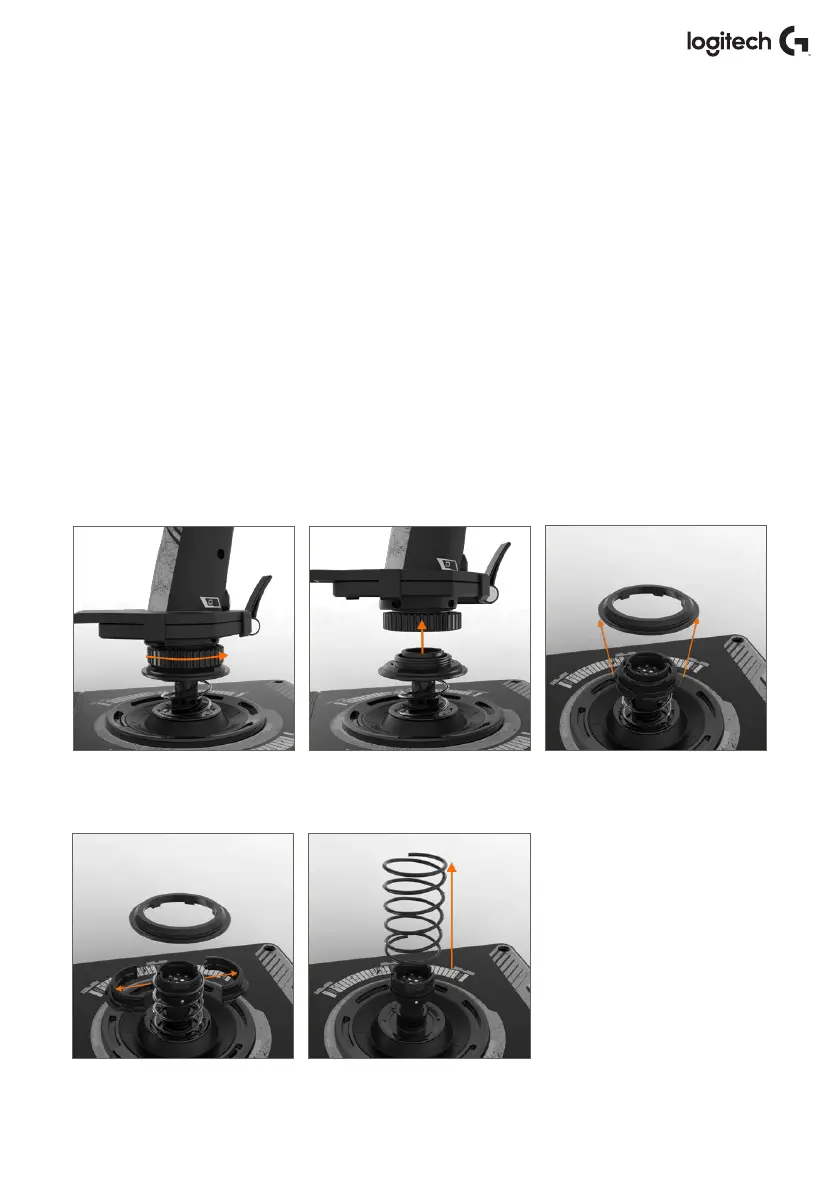
To insert, change, or remove a spring, follow these steps. Ensure the trigger is facing away from
you and that the X56 HOTAS logo plate is facing you.
1. Turn the Locking Bezel (part B) counterclockwise until the Stick comes away from the base.
2. Remove the Seal Ring (part C) by placing the ngers from your left and right hand under
thering on either side, and then lift up. The Seal Ring is sti by design.
3. Pry apart the Locking Clamps (part D). These pull apart from the stick, but are under load
from the spring. Take one half o rst, hold the spring, and then remove the other half.
4. Remove the Spring (part E), then either replace with a new Spring of leave the Spring o.
To reassemble, reverse the order of the above steps, making sure to securely seat the Seal Ring
(Part C) and rmly tighten the Locking Bezel (part D) on the Stick base.
Note: When changing springs, please ensure that the USB cable is disconnected from your PC
and avoid touching the connectors in the stick handle and base.
1. Turn Locking Bezel
counterclockwise
4. Pry apart Locking Clamps
2. Remove Stick
5. Remove Spring
3. Remove Seal Ring