EasyManua.ls Logo

Lopi Heritage Bay Insert User Manual

Lopi Heritage Bay Insert
32 pages
To Next Page IconTo Next Page
Page #1 background imageLoading...
Page #1 background image
Owner's Manual
- August, 2001 -
WARNING: If the information in this manual is not followed exactly, a fire or explosion may
result causing property damage, personal injury or loss of life.
- Do not store or use gasoline or other flammable vapors and liquids in the vicinity of this or any
other appliance.
- WHAT TO DO IF YOU SMELL GAS
¥ Do not try to light any appliance.
¥ Do not touch any electrical switch; do not use any phone in your building.
¥ Immediately call gas supplier from a neighbor's phone. Follow the gas supplier's instructions.
¥ If you cannot reach your gas supplier, call the fire department.
- Installation and service must be performed by a qualified installer, service agency or the gas supplier.
Heritage Bay Insert
B-Vent Gas Fireplace Insert
10850 117th Place N.E. Kirkland, WA 98033
$10.00 93508060
Listed
Question and Answer IconNeed help?

Do you have a question about the Lopi Heritage Bay Insert and is the answer not in the manual?

Lopi Heritage Bay Insert Specifications

General IconGeneral
BrandLopi
ModelHeritage Bay Insert
CategoryIndoor Fireplace
LanguageEnglish

Summary

Safety Precautions

If You Smell Gas

Provides critical steps to take if gas odor is detected, emphasizing immediate action and evacuation.

Features and Specifications

Heating Specifications

Provides technical data on heating capacity, input rates, and efficiency for Natural Gas and LP.

Insert Installation

Installation Preparation

Outlines essential steps and warnings before beginning the installation process.

Insert Placement

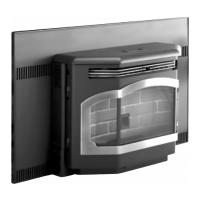
Details the required clearances and positioning for the insert within the fireplace.

Insert Installation (Continued)

Vent Requirements

Outlines critical clearances and installation rules for the vent system.

Gas Line Installation

Covers requirements for connecting the gas line, including codes and pressure testing.

Finalizing the Installation (Continued)

Turn on gas, leak test, start pilot

Covers turning on gas, leak testing, and starting the pilot flame sequence.

Adjust the air shutter

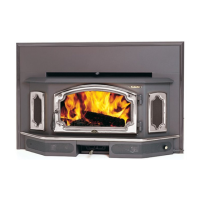
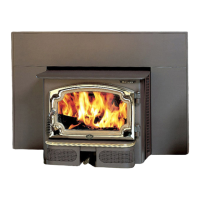
Describes how to adjust the air shutter for optimal flame appearance and performance.

Ensure heater establishes a draft

Addresses potential negative pressure issues and how to establish proper venting draft.

Operating Your Heater

Operating Your Heater (Continued)

Starting The Pilot Flame

Provides step-by-step instructions for safely lighting the pilot flame.

Operating Your Heater (Continued)

Maintaining Your Heater

Yearly Service Procedure

Outlines recommended annual maintenance tasks for the heater.

Troubleshooting

How this Heater Works

Explains the millivolt system and how the heater components interact for operation.

What Turns the Main Burners On and Off

Details the millivolt system and safety features that control burner operation.

What Prevents Gas Buildup

Explains the safety mechanisms, like the thermocouple, that prevent gas accumulation.

Warranty

Warranty

Details the 7-year warranty coverage for parts and labor, including exclusions.

Optional Equipment

Propane Conversion Kit

Continues the installation instructions for converting the heater to propane fuel.

Related product manuals