Wiring the chime
6
You must determine the type of doorbell chime you have in your home: electronic or mechanical.
Not sure? If your doorbell chime is a classic *ding-dong* sound, chances are your chime is mechanical.
If your doorbell sounds more like a melody, then your chime is electronic. If you are still not sure, remove
the cover panel of your chime box - if you nd springloaded levers and a physical metal chime, you have a
mechanical chime.
For users with a mechanical chime, follow the extra step below to complete the installation.
1. Remove the cover panel of your doorbell
chime box.
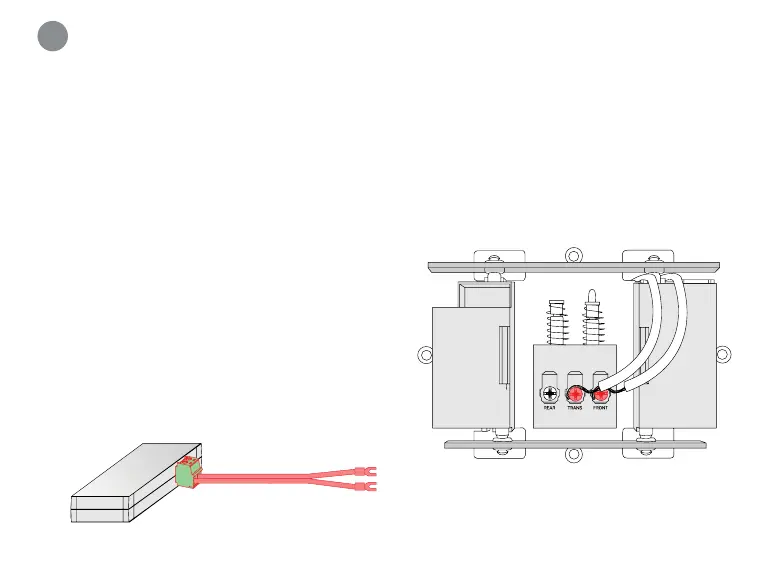
2. Loosen the screws labeled FRONT and
TRANS using a Philips head screwdriver. Do
not remove the screws, and be sure to detach
any connected wiring (see Figure 1).
3. Connect the included chime kit to the green
terminal on the end of the included wire
harness (see Figure 2).
For mechanical chime owners:
Figure 1
Figure 2
 Loading...