L200 Series Quick Setup Guide - English - R1
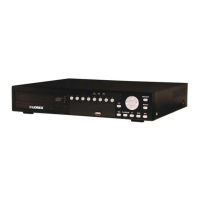
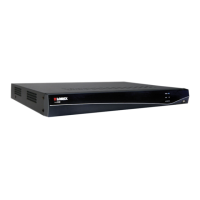
1 x DIGITAL VIDEO RECORDER WITH PRE-INSTALLED HDD*
1 x POWER ADAPTER
1 x REMOTE CONTROL
1 x INSTRUCTION MANUAL
1 x QUICK START GUIDE
1 x SOFTWARE CD
PACKAGE CONTENTS:
Network Ready, Professional Digtial Video Surveillance
Recorder
ATTENTION:
• * Channel/ Port configuration and HDD (hard disk drive) capacity may
vary by model. Check your package for specific content information.
• Monitor and Cameras are not included.
• Broadband Router and Computer are required for local and
remote monitoring (not included).
• For detailed setup and software information, please refer to
your printed User’s manual (included).
Infor mation in this doc ument is subject to change without notice. As our pro ducts are subjec t
to continuous improvement, Lorex Technolog y INC. and our subsidiar ies reser ve the rig ht to
modify product design, specifications and prices, w ithout notice and without incurr ing any
obligation. E&O E © 2009 LOR EX . All right s res erved.
L200 Series Edge DVR
Quick Setup Guide
Time: 20 Minutes
Skills - Easy
BAS I C I N STA LL ATIO N GU I DE
1
2
Connect the first camera (with
BNC connection type. Requires
additional power adaptor) to
the CH1 input. Follow the same
step to connect the additional
cameras.
SET-UP LOCAL VIEWING ON YOUR PC
STEP 3
4
Connecting the Ethernet Cable
Press the MENU button from
the front panel of the DVR (you
may use your remote control or
Mouse (optional) to view the Setup
Menu. On the Setup Menu, scroll
down using the arrow key and
select System Menu and press
Enter. On the System Menu, scroll
down to Time Set and press Enter.
NOTE: Default time is set to Eastern
Standard Time. You should change the
time based on your regional settings.
Scroll down to Time Set menu to
change Date and Time and move
to APPLY to apply the changed
settings. Once you are finished
with the settings, press the Menu
button to access the DVR menus.
Congratulations! You have completed
STEP 1 & 2 successfully. Your DVR is now
ready to use. Refer to the owner’s manual
to learn how to record, playback, use the
search features and all other features
available with this DVR.
This step relates to remote viewing over the LAN (local area network)
by using a pc located on the same network as that of the DVR.
It’s all on the Web
www.lorexcctv.com
For detailed setup
information, please
refer to your included
User’s Manual. For
additional information,
please visit our website
www.lorexcctv.com
5
Navigation Controls/Enter:
Record the IP and MAC Addresses in the section below:
IP ADDRESS : . . .
MAC ADDRESS : : : : : :
(Required for DDNS registration)
Retrieve the DVR Information
1. To retrieve the System
Information, press the REW button
on the Remote Control (ensure
batteries are inserted) (OR) Press the
REW button on the front panel of the
DVR (please check the user’s manual
for MENU steps).
1
2
3
Your DVR must be connected to a Router prior to powering it ON
The Virtual Keyboard control becomes
available when keyboard input is
needed for entering information such
as Names, Network Information, etc.
• Includes a~z, A~Z, 0~9 and Symbols:
!@#$%^&*()_+{}<>?-=[];,./
• Navigate using the arrow keys
on the Front Panel or
Remote Control.
• Use the ENTER Button to choose the
letters, numbers and symbols
• Press the Menu/Exit button once the
setup is completed
• Press the navigation controls to move
Up, Down, Left and Right in the Main
Menu and Search menus.
• Press the ENTER Button to select and
change the values in a menu.
• Pressing the ENTER Button when
displaying live video will change the on
screen view to 8 Channel View (L208
Series Only).
THE DEFAULT DVR PASSWORD IS 111111
Connect Cameras & Monitor (not included) to the DVR:
NOTE: Test the cameras prior to selecting a permanent
mounting location by temporarily connecting the Cameras
and Cables to your DVR.
Connect one end of the Ethernet
cable (for remote monitoring) to
one of the router’s (not included)
LAN ports and the other end to
the DVR’s Network Port.
3
Connecting the Power Cable
Connect one end of the Power
cable to the DVR, the other end
to an electrical outlet. This unit
powers ON once the MASTER
POWER BUTTON at the back of
the DVR is turned ON.
Setting the Date & Time
1
VGA VIDEO OUTPUT (Optional
Connection) - Video Output port
to connect the unit to a Computer
Monitor.
6
Using the Virtual Keyboard:
Optional Connections:
2
BNC VIDEO OUTPUT - Video Output
port to connect the unit to another
recording device or monitor
3
PS/2 (Optional Connection) - PS/2
port to connect a serial Mouse
to the DVR unit. Used for mouse
navigation of the menus.
4
USB PORT - Provides connection
port for USB Flash Drives
(thumbsticks).
1
1. RECORD
2. Not Used
3. QUAD2 (CH5~8)
4. ENTER
5. Not Used
6. VIEW CH8~CH1
7. REVERSE
8. PLAY / PAUSE
9. STOP
10. PTZ MENU
11. VIEW CH1~CH8
12. MENU / EXIT
13. QUAD1 (CH1~4)
14. SYSTEM SEARCH
15. FAST FORWARD
16. MUTE AUDIO
17. VOLUME UP
18. VOLUME DOWN
Using the Remote Control:
2
Using a Mouse:
A mouse can be used with
this system for playback and
menu controls. With system
OFF, connect a mouse to the
PS/2 port on the rear panel
of the system. Once the unit
has loaded, the mouse will
be recognized by the system.
DVR Setup:
• The Setup window is displayed when
the right mouse button is clicked in
viewing mode.
• When the mouse is moved, the purple
highlight box will switch between
menu options.
• Click the left mouse button to access a
menu selection
• To change a setting, click the left
button of mouse on the or icons
displayed onscreen.
• Once the setting has been changed,
click the right mouse button to exit the
menu.
Left-Button
Right-Button
Scroll-Wheel
REW BUTTON – Opens the System
Information window (in live view
mode), and Reverses the playback of
the selected Video (2x,4x,8x).
Insert the Lorex Client Software CD
into your local computer’s CD ROM
drive and proceed with the installation.
Click the Lorex Client Button on the
software CD to save the EXE file to your
computer’s desktop. Double click the
.exe file to run the software.
Confirm that the Lorex Client is
displaying the Viewer screen.
Click on the Connect button located
in the lower left side of the screen.
Connect to the DVR:
Install & Run Software (on your local computer):
Computer - not included