L200 Series Quick Setup Guide - English - R1
SET-UP LOCAL VIEWING ON YOUR PC
STEP 3
CONTINUED
4
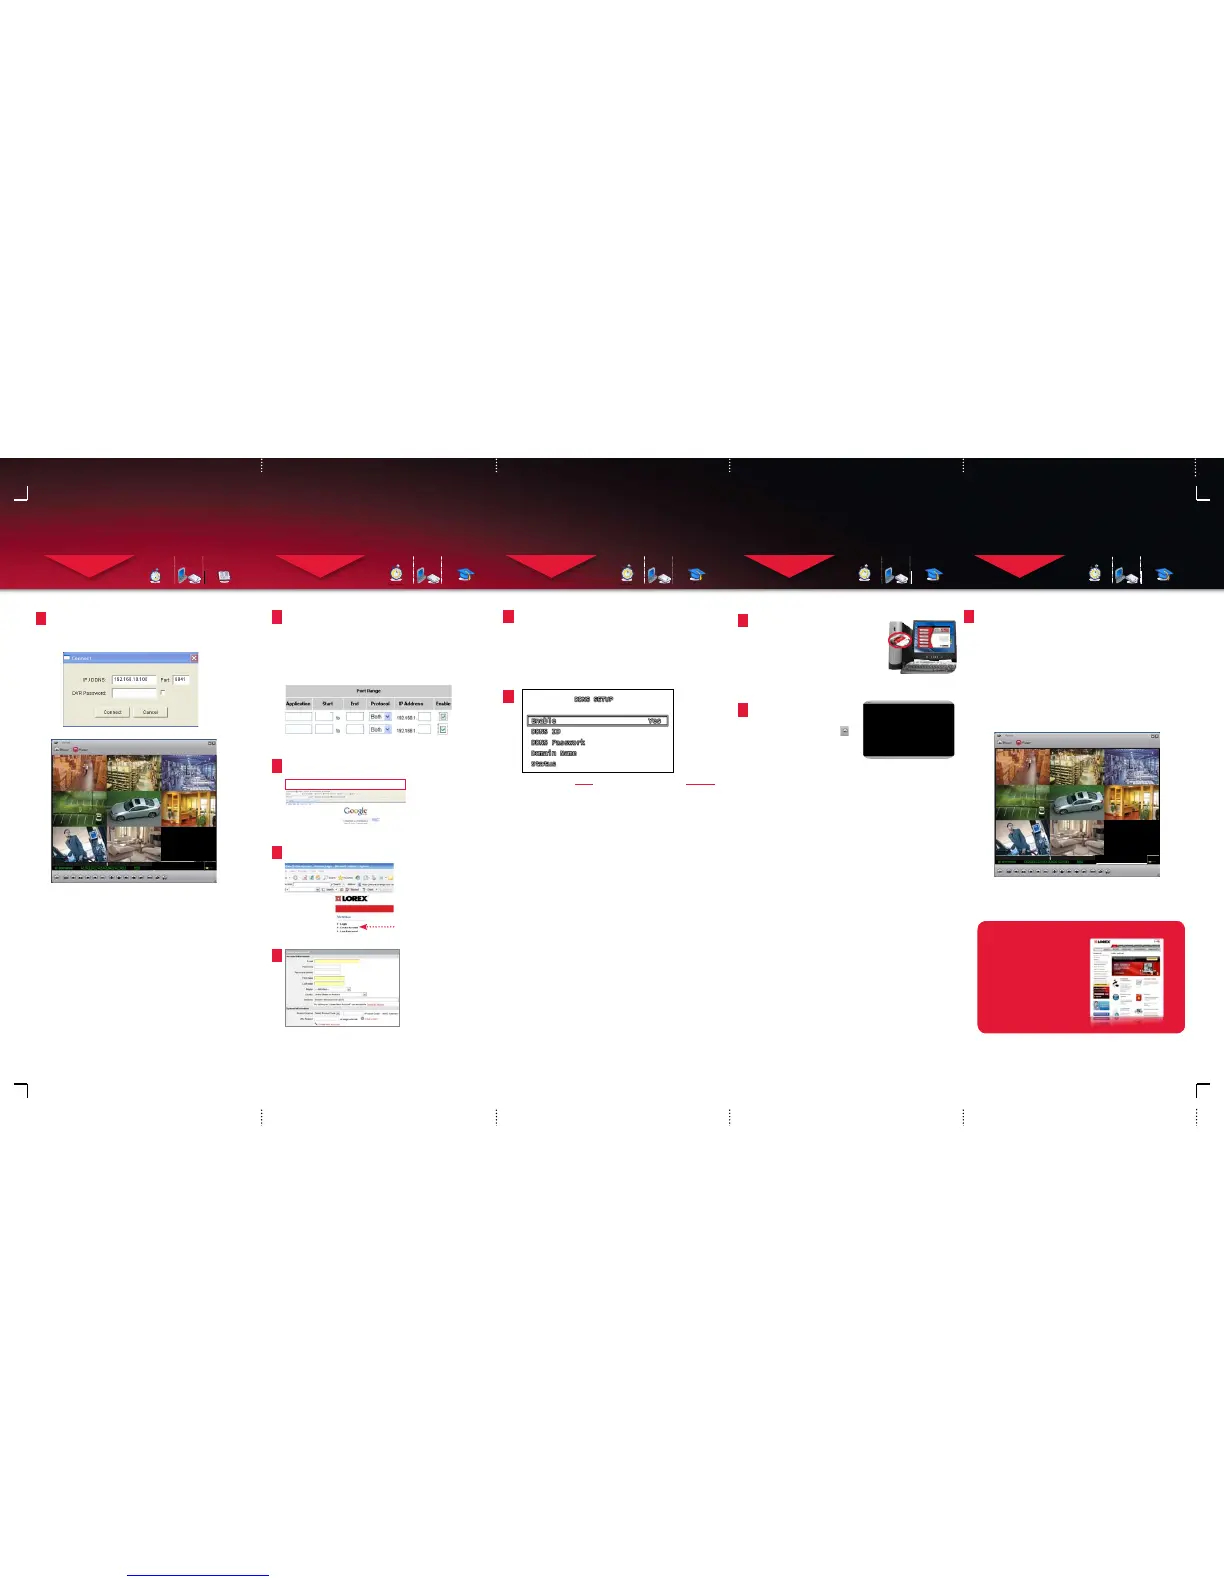
Enter the IP address (recorded in Step 2-1) and
DVR password information and press the
Connect button to view the Local Live Site.
SET-UP INTERNET REMOTE SECURITY
MONITORING
STEP 4
Port Forward your Router:
1
Port forward your router first before proceeding with the set-up.
You must forward Port: 8841
All routers are different. To port forward your router, please
refer to your router’s user manual.
A router configuration guide featuring the most commonly used
routers in the market is available on www.lorexcctv.com/support
in the Consumer’s Guide Section. An example of a port forwarding
screen is shown for illustration purposes.
System
System
8841 8841
80 80
12
12
EXAMPLE
2
Open your web browser (Internet Explorer by default) and enter
http://www.lorexddns.net in the address bar.
DDNS (Dynamic Domain Name System) Set-up:
http://www.lorexddns.net
Create Account
3
Open your web browser (Internet Explorer by default) and enter
http://www.lorexddns.net in the address bar.
Create Account:
1. FOR PRODUCT LICENSE select the L200 Series option
from the drop down menu.
2. FOR PRODUCT CODE enter the Monitor’s MAC address
(recorded in step 3, section 1).
3. FOR URL REQUEST enter a unique URL name (e.g.
tomsmith). Note: URL name should not be more than 15 characters.
Complete New Account Information:
1
2
3
4
An automated REGISTRATION CONFIRMATION EMAIL will be
sent to your email. Print and Save this confirmation. You will
need this information to access your System remotely.
Registration Email:
Service Provider: dns1.lorexddns.net
Domain Name: tomsmith.lorexddns.net
User ID: tomsmith
Password: (your password)
5
SET-UP INTERNET REMOTE SECURITY
MONITORING
STEP 4
CONTINUED
Enter DDNS Set-up on your DVR:
6
Once the DDNS settings have been configured online,
the information must be entered on the DVR to allow for
remote connection via the Lorex Client Software:
1. Access the Setup screen by pressing the MENU button
on the front of the DVR. Navigate to the SYSTEM
option, and press the ENTER button to access the
System Setup.
2. Navigate to the NETWORK option, and press the Enter
button to access the Network settings. Select the
DDNS option, and press the ENTER button to enter
the DDNS SETUP.
3. Set the DDNS Enable to YES. Enter the information
received in email using the Virtual Keyboard:
• DDNS ID
• DDNS Password
• Domain Name Select OK to save the settings.
4. Select the Status option to check the connection. A
SUCCESS message will appear if the DVR successfully
connects the DDNS Server on the Internet.
5. Remember to Save and Exit.
SET-UP INTERNET REMOTE SECURITY
MONITORING
STEP 4
CONTINUED
Congratulations! You have completed Step 3 & 4 successfully.
You can now view, playback images on your Local Computer
via LAN (local area network) and Remotely control the system
on your Remote computer over the Internet (Wide Area
Network).
LO CA L VI E W IN G IN S TAL LAT IO N GU I DE
Time: 30 Minutes
Skills - IntermediateHardware
PC/Router
Enter the DVR Connection Information:
7
8
It’s all on the Web
www.lorexcctv.com
For detailed setup
information, please
refer to your included
User’s Manual. For
additional information,
please visit our website
www.lorexcctv.com
9
ATTENTION: You MUST enter your DDNS information LOCALLY
before attempting remote access.
Local Live Site
Install Software (on your remote computer):
Insert the Lorex Client Software CD
into your remote computer’s CD ROM
drive and proceed with the installation.
Click the Lorex Client Button on the
software CD to save the EXE file to your
computer’s desktop. Double click the
.exe file to run the software.
Computer - not included
Confirm that the Lorex Client is
displaying the Viewer screen.
Click on the Connect button
located in the lower left side of
the screen.
Connect to the DVR:
Enter the DVR Connection Information:
Remote Live Site
1. Enter the DDNS Domain Name from the
Registration Confirmation Email sent to you.
NOTE: Only the first part of the address should
be used (i.e. only use ‘myurl’ from the address
myurl.lorexddns.net).
2. Enter the DVR TCP/IP Port number (8841 by
default).
3. Enter the DVR Password (111111 by default).
4. Press the Connect button to connect to the
Remote Live Site.
SET-UP INTERNET REMOTE SECURITY
MONITORING
STEP 4
CONTINUED
 Loading...


