EasyManua.ls Logo

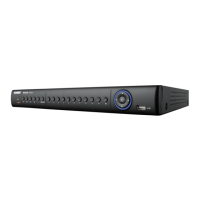
Lorex LH156 - User Manual

Lorex LH156
148 pages
To Next Page IconTo Next Page
Loading...
www.lorextechnology.com
DIGITAL VIDEO SURVEILLANCE RECORDER
LH150 ECO4 SERIES
Copyright © 2013 Lorex Technology Inc.
Instruction Manual
English Version 1.0
THE ECONOMICAL SOLUTION TO PROTECT YOUR HOME OR BUSINESS
RETAIL
INDUSTRY
BUSINESS
BUSINESS HOME
OUTDOOR
C ONNECTIVITY

Table of Contents

Questions and Answers:

Lorex LH156 Specifications

General IconGeneral
Video Inputs4 channels
Recording Resolution1080p
Video CompressionH.264
Channels4
Network ConnectivityEthernet (RJ45)
Remote AccessYes (via mobile app and web browser)
USB Ports2 x USB 2.0
Motion DetectionYes
Alarm TriggersMotion detection
Power Supply12V DC

Summary

Important Safeguards

General Precautions

General safety advice for operating and using the product, including warnings and instructions.

Installation Safety

Safety and operating instructions related to product installation and connections.

Service and Use Instructions

Servicing & Conditions Requiring Service

Product servicing guidelines and conditions that necessitate professional attention.

Replacement Parts & Safety Checks

Importance of using specified parts and performing safety checks after service.

Product Use & Care

Guidelines for proper product use, cleaning, and handling precautions.

Notices

FCC;IC Compliance

Compliance information regarding FCC/IC regulations for digital devices.

Modification & RoHS Compliance

Warning on modifications and compliance with hazardous substances directive.

Features

Digital Video Recorder Features

Key features and specifications of the digital video recorder.

Connectivity Features

Features related to system connectivity, including remote access.

Getting Started

System Components

Lists the components included with the digital video recorder system.

Front Panel Overview

8-Channel Front Panel Details

Details of the front panel controls and indicators for the 8-channel model.

16-Channel Front Panel Details

Details of the front panel controls and indicators for the 16-channel model.

Rear Panel Overview

8-Channel Rear Panel Ports

Description of the rear panel ports and connections for the 8-channel model.

16-Channel Rear Panel Ports

Description of the rear panel ports and connections for the 16-channel model.

Basic Setup

Connect BNC Cameras

Connect BNC cameras to the rear panel Video In ports.

Connect Mouse

Connect a USB mouse to one of the USB ports for navigation.

Connect Ethernet Cable

Connect the LAN port to a router using an Ethernet cable.

Connect Monitor

Connect a monitor via HDMI or VGA for system interface viewing.

Connect Power and Power On

Connect the power adapter and turn on the DVR to start the system.

Upgrade Firmware

Upgrade system firmware to the latest version for enhanced features.

Verify Camera Image

Check camera video quality before mounting and verify outdoor ratings.

Set System Time

Set the system time and date for accurate video time stamps.

Default Passwords & Ports

Default system login credentials and network port numbers.

Lorex Stratus Connectivity

Information on Lorex Stratus cloud connectivity service for remote access.

Quick Access to System Information

How to quickly access vital system information via the PTZ button.

Mouse Control

Mouse Operation

How to use the left-button, right-button, and scroll-wheel for navigation.

Remote Control Overview

8-Channel Remote Control Functions

Explains number keys, navigation cursors, sub menu, mute, and playback controls.

16-Channel Remote Control Functions

Details functions of record, search, number keys, display modes, and playback controls.

Using the On-Screen Display

On-Screen Display Elements

Identifies Date & Time, Record Status, and Channel number/title.

Menu Bar Navigation

How to access and use the menu bar icons for system control.

Virtual Keyboard and Mini-Keyboard

Using on-screen keyboards for inputting values like passwords and dates.

Zoom Mode Operation

How to use zoom mode to enlarge specific areas of the camera view.

Picture in Picture (PIP) Mode

Viewing one channel full-screen with up to two other channels displayed simultaneously.

Setting the Date and Time

System Date and Time Configuration

Steps to set system date, time, format, and DST/NTP options.

Configuring Daylight Savings Time (DST)

Enabling automatic DST adjustments for accurate timekeeping.

Using a NTP Server for System Time

Synchronizing DVR time with an online time server via NTP.

Recording

Continuous Recording

System default for immediate recording from connected cameras.

Event Recording (Motion)

System records when motion is detected by the camera.

Recording Audio

System capability to record audio for specific channels with compatible cameras.

Playback and Backup

Playing Back Recorded Video

Viewing recorded video through the system's search menu.

Searching for Recorded Footage

How to search for recorded footage using the calendar and time.

Using Playback Controls

Advanced playback controls for viewing recorded footage and events.

Finding Events in Playback Bar

Identifying continuous vs. motion/alarm recordings in the playback bar.

Controlling Playback Time Range

Adjusting the start and end times of footage displayed in the playback bar.

Using Zoom in Playback Mode

Using zoom feature for a closer look at recorded video during playback.

Using Video Clip Backup

Selecting and saving video clips to a USB flash drive during playback.

Backing Up Video Files

Process of backing up video files from the DVR to a USB flash drive.

Viewing Backed Up Video

Requirements for viewing backed up video files using Lorex Player software.

Converting Backed Up Video to AVI Files

Converting proprietary backup files into AVI format for sharing.

Managing Passwords

Changing Passwords

Steps to change ADMIN and USER account passwords for system security.

Adding Users

Creating multiple user accounts with specific menu access levels.

Configuring User Accounts

Setting up user names, passwords, and active status for user accounts.

Using the Main Menu

Main Menu Options Overview

Overview of main menu categories: Display, Search, Alarm, System, Record, Network, Device, Advanced.

Display Settings

Configuring display options, channel names, color settings, and covert recording.

Time and Recording Display Settings

Configuring time stamps and sequence time for display and recording.

Video-out Resolution Settings

Adjusting the output resolution for VGA/HDMI monitors.

Restoring System Resolution

Steps to restore default resolution if a blank screen appears.

Menu Transparency and Video Margins

Adjusting menu transparency and video margins for BNC monitors.

Adding Privacy Zones

Blocking out portions of a channel view with black squares for privacy.

Creating Custom Split-screen Display

Arranging channels on a secondary monitor for a custom split-screen view.

Record Settings Configuration

Configuring pre-recording settings and backup file duration.

Recording Schedule Configuration

Setting up recording schedules for continuous, motion, or alarm events.

Enabling Audio Recording

Enabling audio recording for specific channels with compatible cameras.

Recording Quality, Resolution, and Frame Rate

Adjusting quality, resolution, and FPS for each channel's recording.

Recording Quality Settings

Fine-tuning recording quality, resolution, and frame rate for optimal performance.

Searching for Video

How to search for saved video and log files on the system.

Event Search

Finding videos marked as 'Alarm' or 'Continuous' recording types.

Log Search

Searching system event logs for specific events or operations.

Network Settings Configuration

Configuring network protocol type (DHCP/Static IP) and auto port forwarding.

Substream Settings

Adjusting data streaming rates for remote viewing to conserve bandwidth.

DVR Client and HTTP Port Settings

Changing the default client and HTTP port numbers for the DVR.

Email Notification Setup

Configuring email notifications for motion detection or alarm triggers.

Email Notification Configuration

Setting up default or custom email server settings for notifications.

DDNS Settings Configuration

Setting up DDNS for remote access to the DVR over the internet.

Motion Detection Settings

Configuring motion detection areas, sensitivity, and event outcomes.

Alarm Settings Configuration

Configuring system behavior for external alarm devices and triggers.

Hard Drive Settings

Configuring hard drive recording modes and formatting.

Formatting USB Flash Drives

Steps to format USB flash drives for data backup or firmware updates.

System Time and Date Configuration

Changing date format, time format, language, and video output.

Menu Time Out and Auto Logout

Configuring inactivity timeout for menus and automatic system logout.

User Accounts Management

Details on changing admin/user passwords and creating user accounts.

Viewing System Information

Accessing detailed system information such as firmware version and IP address.

Configuring Firmware Upgrades

Information on firmware upgrades and how to configure auto-upgrade notifications.

Manually Upgrading System Firmware

Installing firmware updates manually using a downloaded file.

Restoring Default Settings

Resetting system settings to factory defaults for specific menus or the entire system.

Restarting or Shutting Down the DVR

Procedures for safely restarting or shutting down the DVR.

Configuring System Warnings

Setting up notifications for system events like low storage or video loss.

Saving System Configuration to USB

Backing up current system settings to a USB flash drive.

Loading System Configuration from USB

Restoring system settings from a saved configuration on a USB flash drive.

Connecting Over the Internet (PC;Mac)

System Requirements for Stratus Client

Minimum system requirements for using the Lorex Stratus Client software.

Connect DVR to Router

Step-by-step guide to connect the DVR to your network router.

Obtain DVRs Device ID

How to find the unique Device ID required for internet connection.

Connect to DVR via Internet (PC)

Steps to connect to the DVR over the internet using client software on a PC.

Connect to DVR via Internet (Mac)

Steps to connect to the DVR over the internet using client software on a Mac.

Using PC;Mac Client Software

Navigation Tabs and Main Screen

Overview of client software tabs (Live, Playback, Remote Setting) and the main display screen.

Viewing Modes and Controls

Changing viewing modes (split-screen) and using basic controls like mute and PTZ.

Taking Screen Shots

Capturing images of the live view from selected channels.

Recording Video via Client

Recording video footage directly to your computer's hard drive.

Showing;Hiding Channels

Managing which cameras are displayed in the main viewing window.

Viewing Bit Rate

Displaying the video bit rate for selected channels.

Changing Save Directory

Setting the save location for screenshots and recorded video files.

Changing Recorded Video Format (PC)

Changing the format of recorded video saved via remote surveillance.

Configuring PTZ Settings

Controlling PTZ camera functions like pan, tilt, zoom, focus, and iris.

Video Playback via Client

Watching recorded video saved on the DVR's hard drive using the client.

Configuring Display Settings

Adjusting display options like channel names, positions, and covert recording.

Configuring Privacy Zone Settings

Blacking out specific areas of a channel view for privacy masking.

Configuring Recording Parameters

Setting recording parameters like channel, record enable/disable, pack duration, and pre-record.

Configuring Recording Schedule

Setting up recording schedules for continuous, motion, or alarm events.

Configuring System Recording Quality

Adjusting resolution, FPS, and audio settings for system recording.

Configuring Basic Network Settings

Configuring network protocol type (DHCP/Static IP) and auto port forwarding.

Configuring System Substream

Adjusting data streaming rates for remote viewing to conserve bandwidth.

Configuring Email Notification Settings

Setting up email notifications for motion detection or alarm triggers.

Configuring DDNS Settings

Setting up DDNS for remote access to the DVR over the internet.

Configuring Motion Detection Settings

Configuring motion detection areas, sensitivity, and event outcomes.

Configuring System to Beep During Motion

Setting up audible beeps for motion detection events.

Configuring Alarm Notifications

Configuring settings for external alarm devices and system alarms.

Configuring Hard Drive Recording Mode

Setting the hard drive recording mode to auto overwrite or retain data.

Configuring PTZ Parameters

Setting PTZ camera protocol, baud rate, data bits, and other parameters.

Configuring System Time and Date

Setting system time, date, and format, including DST and NTP sync.

Changing System Menu Time Out

Adjusting the menu timeout duration and enabling auto logout.

Configuring System User Accounts

Adding and configuring user accounts with specific access privileges.

Viewing System Information

Accessing detailed system information such as firmware version and IP address.

Configuring Firmware Upgrades

Information on firmware upgrades and how to configure auto-upgrade notifications.

Manually Upgrading System Firmware

Installing firmware updates manually using a downloaded file.

Restoring Default Settings

Resetting system settings to factory defaults for selected menus.

Configuring Event Settings

Setting up notifications for system events like hard drive errors or video loss.

Configuring Auto-Reboot

Setting up automatic system restarts at a specified time or date.

Lorex Player 11: Playing Backed up Video on PC

Minimum System Requirements

Minimum requirements for installing and running Lorex Player 11 on a PC.

Installing Lorex Player 11

Instructions for installing Lorex Player 11 software from the CD or website.

Running Lorex Player 11

Steps to launch the Lorex Player 11 application and load video files.

Lorex Player 11 Interface Overview

Overview of the Lorex Player 11 interface, including video window and controls.

Advanced Config Menu

How to access and use the Advanced Config menu to select snapshot save folders.

Lorex Player for Mac: Viewing Backed up Video on Mac

Installing Lorex Player Mac

Instructions for downloading and installing the Lorex Player for Mac software.

Launching Lorex Player Mac

How to launch the Lorex Player for Mac application from the Dock or Finder.

Lorex Player Mac Interface

Overview of the Lorex Player for Mac interface, including video playlist and slider.

Loading Individual Video Files

How to load single video files into the Lorex Player for Mac playlist.

Loading Multiple Video Files

How to load an entire folder of video files into the playlist.

Appendix A: System Specifications

System Specifications Table

Detailed technical specifications for the system, including hardware and software.

Appendix B: Connecting a PTZ Camera

Connecting a PTZ Camera to the System

Physical connection steps for RS-485 PTZ cameras to the DVR.

Configuring PTZ Settings in DVR

Entering PTZ protocol details into the DVR for camera control.

PTZ Camera Configuration Details

Setting channel, protocol, baud rate, data bits, parity, cruise, and address for PTZ cameras.

Using the PTZ Menu (Local DVR)

Controlling PTZ cameras directly from the DVR's on-screen interface.

PTZ Presets and PTZ Cruise

Setting preset positions and enabling PTZ cruise for automatic camera movement.

Appendix C: Connecting Additional External Monitors

Connecting Monitors to DVR

Connecting external monitors to VGA, HDMI, and Video Output ports.

Customizing Channel Arrangement on External Monitor

Creating custom split-screen displays on secondary monitors.

Appendix D: Recording Audio

Enabling Audio Recording

Steps to enable audio recording for specific channels with compatible cameras.

Appendix E: Replacing the Hard Drive

Removing the Hard Drive (8-Channel)

Step-by-step guide to remove the hard drive from an 8-channel DVR.

Removing the Hard Drive (16-Channel)

Step-by-step guide to remove the hard drive from a 16-channel DVR.

Installing the Hard Drive (8-Channel)

Steps to install a hard drive into an 8-channel DVR.

Installing the Hard Drive (16-Channel)

Steps to install a hard drive into a 16-channel DVR.

Formatting the Hard Drive

Formatting a replacement hard drive to ensure proper system function.

Appendix F: DDNS Setup (Advanced)

Accessing DVR via Local Network (LAN)

Connecting to the DVR through Internet Explorer on a local network.

Connect DVR to Local Area Network

Step 1 of connecting the DVR to the LAN.

Obtain DVRs Local IP Address

Step 2 of finding the DVR's local IP address.

Connect to DVR via Local IP Address (PC)

Step 3 of connecting to the DVR using its local IP address on a PC.

Connect to DVR via Local IP Address (Mac)

Step 3 of connecting to the DVR using its local IP address on a Mac.

DDNS Setup: Access DVR Remotely

Overview of setting up DDNS for remote DVR access from any device.

Step 1 of 4: Port Forwarding

Port forwarding HTTP and Client ports on the router to the DVR's IP address.

Step 2 of 4: Create a DDNS Account

Creating a free DDNS account for a web site address pointing to the local network.

Create Lorex Account and Register Product

Creating a My Lorex account and registering the product for warranty.

Enter Address and Product Details for Warranty

Filling in address and product information for warranty registration.

Register Product for Lorex DDNS

Registering the product for Lorex DDNS and configuring device details.

Step 3 of 4: Enable DDNS on the DVR

Enabling DDNS settings on the DVR using the Network menu.

Step 4 of 4: Connect to DVRs DDNS Address (PC)

Connecting to the DVR remotely using its DDNS address on a PC.

Step 4 of 4: Connect to DVRs DDNS Address (Mac)

Connecting to the DVR remotely using its DDNS address on a Mac.

Troubleshooting

System Power and Connectivity Issues

Solutions for problems like no power, remote control not detected, or hard drive issues.

Monitor;TV Picture and Sound Issues

Troubleshooting no picture on monitor, incorrect resolution, or no sound.

Mouse and System Reset Issues

Solutions for mouse not detected and system needing a reset.

Motion Detection and Email Notification Issues

Troubleshooting system beeps during motion and email notification problems.

Related product manuals