LOADER INSTALLATION
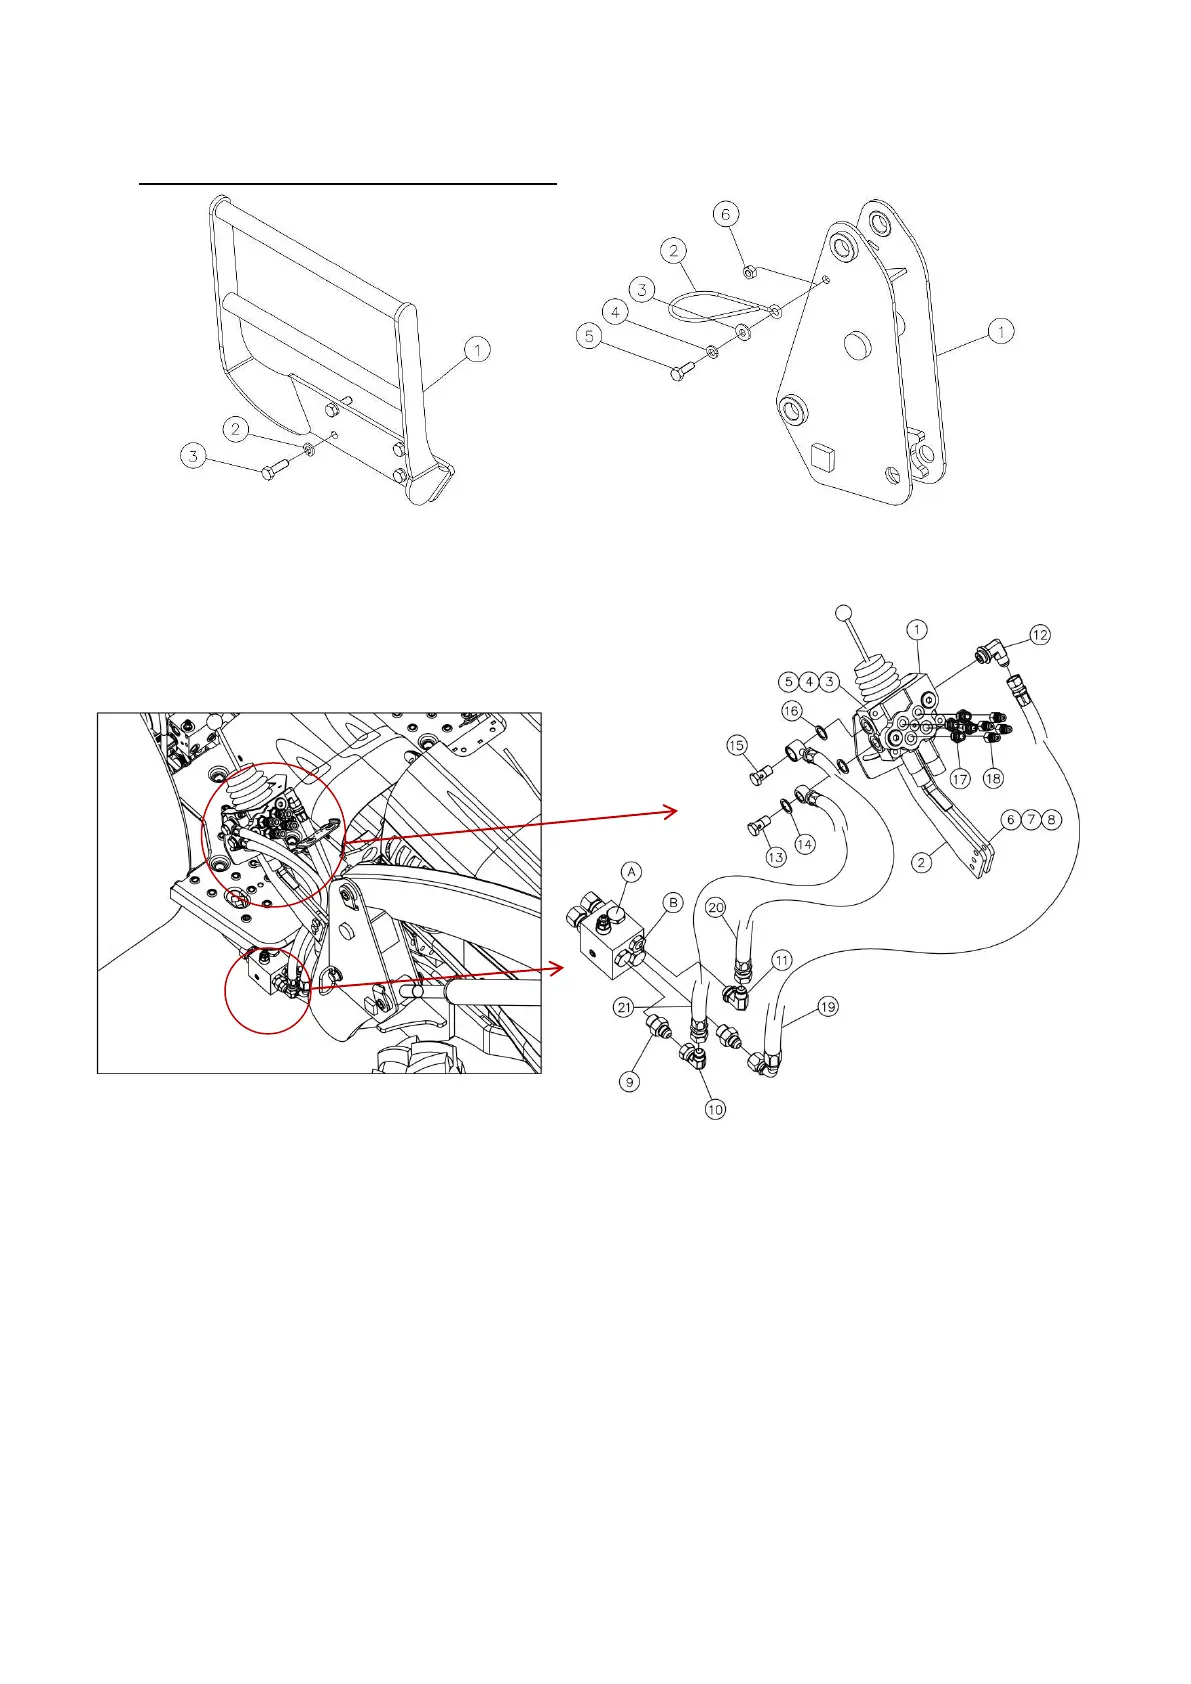
▶ Install Grille Guard
(1) BUMPER - 1EA
(2) SPRING WASHER M14 - 4EA
(3) BOLT M14x45Lx1.5P - 4EA
▶ Hose Guide
(1) COLUMN - 1EA
(2) HOLDER - 1EA
(3) PLAIN WASHER, M10 - 1EA
(4) SPRING WASHER, M10 - 1EA
(5) BLOT, M10x30L - 1EA
(6) NUT, M10 - 1EA
▶ Install Valve
(1) VALVE- 1EA
(4) SPRING WASHER, M8 - 3EA
(7) SPRING WASHER, M10 - 2EA
(10) ELBOW NIPPLE - 1EA
(13) BENJO BOLT – 1EA
(16) COPPER WASHER – 1EA
(19) HOSE, P LINE - 1EA
(2) BRACKET-C/V - 1EA
(5) NUT, M8 - 3EA
(8) NUT, M10 - 2EA
(11) ELBOW NIPPLE - 1EA
(14) COPPER WASHER – 2EA
(17) NIPPLE – 4EA
(20) HOSE, P/B LINE - 1EA
(3) BLOT, M8x70L - 3EA
(6) BLOT, M10x40L - 2EA
(9) NIPPLE - 2EA
(12) ELBOW NIPPLE - 1EA
(15) HOUSING – 1EA
(18) Q-COUPLING - 4EA
(21) HOSE, T LINE - 1EA
※ Remove the plug from “B” port of Hydraulic block, and then install it onto “A” port.
Verify that all mounting kit hardware has been torqued as specified before installing loader.
▶ Identify hardware size and grade.
▶ Refer to Torque Chart, page 24 and find correct torque for your hardware size and grade.
▶ Torque hardware to this specification unless otherwise specified.
▶ IMPORTANT NOTE: To keep mounting kit hardware from loosening during loader operation,
hardware must be torque to specifications.