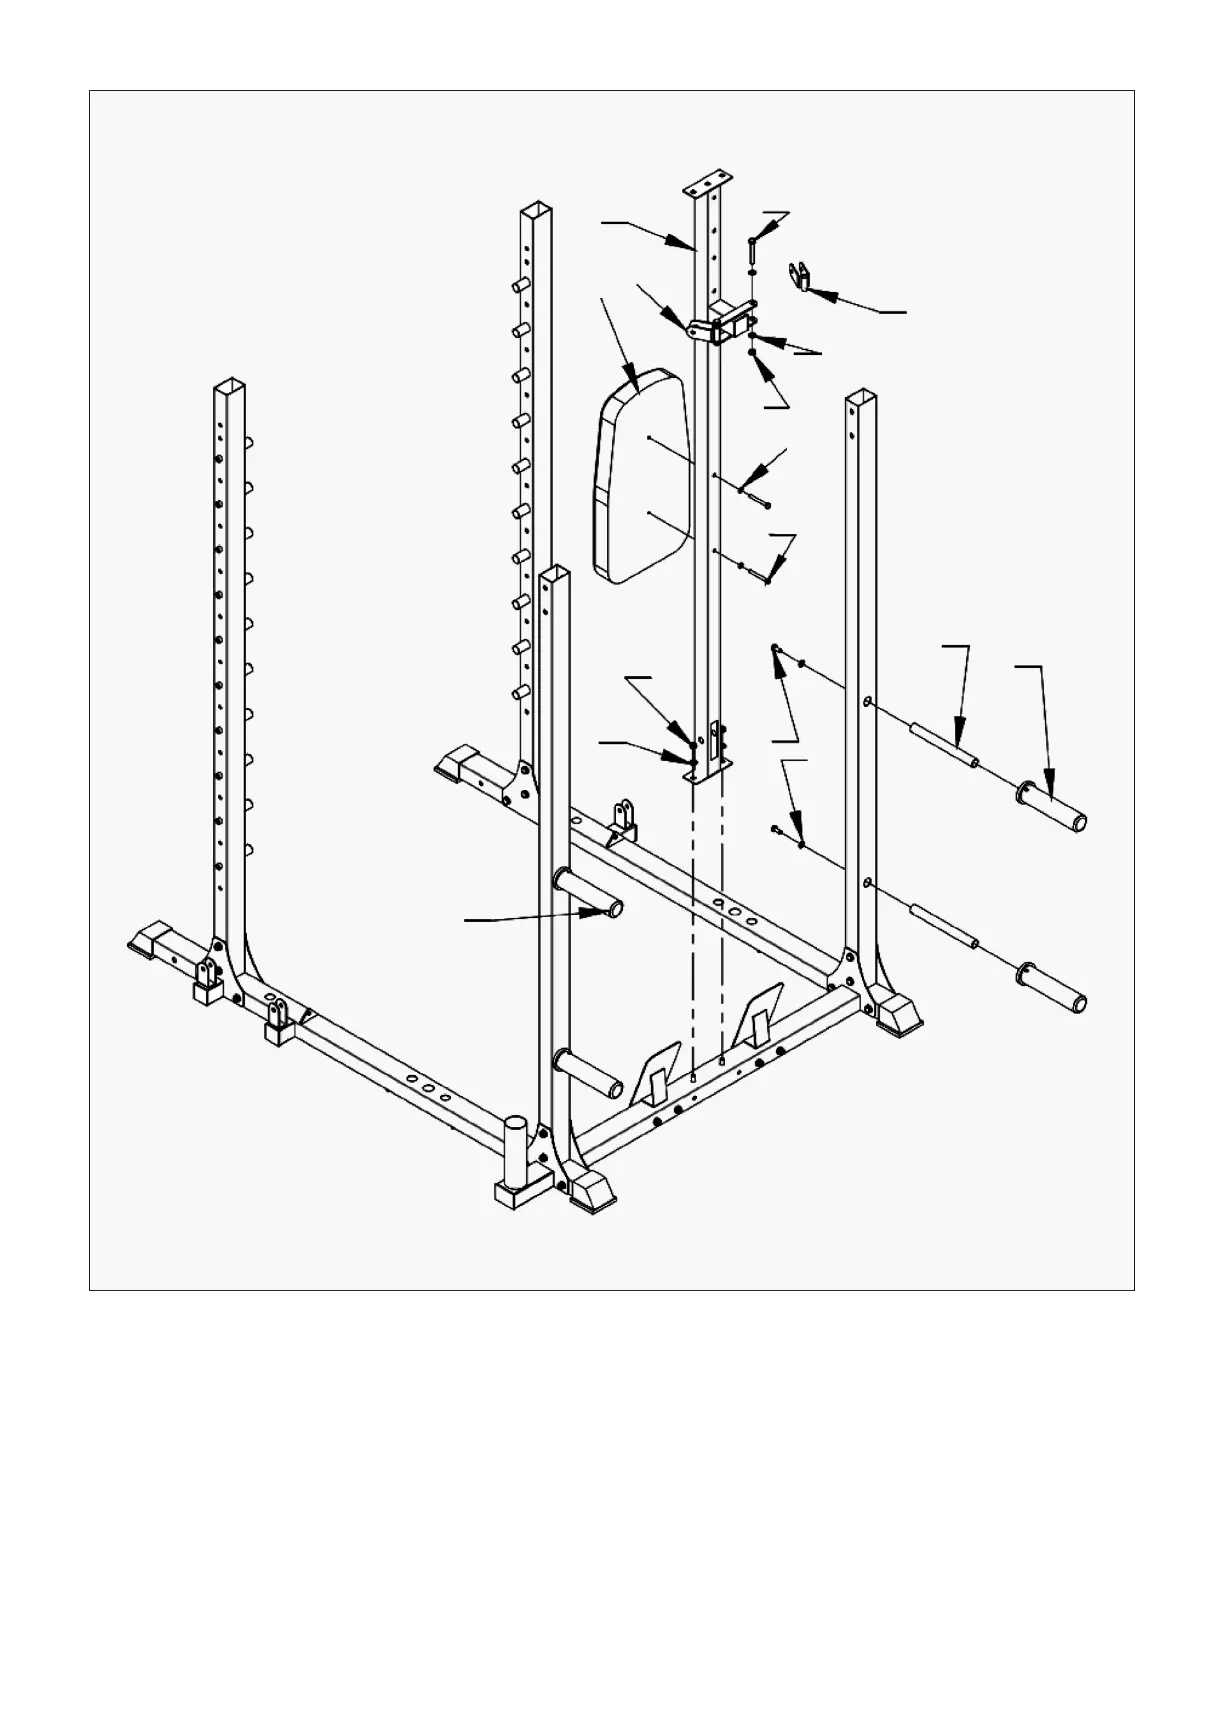
10 | ASSEMBLY INSTRUCTIONS
STEP 3
1. Install (#10) on (#1) according to the drawing, and secure with flat spacer (#99), nut (#100) and the
pre-installed bolt (#91).
2. Place (#66) on (#10) and secure with bolts (#98) and flat pads (#102).
3. Place (#59) on (#10) as shown in the figure and secure with bolts (#93), flat spacer (#99) and nut
(#100).
4. Place (#58) in (#8) as shown and tighten with bolts (#94) and flat spacers (#99). Secure the sleeve
(#77) onto part (#58).
93
10
66
59
59
99
100
102
98
100
99
99
94
58
77
77