17ASSEMBLY INSTRUCTIONS |
STEP 10
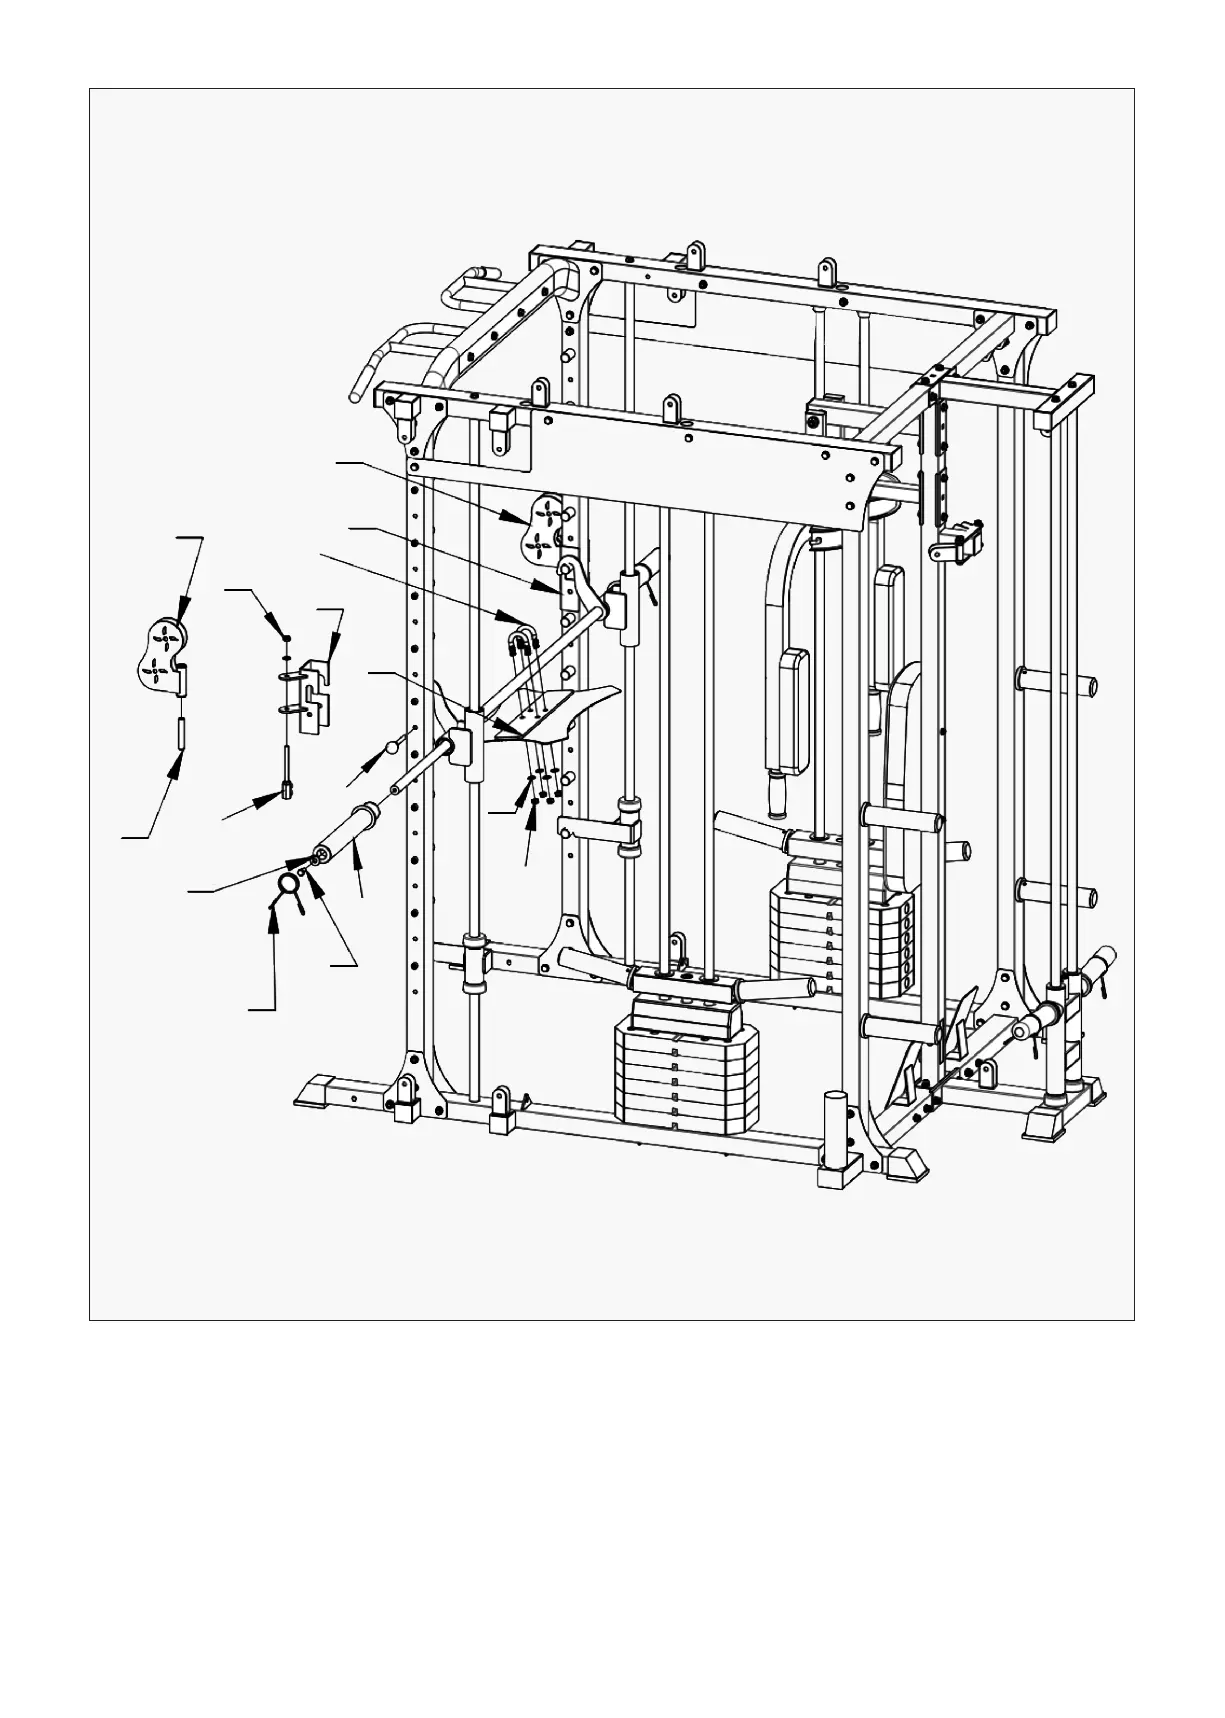
1. According to the diagram, hang (#39) to the appropriate position.
2. Place (#63) into (#40) and secure it to (#39) using (#41), flat pad (#99), nut (#100). Repeat the same
on the other side.
3. Install (#37) onto (#11) and secure with bolts (#94) and flat spacer (#101). Place the collars (#78) onto
(#37). Repeat on the other side.
4. Place (#42) to (#11) bar in the figure and secure with (#90) U-bolt, flat gasket (#99) and nut (#100).
40
38
90
39
42
100
40
63
41
101
76
78
94
37
99
100