13. Locate reverse light socket and remove light bulb. There are two wires connected to the
reverse light sockets on most vehicles. Usually the negative wire is black and the positive wire is
a colored wire. If you are uncertain about the wiring, use a 12 volt multimeter (available at most
auto parts stores) to determine which wire is positive. Follow the manufacturer’s
instructions for the safe use of the multimeter.
14. After determining which wire is the positive and which is the negative, turn off the ignition key,
then remove the battery’s negative cable.
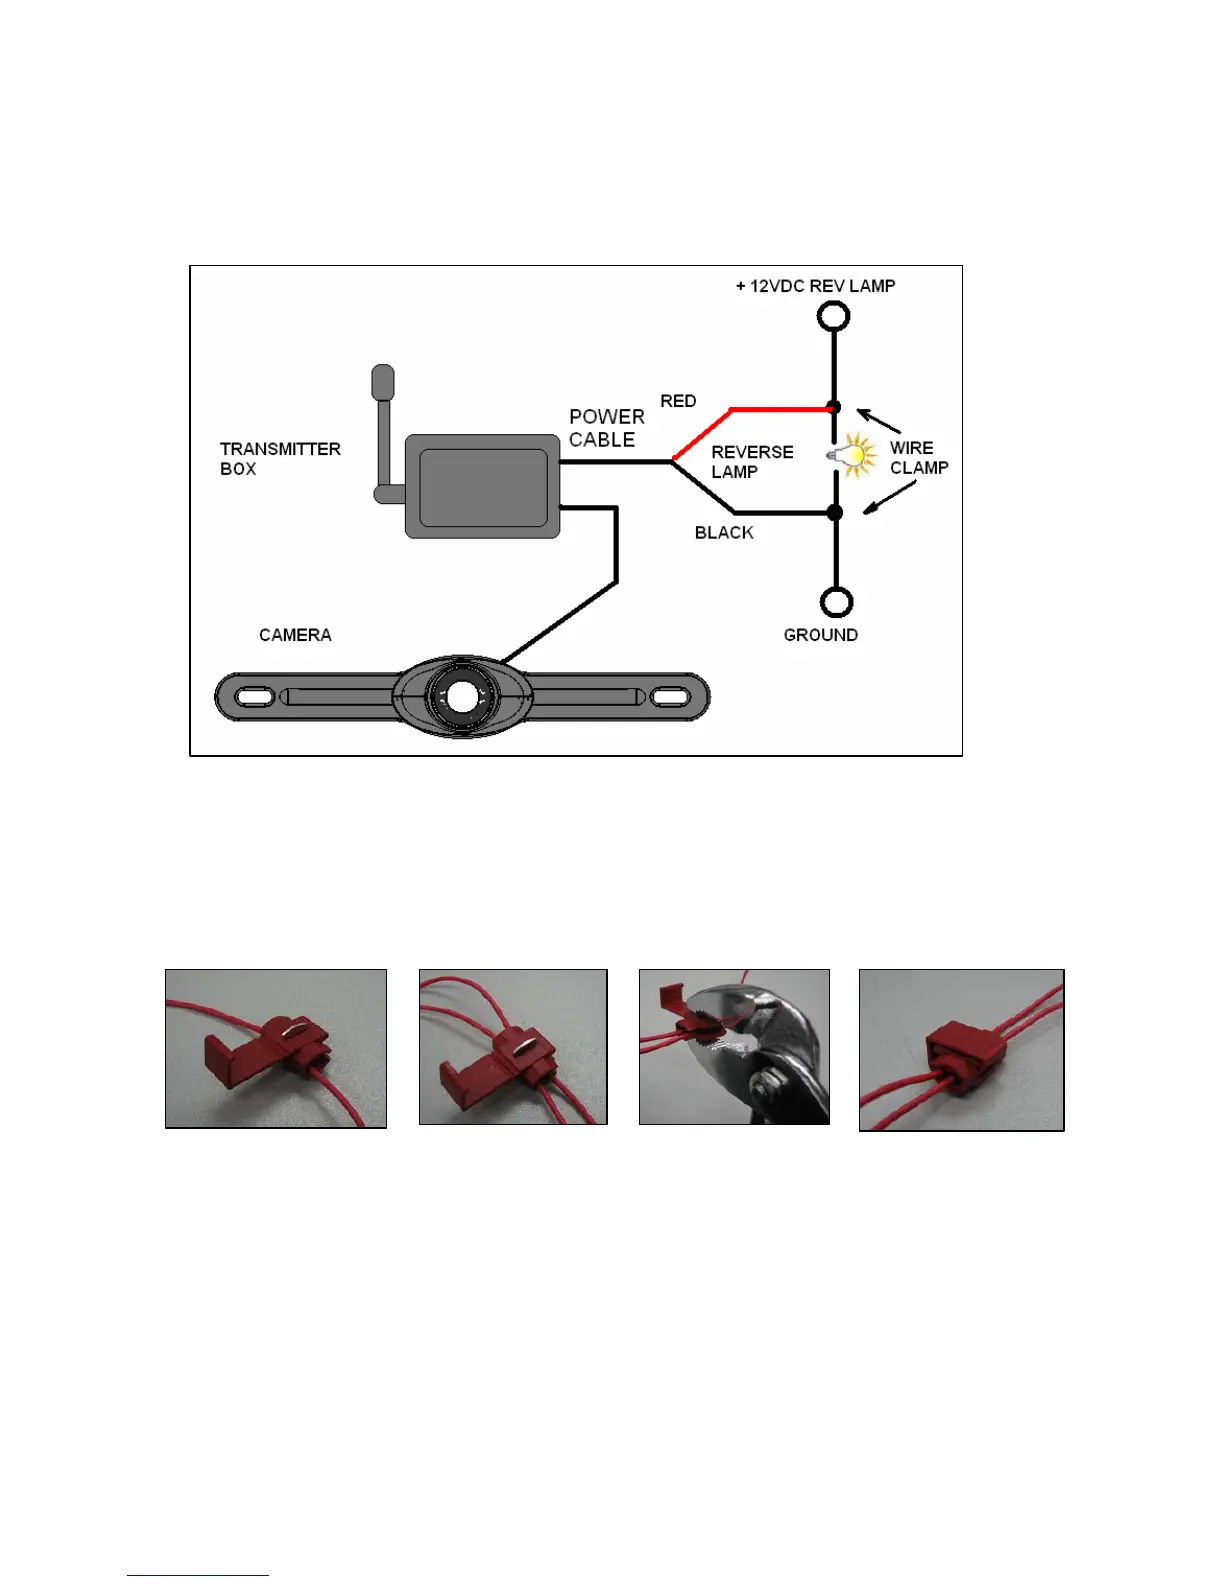
15. Splice the red wire using the supplied wire clamp to the reverse light’s positive (+) wire. Use a
set of slip joint pliers to squeeze the METAL BLADE and insure good connection of both
wires.
Insert the existing wire Insert the wire to be Crimp clamp with pliers, Wire Clamp after locking
to be tapped to the clamp. attached to the clamp. then close lock
16.You may not need to use the wire clamp. The power cable can be wired directly to the reverse
light circuit by stripping the reverse light wires then twisting the camera wires to the exposed
reverse light wires. Once connected, wrap with electrical tape. Do not attempt this if you
17.Next splice the black wire of the camera’s power cable to the reverse light’s negative (-) wire
or ground.
18.Replace the reverse light bulb and re-install the light socket. Secure all the wires with cable
ties or electrical tape. Reattach the negative battery cable to the battery afterwards.
15
 Loading...