Do you have a question about the Luca Varess MORANO and is the answer not in the manual?
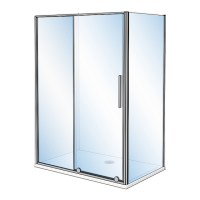
Ensuring the base is level and correctly positioned before installation.
Attaching wall profiles and ensuring vertical alignment for the enclosure.
Drilling holes and securely fixing components to the wall and base.
Sliding the fixed glass panel into the designated profiles.
Mounting the sliding door panel onto the track system.
Fitting the rollers and guide mechanisms for the sliding door operation.
Fastening the vertical profiles to the main structure for stability.
Fine-tuning the door's vertical position and operational alignment.
Attaching the door handle and any other specified accessories.
Applying sealant around the enclosure for water tightness.
Adjusting gaps between profiles for a precise and secure fit.
Verifying roller settings for smooth sliding action.
Ensuring all profiles are correctly aligned and secured.
Applying sealant to the exterior and interior edges of the enclosure.
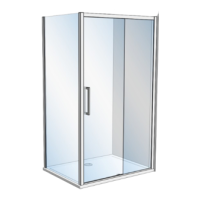
| Brand | Luca Varess |
|---|---|
| Model | MORANO |
| Category | Bathroom Fixtures |
| Language | English |