EasyManua.ls Logo

Luca Varess Nona User Manual

Default Icon
4 pages
To Next Page IconTo Next Page
Page #1 background imageLoading...
Page #1 background image
Disclaimer
If you install the product in a way that differs from this manual, this will void all guarantees. Before installation check that the product meets all your requirements and is
not damaged. By proceeding with installation, you accept the condition of the product.
Disclaimer
Indien u het product plaatst op een manier die afwijkt van deze handleiding, vervalt alle garantie. Controleer voor plaatsing of het product aan al uw eisen voldoet en
niet beschadigd is. Indien u overgaat tot plaatsing, aanvaardt u de staat waarin het product zich bevindt.
Clause de non-responsabilité :
Si vous installez le produit d’une manière différente de celle présentée dans ce manuel, toutes les garanties seront invalidées. Contrôlez avant le placement si le produit
répond à toutes vos exigences et n’est pas endommagé. En procédant au placement, vous acceptez l’état dans lequel se trouve le produit.
Haftungsausschluss
Wenn Sie das Produkt nicht genau nach den Angaben in dieser Montageanleitung einbauen, verfällt die Garantie. Überprüfen Sie vor dem Einbau des Produkts, ob sämtliche
Voraussetzungen erfüllt sind und das Produkt nicht beschädigt ist. Sobald Sie mit der Montage beginnen, sehen Sie, in welchem Zustand sich das Produkt be ndet.
Installation guide
Installatiegids
Guide d’installation
Montageanleitung
Nona shower door
63039_INSTALL_INT_ver2018.1.2
PARTSLIST
Safety
D
A
B
C
G
A
F
E
2,5+5
mm
8 Pc.
6 Pc.
1 Pc.
1 Pc. L
+
1 Pc. R
H
I
8 Pc.
1 Pc.
6 Pc.
1 Pc.
2 Pc.
4 Pc.
1+1
Pc.
2 Pc.
J
K
T
L
5x40
N
M
O
6 Pc.
P
Q
R
S
4x8
Item
Quant.
Item
Quant.
TOOLS NEEDED
Question and Answer IconNeed help?

Do you have a question about the Luca Varess Nona and is the answer not in the manual?

Luca Varess Nona Specifications

General IconGeneral
BrandLuca Varess
ModelNona
CategoryBathroom Fixtures
LanguageEnglish

Summary

Safety Information

Tools and Parts

Tools Needed

List of tools required for the installation of the shower door.

Parts List

Comprehensive list of all components included in the shower door kit.

Shower Door Assembly

Decorative Side Installation

Instructions for installing glass panels with a decorative side facing outwards.

Step 1: Initial Setup

First steps in assembling the shower door, involving panel alignment and fixture placement.

Step 2: Door Placement

Positioning the main door panel into its frame or guides.

Step 3: Panel Alignment

Ensuring vertical alignment of the shower door panels.

Step 4: Securing Panels

Fastening the glass panels to the frame or wall.

Step 5: Hinge Attachment

Mounting the hinges onto the glass panels and frame.

Step 6: Hinge Adjustment

Adjusting the hinges to ensure proper door alignment and operation.

Step 7: Handle Installation

Attaching the door handle and locking mechanism.

Step 8: Final Touches

Completing the assembly with minor adjustments and securing elements.

Step 9: Wall Mounting

Fixing the shower door frame or supporting elements to the wall.

Step 10: Sealing Installation

Installing weather seals or gaskets for water containment.

Step 11: Bottom Seal Attachment

Attaching the seal or sweep to the bottom of the shower door.

Step 12: Correct Direction

Ensuring the lowest part of the door points towards the inside of the shower.

Step 13: Sealing Application

Applying sealant around the shower enclosure for waterproofing.

Step 14: Completed Installation

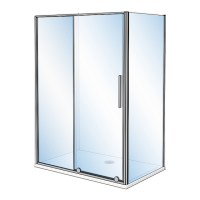
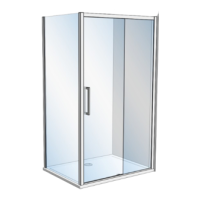
Final view of the fully installed shower door.

Related product manuals