User Name: admin
Password: 9999
www.MyLumens.com
Copyright © Lumens Digital Optics Inc. All rights reserved.
192.168.100.150
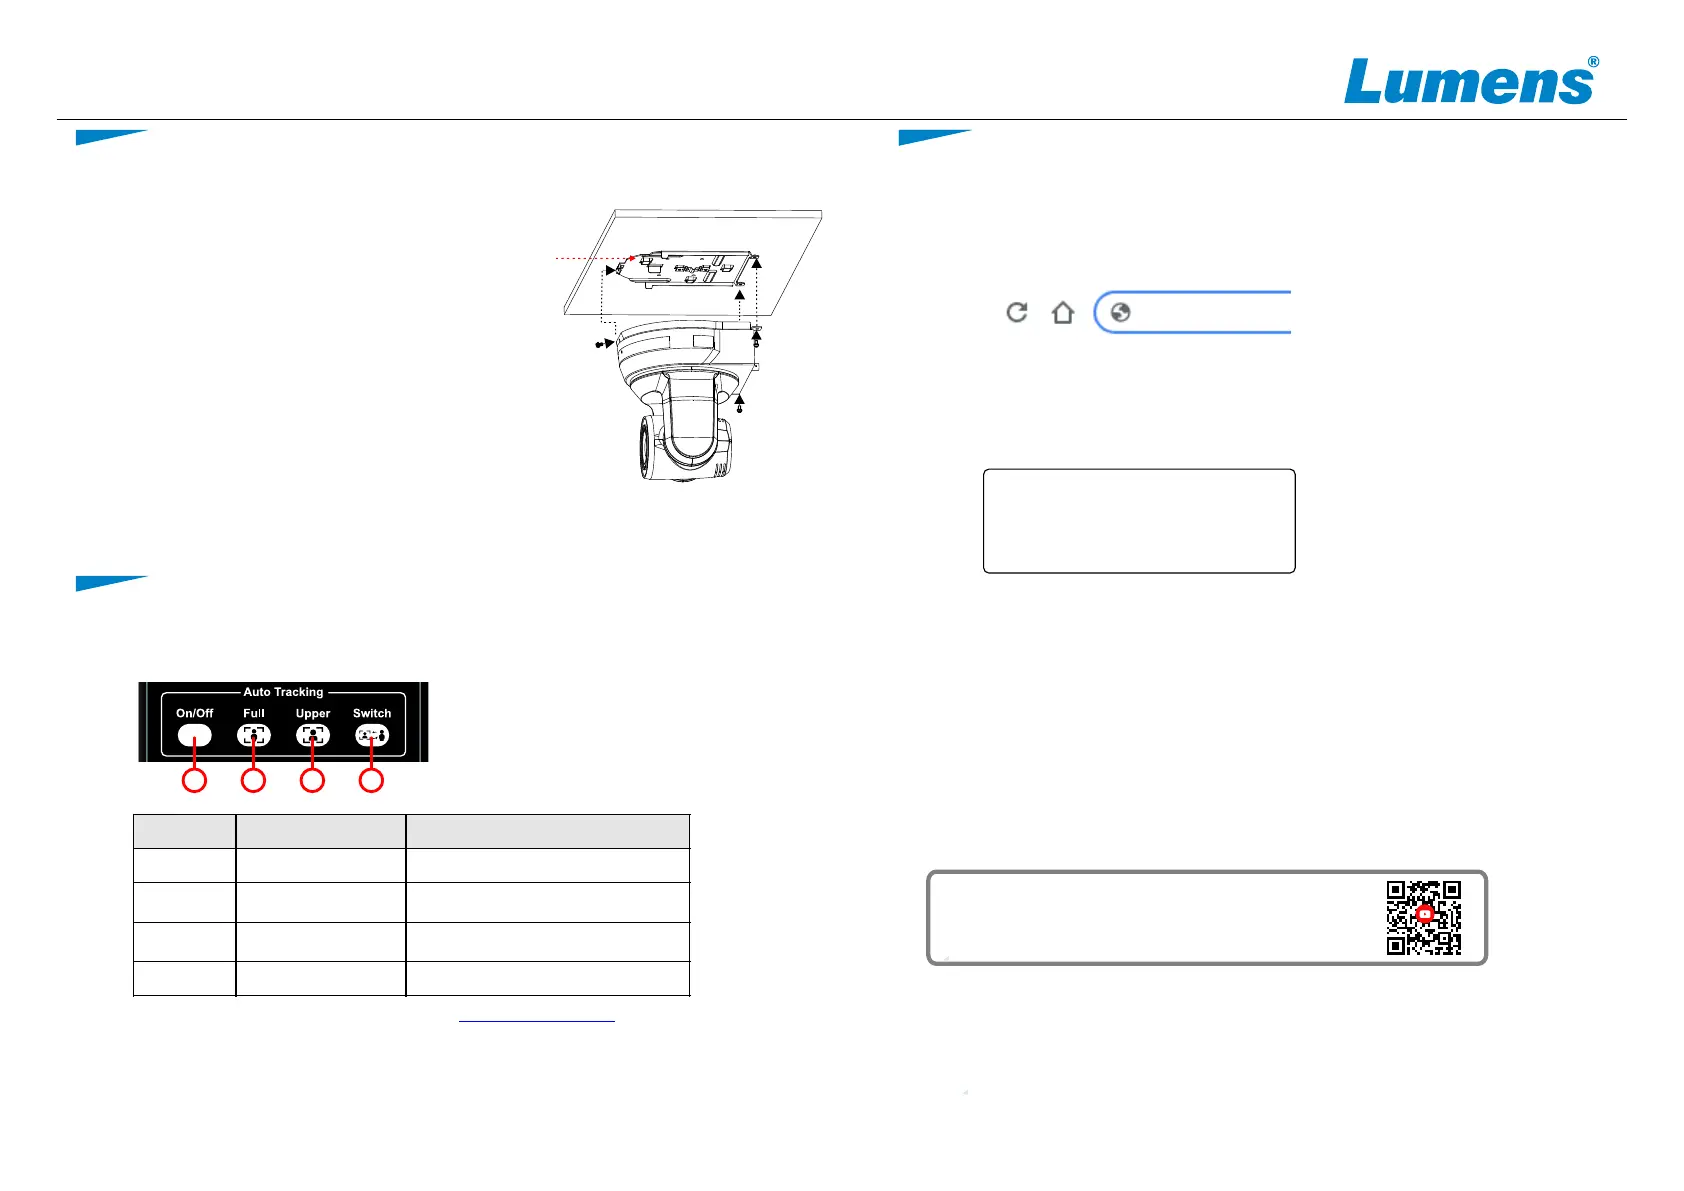
5.1 Press the remote control to start the auto-tracking function
*Power LED flashes green when the tracking function of the camera is activated
* For advanced tracking, please download the from Lumens websiteVC-TA50 User Manual
Items Button Name Function
1 Auto Tracking Enable/Disable Auto Tracking
2 Full
When the presenter’s full body is
framed by the camera
3 Upper
When the speaker’s torso is framed
by the camera
4 Switch Force switch to a different presenter
4
3
21
4.3 Screw ceiling plate B to the ceiling
*Caution:
(1) This should be undertaken in accordance with UL
guidelines.
(2) Do not obstruct the cable pass thru hole
4.4 Attach base plate A to the camera base
plate B
▼Push base plate A up to the ceiling and
slide to the right to latch on to plate B.
▼Secure with 2x M3 silver screws and 1x
M3 black screw.
black
screw
5. Start Tracking
6. Webpage Settings
* Please visit YouTube [My Lumens] channel to watch the
related videos for instructions
6.1 Open your web browser and enter the IP address in the address bar.
* If the camera is not connected to a DHCP router, the default IP address is 192.168.100.150
* The IP address can be verified on a connected monitor by clicking [MENU] =>
[Ethernet] => [IP Address] on the remote control
6.2 Enter the user name and password to view the camera images,
control the camera and manage advanced settings.
* After the camera is inverted, press the [Mirror] button on the
remote control to flip the screen [Flip]
Base
plate B
 Loading...