Do you have a question about the Lumix G6 and is the answer not in the manual?
Configure and use custom camera settings for specific shooting scenarios.
Explains PASM (Program, Aperture, Shutter, Manual) and custom modes.
Details how to set and adjust ISO sensitivity for different lighting conditions.
Describes methods for measuring light exposure (Multi, Centre-weighted, Spot).
Explains AFS, AFF, and AFC auto-focus modes for different subject types.
Details FACE DETECTION, TRACKING, 23-AREA, 1-AREA, and PINPOINT focus areas.
Options for image quality, file format (RAW/JPEG), and resolution settings.
Configures single shot, burst, auto bracket, and self-timer shooting modes.
Explains optical image stabilisation (OIS) for lenses.
Controls the electronic shutter for silent shooting, potential distortion.
Enables firing the shutter by touching the screen for focus and capture.
Guide to setting up various camera menus and options for optimal use.
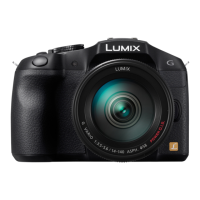
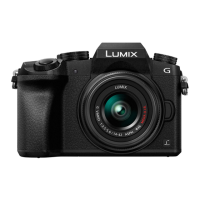
The Lumix G6 is a modern digital camera designed for stills photography, offering a balance of advanced features and user-friendly controls. It aims to simplify the complex world of digital photography by allowing extensive customization and quick access to frequently used settings.
The Lumix G6 is primarily a stills camera, optimized for photographers who prefer to shoot in RAW format for maximum post-processing flexibility. While it does not extensively cover JPEG-only features, intelligent auto mode, or video recording, it provides robust capabilities for capturing high-quality still images. The camera supports various exposure modes, including Program (P), Aperture priority (A), Shutter speed priority (S), and Manual (M), allowing photographers to control exposure based on their creative needs. It also offers four customizable modes (C1, C2-1, C2-2, C2-3) where users can store specific camera settings for different shooting scenarios.
The camera features multiple metering modes—Multi-metering, Centre-weighted, and Spot metering—to accurately assess exposure in diverse lighting conditions. Auto-focus (AF) capabilities are extensive, including FACE DETECTION, AF TRACKING, 23-AREA, 1-AREA, and PINPOINT modes, allowing precise control over where the camera focuses. The AF/MF switch and AFS/AFF/AFC settings further refine focus behavior, with options for single, flexible, and continuous auto-focus.
For image stabilization, the G6 relies on optical image stabilization (OIS) provided by attached lenses, as it does not have in-body image stabilization (IBIS). The electronic shutter can be activated to eliminate mechanical shutter noise and shock, although users should be aware of potential distortion with moving objects due to its sequential row exposure. The camera also supports flash photography, both with its built-in flash and external hot-shoe mounted flashes, offering various flash modes and synchronization options. Wireless flash is supported via infra-red communication.
The Lumix G6 is designed for intuitive operation, with many functions accessible through dedicated buttons, dials, and a touch screen. The Mode dial allows quick selection of exposure modes, custom modes, intelligent auto, movie mode, and scene/filter modes. The Q.MENU (Quick Menu) provides fast access to frequently used settings like STABILIZER, AFS/AFF/AFC, METERING MODE, QUALITY, ELECT. SHUTTER, SELF TIMER, BURST RATE, FLASH MODE, and FLASH ADJUST, which can be customized by the user.
Programmable function (Fn) buttons and screen icons allow users to assign specific functions for immediate access, enhancing workflow efficiency. For example, the FOCUS AREA SET button can be programmed to enable touch screen and cursor key control for AF area positioning. The rear dial and function lever are crucial for adjusting settings, often without needing to change grip on the camera.
When using the viewfinder, the dioptre adjustment helps focus the image. The LVF button toggles between viewfinder and LCD screen displays, with an automatic switching option. The DISP button cycles through various display information on the screen or viewfinder, including a control screen for quick setting changes.
For stationary subjects, the camera's FACE DETECTION AF mode is highly flexible, automatically switching to 23-AREA AF if no faces are detected. Users can easily switch to 1-AREA AF mode by pressing the FOCUS AREA SET button to precisely control the focus area. Manual focus is aided by focus peaking, which highlights in-focus edges in blue, and an AF ASSIST area that can be enlarged and moved for critical focusing.
For moving subjects, the C2-3 custom mode is recommended, utilizing shutter-speed priority, 1-AREA AF, and SPOT metering. This mode is configured for "back button AF," where auto-focus is activated by pressing the AF/AE LOCK button, allowing the shutter button to be fully depressed for taking a burst of photos with focus locked or tracked. Burst rates can be adjusted, with higher rates potentially sacrificing live view.
The camera supports taking panoramas either by manual exposure and stitching in post-processing or by using the in-camera Panorama Shot scene mode. Astrophotography is also supported, recommending manual focus at infinity, wide apertures, and manual exposure in the C2-2 custom mode.
The manual provides guidance on configuring menu settings, including the SETUP menu, which contains rarely changed settings like CLOCK SET, WORLD TIME, and USB MODE. It also covers the CUSTOM menu for more frequently accessed settings and the REC (still photography) menu for shooting-specific parameters. These settings can be reset to factory defaults if needed.
The ECONOMY function helps extend battery life by allowing the camera to switch off the display or enter standby after a period of inactivity. The FORMAT option in the SETUP menu allows users to format the memory card, deleting all contents, which is a common maintenance task for ensuring optimal card performance. PIXEL REFRESH and SENSOR CLEANING options are also available, with details referred to the official Panasonic manual.
The manual also includes instructions for accessing the shutter count, a useful piece of information for tracking camera usage and assessing its lifespan. This involves a specific sequence of button presses while turning the camera on, indicating a service mode access.
| Sensor Type | Live MOS |
|---|---|
| Effective Pixels | 16.05 megapixels |
| Autofocus System | Contrast Detect (sensor) |
| Max Video Resolution | 1920 x 1080 |
| Viewfinder Type | Electronic |
| Viewfinder Resolution | 1, 440, 000 dots |
| Camera Type | Mirrorless |
| Image Sensor Type | Live MOS |
| Lens Mount | Micro Four Thirds |
| Continuous Shooting | 7 fps |
| Built-in Flash | Yes |
| Image Processor | Venus Engine |
| Autofocus Points | 23 |
| Sensor Size | 17.3 x 13.0 mm |
| LCD Screen Size | 3.0 inches |
| LCD Screen Resolution | 1, 036, 000 dots |
| Video Frame Rate | 60p, 30p, 24p |
| Battery Type | Lithium-Ion Battery Pack |
| Weight | 390 g |
| Shutter Speed | 60 - 1/4000 sec |
| Storage Media | SD/SDHC/SDXC |
| Connectivity | USB 2.0, HDMI, Wi-Fi |
| Battery Life | 340 shots |
| Dimensions | 122 x 85 x 71 mm |