Do you have a question about the Lumix G7 and is the answer not in the manual?
Configure and utilize custom shooting modes for specific photographic scenarios.
Optimize camera settings for capturing moving subjects effectively.
Understand the PASM and other shooting modes for controlling exposure.
Explore different focus modes and how to specify focus areas.
Set up camera menus, including SETUP, CUSTOM, and REC menus.
Program function buttons for quick access to camera operations and settings.
Customize the Quick Menu and set up custom shooting modes for efficiency.
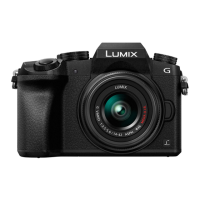
This manual describes the Lumix G7, a modern digital camera designed for stills photography, particularly for users who primarily shoot in RAW format. The camera offers a balance of advanced capabilities and user-friendly configurability, aiming to simplify complex photographic processes.
The Lumix G7 is equipped with a range of controls and features to manage exposure, focus, and image capture. It supports four primary exposure modes: Program (P), Aperture priority (A), Shutter speed priority (S), and Manual (M). These modes allow photographers to control various aspects of exposure, from fully automatic settings in Program mode to complete manual control over aperture, shutter speed, and ISO in Manual mode. The camera also includes three custom modes (C1, C2, C3) where users can store preferred settings for specific shooting scenarios, such as stationary subjects or moving subjects.
For focusing, the G7 offers multiple auto-focus (AF) modes, including FACE DETECTION, AF TRACKING, 49-AREA, CUSTOM, 1-AREA, and PINPOINT. FACE DETECTION automatically identifies and focuses on faces, switching to 49-AREA AF if no faces are detected. The 1-AREA AF mode allows users to precisely select a specific focus area, which can be moved and resized using cursor keys or the touch screen. The camera also features focus peaking, which highlights in-focus edges in blue to assist with manual focusing. An AF/MF switch allows quick toggling between auto-focus and manual focus.
Metering modes—Multi-metering, Centre-weighted, and Spot metering—determine how the camera measures exposure. Multi-metering considers the entire scene, while Spot metering focuses on a specific point, often linked to the AF area.
The camera supports various image formats, including RAW and JPEG, and allows simultaneous capture of both. Users can select different image resolutions and aspect ratios. Drive modes include Single shot, Burst shooting (with various rates like super-high, high, medium, and low), 4K PHOTO modes (4K BURST, 4K BURST S/S, 4K PRE-BURST), Auto Bracket for exposure bracketing, and a Self-timer. Time Lapse/Animation functions are also available for creative video capture.
Image stabilization is supported through optical image stabilization (OIS) in compatible lenses, which can be set to NORMAL or PANNING via the Q.MENU or a physical switch on the lens. The electronic shutter function provides silent shooting and eliminates shutter shock, though it may introduce distortion with moving subjects due to its sequential row exposure.
Flash photography is integrated with a built-in flash and hot-shoe support for external flashes. Flash modes include NORMAL and SYNCHRO, with options for 1st or 2nd curtain synchronization. Flash output can be adjusted with Flash Adjust and linked to exposure compensation. The camera also supports wireless flash, though it uses infra-red communication, requiring line-of-sight between the camera and remote flashes.
The Lumix G7 is designed for intuitive operation. Key controls include a Mode dial for selecting exposure modes, a Drive mode dial for burst shooting and other capture sequences, and front and rear dials for adjusting settings like aperture, shutter speed, and exposure compensation. A Q.MENU button provides quick access to frequently used functions, which can be customized by the user. The full MENU system, organized into tabs (REC, MOTION PICTURE, CUSTOM, SETUP, PLAYBACK), offers comprehensive control over all camera functions.
The camera features both a viewfinder (LVF) and an LCD screen. The LVF button toggles between LVF on, LCD screen on, and automatic switching. The DISP button cycles through various display options, including information displays, level indicators, and a control screen for quick setting changes. The touch screen functionality allows for intuitive control, such as moving the AF area, selecting functions, and even firing the shutter.
Programmable function buttons (Fn buttons) and screen function icons allow users to assign frequently used features for direct access, enhancing workflow efficiency. For example, the FOCUS AREA SET button can be programmed to enable movement of the AF area using cursor keys or the touch screen.
For astrophotography, the manual recommends using manual focus, setting the lens to infinity, and using manual exposure mode with a wide maximum aperture. It suggests experimenting with shutter speed, ISO, and image brightness to balance noise and detail.
For panoramas, the camera supports both manual exposure with post-processing stitching and an in-camera Panorama Shot scene mode. The in-camera mode allows users to scan the scene by holding the shutter button, with options to set the scan direction and apply effects filters.
The manual provides guidance on basic maintenance, such as inserting a charged battery and memory card. It also includes instructions for formatting the memory card, which deletes all contents. The SENSOR CLEANING function is available in the SETUP menu to help maintain the sensor's cleanliness.
The ECONOMY function helps extend battery life by allowing the camera to automatically switch off the display and/or enter standby after a set period. Pressing any button or half-pressing the shutter button can wake the camera from standby.
The manual also details how to access the shutter count, a useful piece of information for monitoring camera usage and lifespan. This involves a specific sequence of button presses to enter a service mode and navigate through information pages.
Overall, the Lumix G7 is presented as a versatile camera that, once configured to a user's preferences, offers a powerful and efficient tool for stills photography, particularly for those who appreciate detailed control and RAW image capture.
| Camera Type | Mirrorless |
|---|---|
| Sensor Size | 17.3 x 13.0 mm |
| Image Sensor Format | Four Thirds |
| Lens Mount | Micro Four Thirds |
| Built-in Flash | Yes |
| Dimensions | 124.9 x 86.2 x 77.4 mm |
| Sensor | 16.0MP Live MOS Sensor |
| ISO Range | ISO 100-25600 |
| Autofocus | Contrast Detection, 49-area |
| Video Resolution | 4K UHD (3840 x 2160) |
| Viewfinder | OLED Live View Finder |
| Screen | 3.0" 1, 040k-dot Free-Angle Touchscreen LCD |
| Connectivity | Wi-Fi |
| Battery Life | Approx. 360 shots |
| Weight | 410 g (with battery and SD card) |
| Shutter Speed | 1/4000 to 60 sec |
| Continuous Shooting | 8 fps |
| Video Frame Rate | 4K: 30p/24p, Full HD: 60p/30p |
| LCD Screen Type | TFT-LCD |
| Viewfinder Type | Electronic |
| Battery | DMW-BLC12 Lithium-Ion |