Copyright © 2015-19 Clive Dyson Version 4.5 3
priority (S) mode and Manual (M) mode. It also lets you access 4 custom modes (stored sets of camera
settings), an ‘intelligent auto’ mode, a movie mode and a number of scene and filter modes.
Switching between shooting and playback
• Press the playback button () to view photographs and videos you have taken, in playback mode.
• Half-press the shutter button, or press the playback button again, to return to shooting mode.
The Q.MENU
Other important functions for stills photography are programmed on the Q.MENU, I recommend
programming the functions shown in Table 1 on the Q.MENU, following the instructions in chapter 4,
section 3.
Each row in Table 1 appears on a separate page at the bottom of the Q.MENU. Scroll beyond the end of
the row to access the other page.
Table 1: Setup of the Q.MENU
To change one of these function settings:
• Press the Q.MENU button.
• Select the function to change, using the front dial, left/right-cursor keys or touch screen.
• Change the setting for the function using the rear dial or touch screen. Alternatively, press the up-
cursor key to change the function setting with the left/right-cursor keys.
• Half-press the shutter button (or press SET, Q.MENU or BACK) to save the setting and exit.
Using the front dial, rear dial and shutter button means you don’t have to change your grip on the camera.
The MENU system
All functions (except for some with dedicated controls) can be accessed by pressing MENU. The menu
system has tabs for REC (still photographs), MOTION PICTURE, CUSTOM, SETUP and PLAYBACK.
• Use the front dial or touch screen to move between tabs.
• Press DISP to move to the next page on a tab.
• Use the rear dial, cursor keys or touch screen to move between functions on a tab.
• Press SET (or the right-cursor key) to edit a function.
• Change the function setting with the rear dial, cursor keys or touch screen.
• Press SET to accept an edit. Press BACK (or the left-cursor key) to leave the setting unchanged.
• Press BACK (or half-press the shutter button at any time) to exit the menu system.
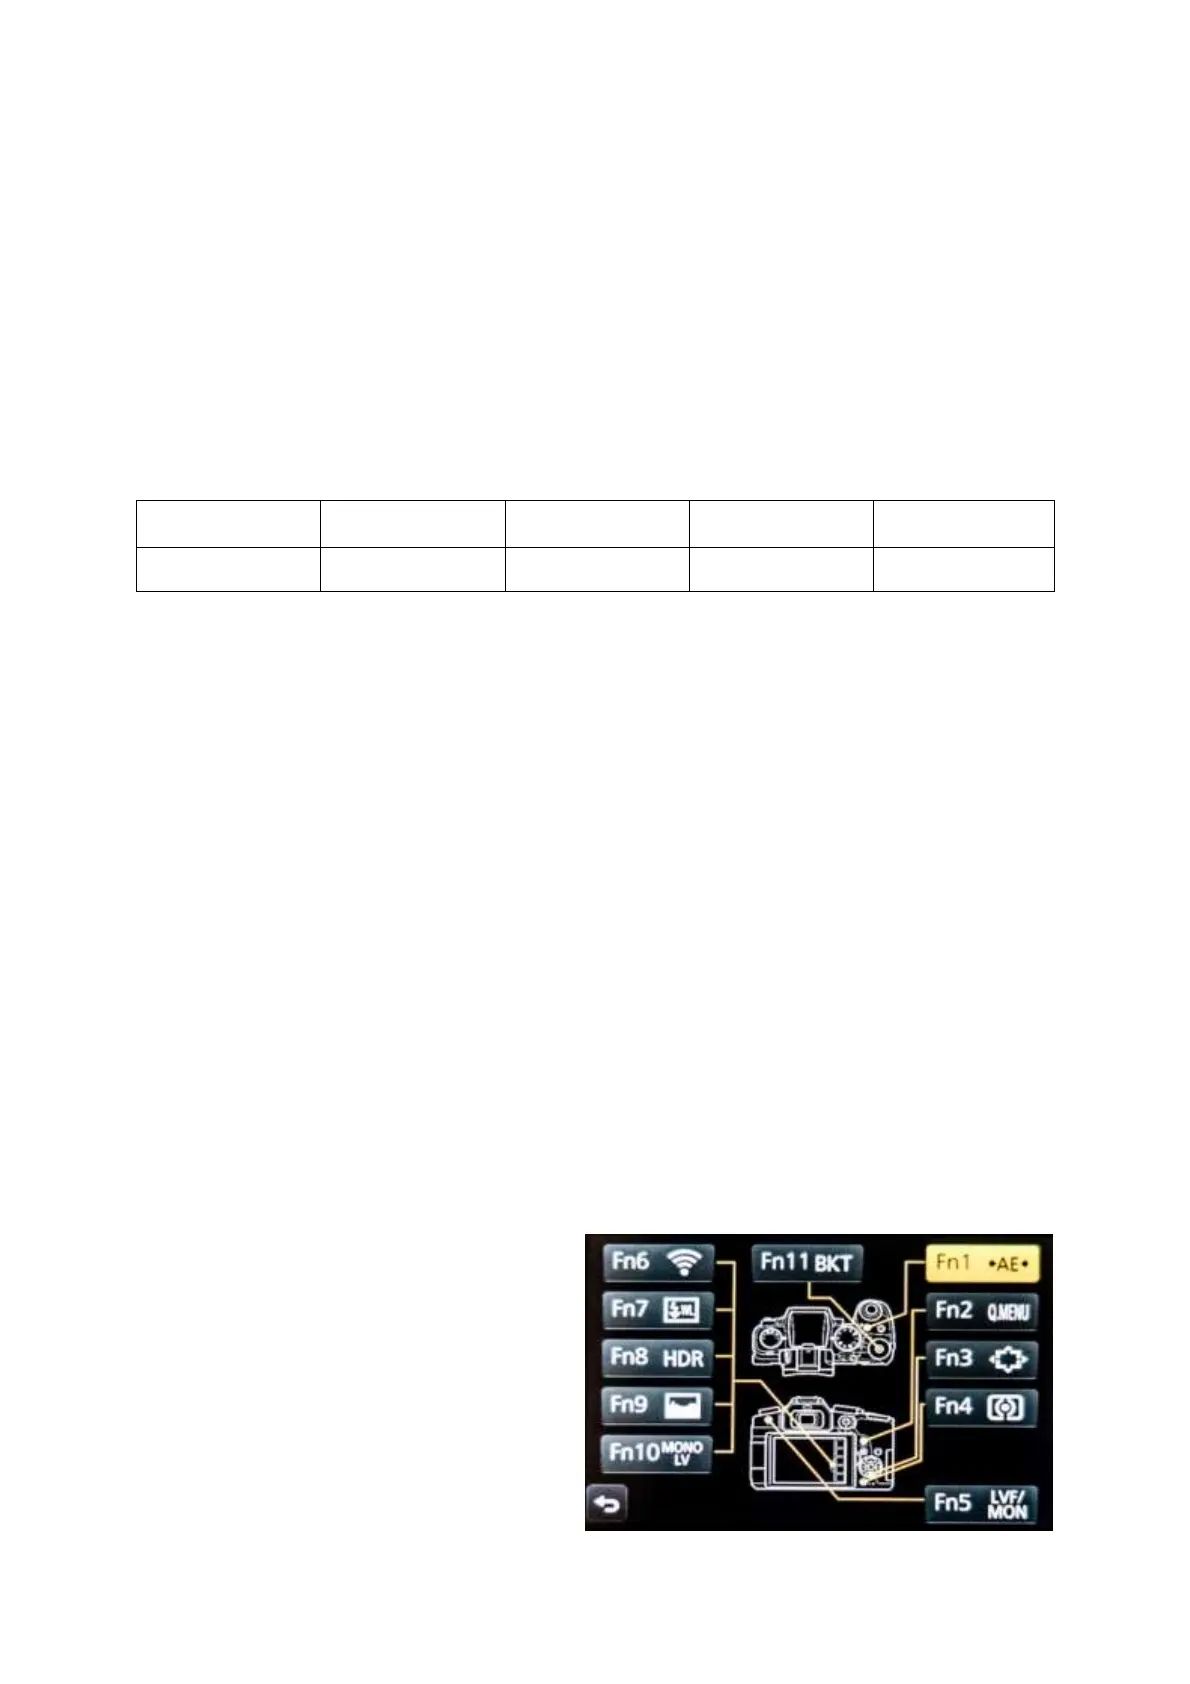
Function icons on the screen
You can allocate functions to function icons on
the screen, which are accessed through the tabs
to the right of the screen.
I use Fn6 for the Wi-Fi function, which can’t be
put on the Q.MENU and I don’t want to allocate
to a physical button.
I use the other four function icons for WIRELESS
SETUP, HDR, HISTOGRAM and
MONOCHROME LIVE VIEW.
I’d have liked to be able to turn wireless flash on
and off from here.