Do you have a question about the Luna BCS 250P and is the answer not in the manual?
Warning symbol for rotating objects.
Warning symbol for rotating objects.
Warning symbol for electrical hazards.
Warning symbol for rotating cutting tools.
Warning symbol for crushing hazards.
Warning for power off during maintenance.
Warning symbol for saw blades.
Prohibition symbol against wearing jewellery.
Prohibition symbol against wearing gloves.
Prohibition symbol to avoid wet hands.
Introduction to the manual and its importance.
Details on identifying the machine by its plate.
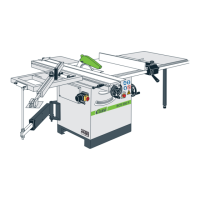
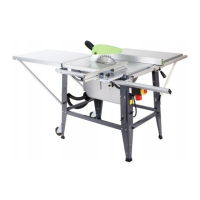
Overview of machine components and their functions.
Key technical data and specifications of the saw.
Guidance on essential personal protective equipment.
Information on noise levels and associated risks.
Procedures for safely lifting and unloading the machine.
Guidelines for correctly positioning the machine.
How to identify the contents of shipping boxes.
Instructions for installing the saw blade guard.
Steps for attaching the sliding beam assembly.
Procedures for installing the squaring frame.
Steps for installing the telescopic ruler.
Instructions for installing the rear extension table.
Instructions for installing the right extension table.
Steps for installing the rip fence.
Guidance on connecting the dust extraction system.
How to install and adjust the main saw blade.
How to install and adjust the scoring blade.
Procedures for adjusting saw blade tilt and height.
Steps for accurately adjusting the rip fence.
Overview of the control panel functions and buttons.
Guide to performing cuts using the sliding beam.
Guide to performing parallel cuts with the rip fence.
Instructions for saw driving belt replacement and tensioning.
Instructions for engraver driving belt replacement.
Guidance on cleaning the machine and its parts.
Recommendations for lubricating machine components.
Information on part replacement and waste disposal.