31
AFTER USE
Remove all swarf from the machine and thoroughly
clean all surfaces. If coolant has been used, ensure it
has completely drained from the tray.
Components should be dry, and all machined surfaces
should be lightly oiled.
Always removed cutting tools, and store in a safe
place.
MOTOR BRUSHES
The motor brushes may be changed by unscrewing the
caps, at the upper of the motor, beneath the headstock.
SETTINGS AND ADJUSTMENTS
Occasionally, it may be necessary to readjust various
components in order to maintain optimum performan-
ce. The adjustments that may be performed are as foll-
lows:
A. CROSS-SLIDE ADJUSTMENTS
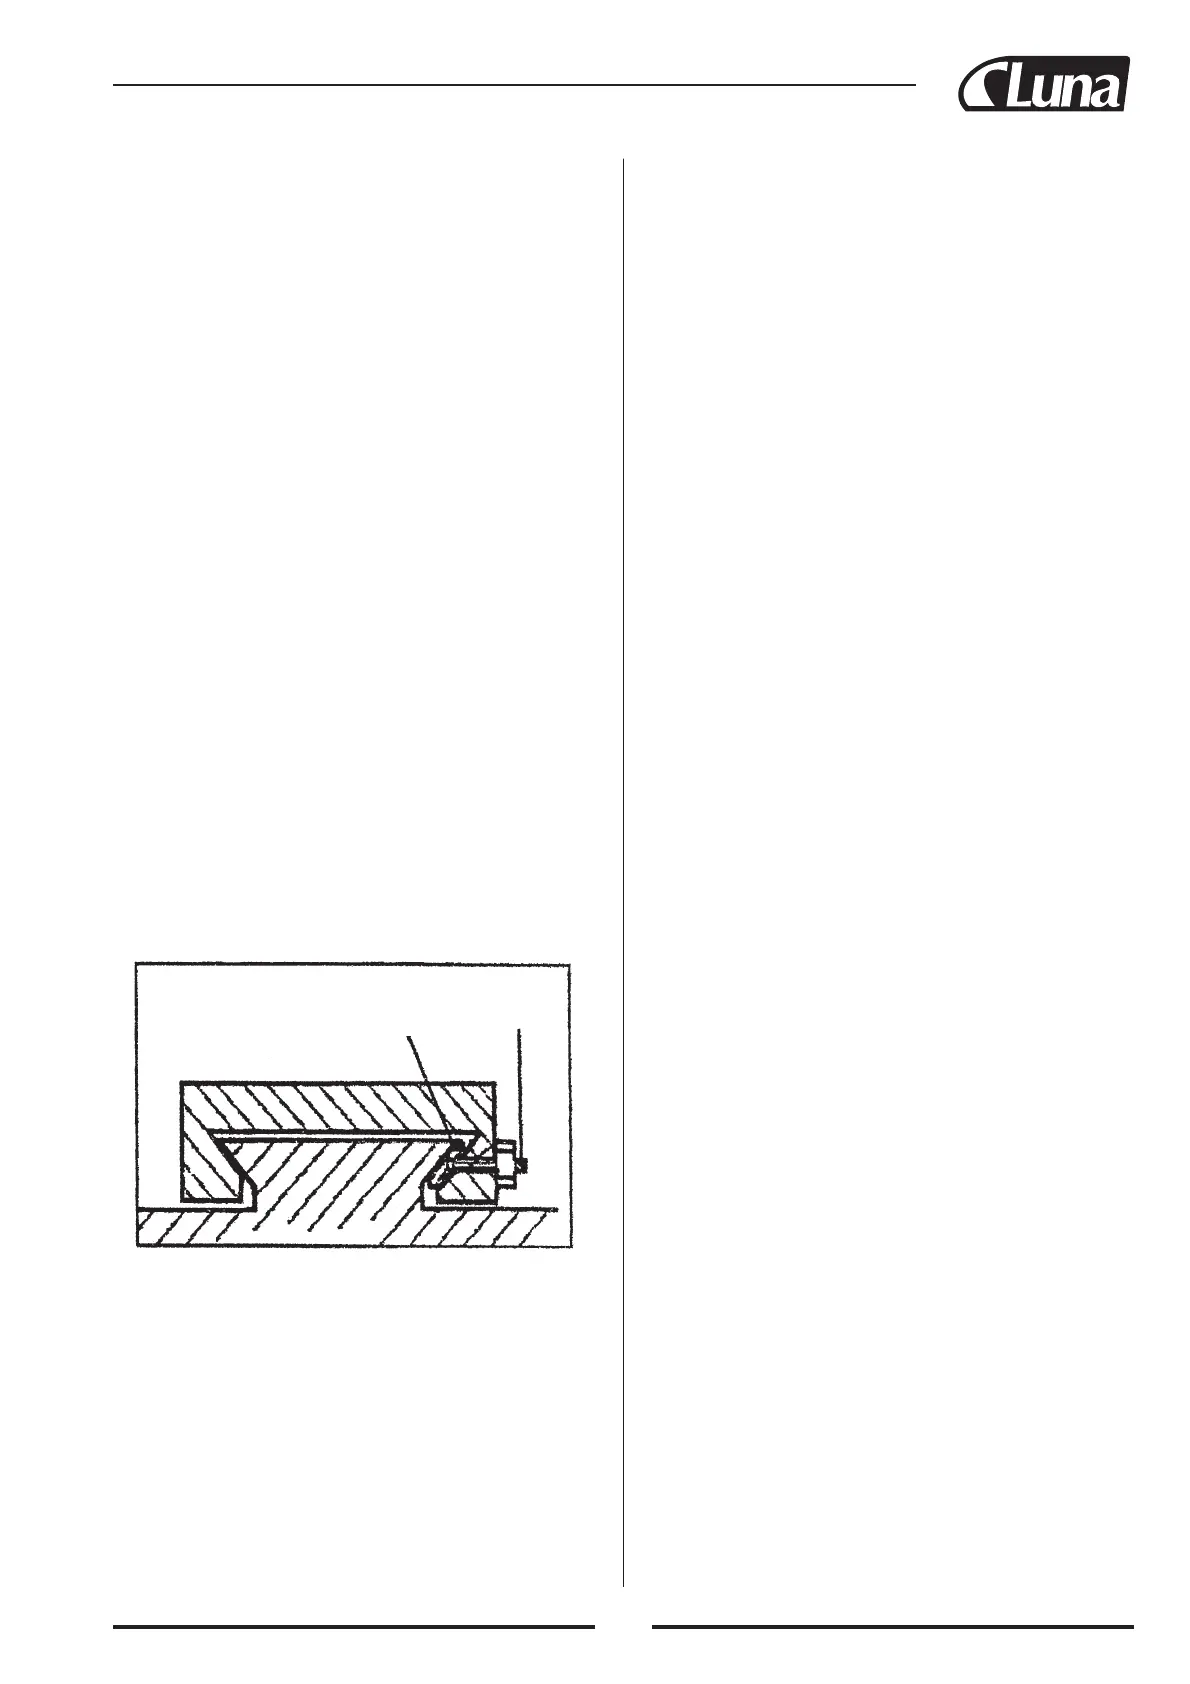
The cross-slide is mounted on a dovetail slide, as
shown below. Between the sloping surfaces on one
side of the dovetail, a “jib stip” is inserted, which may
be tightened against the dovetail under the influence of
three adjuster, or “jib” screws, mounted along it’s
length.
The jib screws are to be found on the right hand side
of the slide, directly beneath the compound slide hand-
le. In time, wear will occur on the mating surfaces
resulting in a “sloppiness” of action.
To adjust the jib strip, account for wear and ensure the
slide moves evenly and smoothly, proceed as follows:
1.Slacken off all lock nuts and screw in the jib screws
evenly, i.e. use the same torque for each screw. The
slide should be held firmly. Test by trying to turn the
handle, but do not foce it.
Jib strip
Jib or Adjuster
Screws
2.Screw out each jib screw by one quarter of a turn
only, and nip up the lock nuts.
3.Test again, by turning the handle, the movement
should be even and smooth along its complete
length.
4.If the movement is too slack, screw all adjusters “in”
by one eighth of a turn, and re-try. Similarly, if the
movement is too stiff, screw “out” the adjusters by
one eighth of a turn until the correct adjustment is
attained.
5.Tighten all lock nuts taking care to ensure you do
not move the jib screws whilst doing so.
6.When completed, retract the slide fully and apply oil
to all mating surfaces and the feed screw thread,
then wind the slid back to its normal position.
B. CROSS-SLIDE FEED HANDLE
The cross-slide feed should run smoothly, and the
scale must rotate with the handle.
If any stiffness occurs, it is probably the result of swarf
lodging between the mating surfaces. Undo the secu-
ring screw securing the handwheel. Remove the
handwheel and pull off the collar with the scale taking
great care to retain the small spring plate which sits in
a groove beneath the collar.
Clean the assembly and reassemble in reverse order. If
will be necessary to hold he spring plate in place with
a small screwdriver, or similar tool, and pushing down
on it to allow the collar to be correctly located on to
shaft.
C. TAILSTOCK ADJUSTMENTS
The tailstock locked by two lock screw, if loose the
lock screw the tailstock can moved to left or right,
when lock the lock screw (front the tailstock) then the
it can fixed any position on the bed way.
NOTE: It is important that the cross-slide and com-
pound slide adjustments are correctly out and that
there is no “sloppiness” of action. Any maladjustment
will have a serious effect on the quality of your work,
as they will all be transferred to the tool tip. It is vital
that there is as little movement of the tool as possible.


 To Next Page