Do you have a question about the LUX DMH110c and is the answer not in the manual?
Lists necessary tools for thermostat installation, including screwdrivers and drills.
Guidelines for selecting an optimal location for the thermostat to ensure accurate temperature readings.
Step-by-step instructions for safely detaching the existing thermostat from the wall.
Procedures for attaching the new thermostat base securely to the wall.
Details on how to connect wires to the thermostat terminals correctly and securely.
Instructions for replacing batteries and the procedure if the LO BATT indicator appears.
Adjusting the thermostat's temperature control sensitivity for comfort or energy savings.
Setting the minimum on-time for the compressor to protect the system.
Procedure to switch the temperature display between Fahrenheit (°F) and Celsius (°C).
Contact information and hours for technical support regarding installation or usage issues.
Details on the product's limited warranty, coverage, and return procedures.
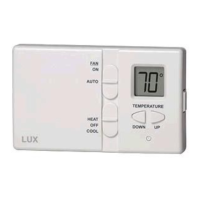
The LUX DMH100 Series is a digital mechanical thermostat designed for easy installation and operation, providing precise control over your home's heating and cooling systems. It is compatible with most 24-volt gas, oil, or electric heating and air conditioning systems, gas millivolt heating systems, and single-stage heat pumps. However, it cannot be used with 120-volt heating systems or two-stage heat pumps. If you have such systems, you should consult your dealer for alternative LUX thermostats.
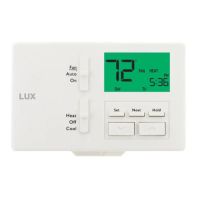
The primary function of the DMH100 Series thermostat is to regulate the temperature in your home. It features a large, easy-to-read display that continuously shows the current room temperature. A built-in digital control system ensures accurate temperature management. The thermostat incorporates a learning capability, adapting to your home's temperature characteristics on a daily basis to customize control and deliver optimal comfort.
Users can select between heating and cooling modes using the system switch. In winter, set the switch to HEAT to control your heating system. In summer, set it to COOL for air conditioning. During spring, fall, or when windows are open, the OFF setting can be used. The FAN switch offers two modes: AUTO, which automatically runs the system's fan during heating and cooling, and ON, which runs the fan continuously, even when heating or cooling is not active. The FAN switch operates only if your system provides a wire for the unit's "G" terminal.
The thermostat also includes a 4-minute minimum off time in COOL mode to protect your air conditioning system from damage. This internal timer forces a minimum on-time of 5 minutes for the compressor. This minimum on-time can be adjusted to 2 minutes by placing the W3 jumper over both pins and pressing the small unmarked button on the face of the thermostat.
The DMH100 Series is designed for straightforward use. To reveal the current set temperature, simply press either the Temperature Up or Down key. To adjust the desired temperature, continue pressing the Temperature Up or Down keys until the desired temperature is displayed. The display will revert to showing the current room temperature after two seconds.
The thermostat offers advanced features for customizing temperature control. It works by turning your heating or cooling system on and off when the room temperature varies a certain number of degrees from the set-point temperature, a variation known as "swing." While the thermostat is factory-tuned for exceptional comfort and energy savings, users can adjust the swing value for tighter temperature control, though this may come at the expense of increased energy savings. This setting can be particularly beneficial for users of forced hot water systems. Located on the back of the thermostat body are three jumpers that allow for these adjustments. To change from 0.5 degree F control to 0.25 degree F control, remove the jumper indicated by 0.5 F/0.25 F and press the small unmarked button on the front of the thermostat with a paper clip. The unit will then control your home to 0.5 degrees.
The thermostat also allows users to switch between Fahrenheit (°F) and Celsius (°C) temperature displays. To change to Celsius, place the jumper labeled W2 over both pins and press the small unmarked button on the front of the thermostat.
For electric systems where the blower does not operate after installation, an electric/gas heat selector on the back of the body needs to be moved to the ELEC position. If you have an electric system and the blower does not operate after installation, find the electric/gas heat jumper on the back of the body as indicated on the diagram and move the jumper from the pins on the far right to the pins on the far left.
The DMH100 Series thermostat requires two Energizer® or DURACELL® "AA" alkaline batteries (not included) for operation and to retain its time and temperature programs. The batteries should be replaced when the "LO BATT" indicator appears in the display or at least once a year.
To replace the batteries:
When replacing batteries, you have approximately 1 minute before programs are lost, so it is advisable to replace them promptly.
The thermostat is a precision instrument and should be handled with care. Before installing or servicing the thermostat or any part of the system, turn off electricity to the appliance. Do not turn electricity back on until work is completed. It is important not to short (jumper) across electric terminals at the control on the furnace or air conditioner to test the system, as this will damage the thermostat and void your warranty. All wiring must conform to local codes and ordinances. This thermostat is designed for use with 24-volt and millivolt systems, and the thermostat should be limited to a maximum of 1.0 amps; higher amperage may cause damage. If in doubt, contact your utility company.
| Stages | 1 Heat/1 Cool |
|---|---|
| Power Source | Battery |
| Display Type | LCD |
| Accuracy | ±1°F |
| Hold Function | Yes |