EasyManua.ls Logo

LuxaFlex 2106/56 User Manual

Default Icon
2 pages
To Next Page IconTo Next Page
Page #1 background imageLoading...
Page #1 background image
83
Installation and User manual:
Model
Installation and User’s manual PB - GB
Subject to technical changes
FaceFix installation to a window frame / wall [F1]
Do not damage the product when using a sharp knife to open
the packaging! Fitting screws: Use a size-2 screwdriver (PO-
ZIDRIVE) or use an electric screwdriver at it’s lowest torque.
5DLOUHPRYDO8VHDÀDWVFUHZGULYHURIPD[PPZLGH2QO\
use the original screws enclosed, to prevent malfunctioning
from using too thick screw heads!
B
C
A
A
B
X=5 cm
xx
max. 70 cm
xx
max. 70 cm
2 3 3 3 1 10 30 - 80 cm
3 4 4 4 1 14 481 - 115 cm
3 5 5 5 1 16 5116 - 150 cm
4 6 6 6 1 20 6151 - 185 cm
4 7 7 7 1 22 7186 - 220 cm
5 8 8 8 1 26 8221 - 230 cm
A
B
C
Removal
5
Connection
3
Tensioning/slackening the steel wire
1
FaceFix installation
2
Fitting the lower covers
4
Installation sequence
4-A1
4-A2
4-B1 4-B2
Rail installation sequence on Clips
The built-in motor (24 V DC) with automatic end position
adjustment may only be connected to the 230V mains
using a stabilized 24 Volt DC Power Supply.
Only use Power Supplies and controls recommended
by the manufacturer of the Pleated Blind, to prevent
damage or malfunctioning caused by non-compatible
electric components! When connecting electric compo-
nents, the wiring diagram provided by the manufacturer of
the Power Supply must be observed.
Note: if necessary, before clicking the rail
into place, slacken the steel wire
Push ¿rmly to the rightleft to tensionslacken
the steel wire
Number of parts Product width
21-03-2014
2106/56
[F1]
Question and Answer IconNeed help?

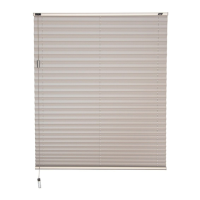
Do you have a question about the LuxaFlex 2106/56 and is the answer not in the manual?

LuxaFlex 2106/56 Specifications

General IconGeneral
BrandLuxaFlex
Model2106/56
CategoryWindow Blinds
LanguageEnglish

Summary

FaceFix Installation to Window Frame/Wall

Installation Sequence Overview

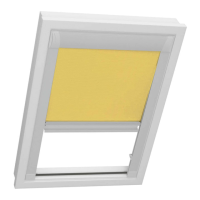
Details the step-by-step process for installing the rail and blind components.

Rail Installation on Clips

Illustrates how to attach the rail to mounting clips, detailing specific clip sequences.

Fitting Lower Covers

Instructions on how to attach the lower covers to the blind assembly.

Tensioning Steel Wire

Guide on adjusting the tension of the internal steel wire for proper operation.

Electrical Connection Guide

Details on connecting the motor (24V DC) to a 230V mains via a suitable power supply.

Removal Procedure

Instructions on how to safely remove the installed blind from its mounting.

TopFix and RecessFix Installation

Bottom Rail Clip Installation

Steps for installing mounting clips onto the bottom rail of the blind.

High Rail Clip Installation

Steps for installing mounting clips onto the high rail of the blind.

Steel Wire Tension Adjustment

Guide on adjusting the tension of the internal steel wire for proper operation.

General Installation Sequence

Outlines the general order of operations for installing the TopFix/RecessFix system.

Rail Installation on Clips

Details the sequence for attaching the rail to the mounting clips.

Electrical Connection

Information on connecting the built-in motor to the 230V mains using a 24V DC power supply.

Removal Process

Instructions on how to detach and remove the blind from its installed position.

Related product manuals