Thank you for purchasing this Luxaflex
®
quality product. Please read and follow these installation and
operating instructions carefully. We cannot accept responsibility for problems caused by not adhering
to the instructions.
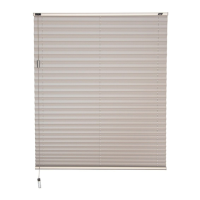
Installation and Operating Instructions for Freehanging Pleated Blinds
Please read the following instructions thoroughly before commencing installation:-
• Do not damage the product when using a sharp knife to open the packaging !
• Fitting screws: use a size 2 screwdriver, or use a 3.6v electric screwdriver at it’s lowest torque.
• Rail removal: use a flat blade screwdriver
• It is recommended that you use the screws supplied for fitting to prevent malfunction from using
screws with too large heads.
• There is a possibility that this product may not reach the required drop when lowered initially. This is
usually caused by the tight compression of the pleats during transit. Whilst the blind, if left hanging
would normally fall to its required drop over a short period of time, the following action could help
speed up the process. To relax the pleats and enable them to drop fully, we recommend the following
course of action:-
• Lower the blind as far as it will drop
• Gently ‘work’ the pleats open in a downward fashion (from the top of the blind either side down)
The blind should now reach the desired drop.
These instructions are suitable for the following models :
Fittings Supplied :
Models 116, 120 & 124
(Model 116 has fixed bottom rail)
(Model 124 has no fixed headrails)
Models 130 Models 140
& 170
Models 150 & 151
(model 151 Full arch)
Models 172 Models 160 & 161
(Model 161 slopes
both sides)
Models 110 & 113
Recommended Bracket Positions :
(For models with fixed rails at the bottom or sloping
rails, the same distance dimensions should apply)
If your fixing surface is uneven, packing shims are
supplied which can be positioned above the
brackets to level the headrail.
Bracket Face Fitted Bracket Top fitted
Interlockable packing
shims and back covers are
supplied if top fixing
11° wedges are supplied
and can be built up to fit to
angled frames up to 45°
free hanging instructions june 09.qxd:Layout 3 10/8/09 16:15 Page 4

 Loading...