Quick Guide
Congratulations for purchasing the LX FLARM Eagle.
Please congure the LX FLARM Eagle before rst
use. Set your ICAO 24-bit address, aircra type and
transponder conguration (chapter 1.2).
1. Installation
Aer unpackaging power the device with 9-36 V DC
power via main power supply or RJ 12 (1:1 cable),
connect and install GPS antenna facing the GPS sign of
the antenna towards the sky. Connect and install FLARM
RF antenna according to FTD-041 (www.arm.com) and
congure the unit.
1.1. Basic conguration of LX FLARM Eagle
The LX FLARM Eagle can be congured by the use of
the cong le stored on USB ash drive using program
1
FLARM Tools. Always use the latest version of
1
FLARM
Tools program on your PC.
Default settings:
• Flight recorder logtime is set to 4 seconds.
• Communication baud rate is set to 19200 bps.
• Output data is set to “navigation & FLARM”.
• Horizontal detection range is set to 25500 meters.
1.2 Conguration via USB ash drive
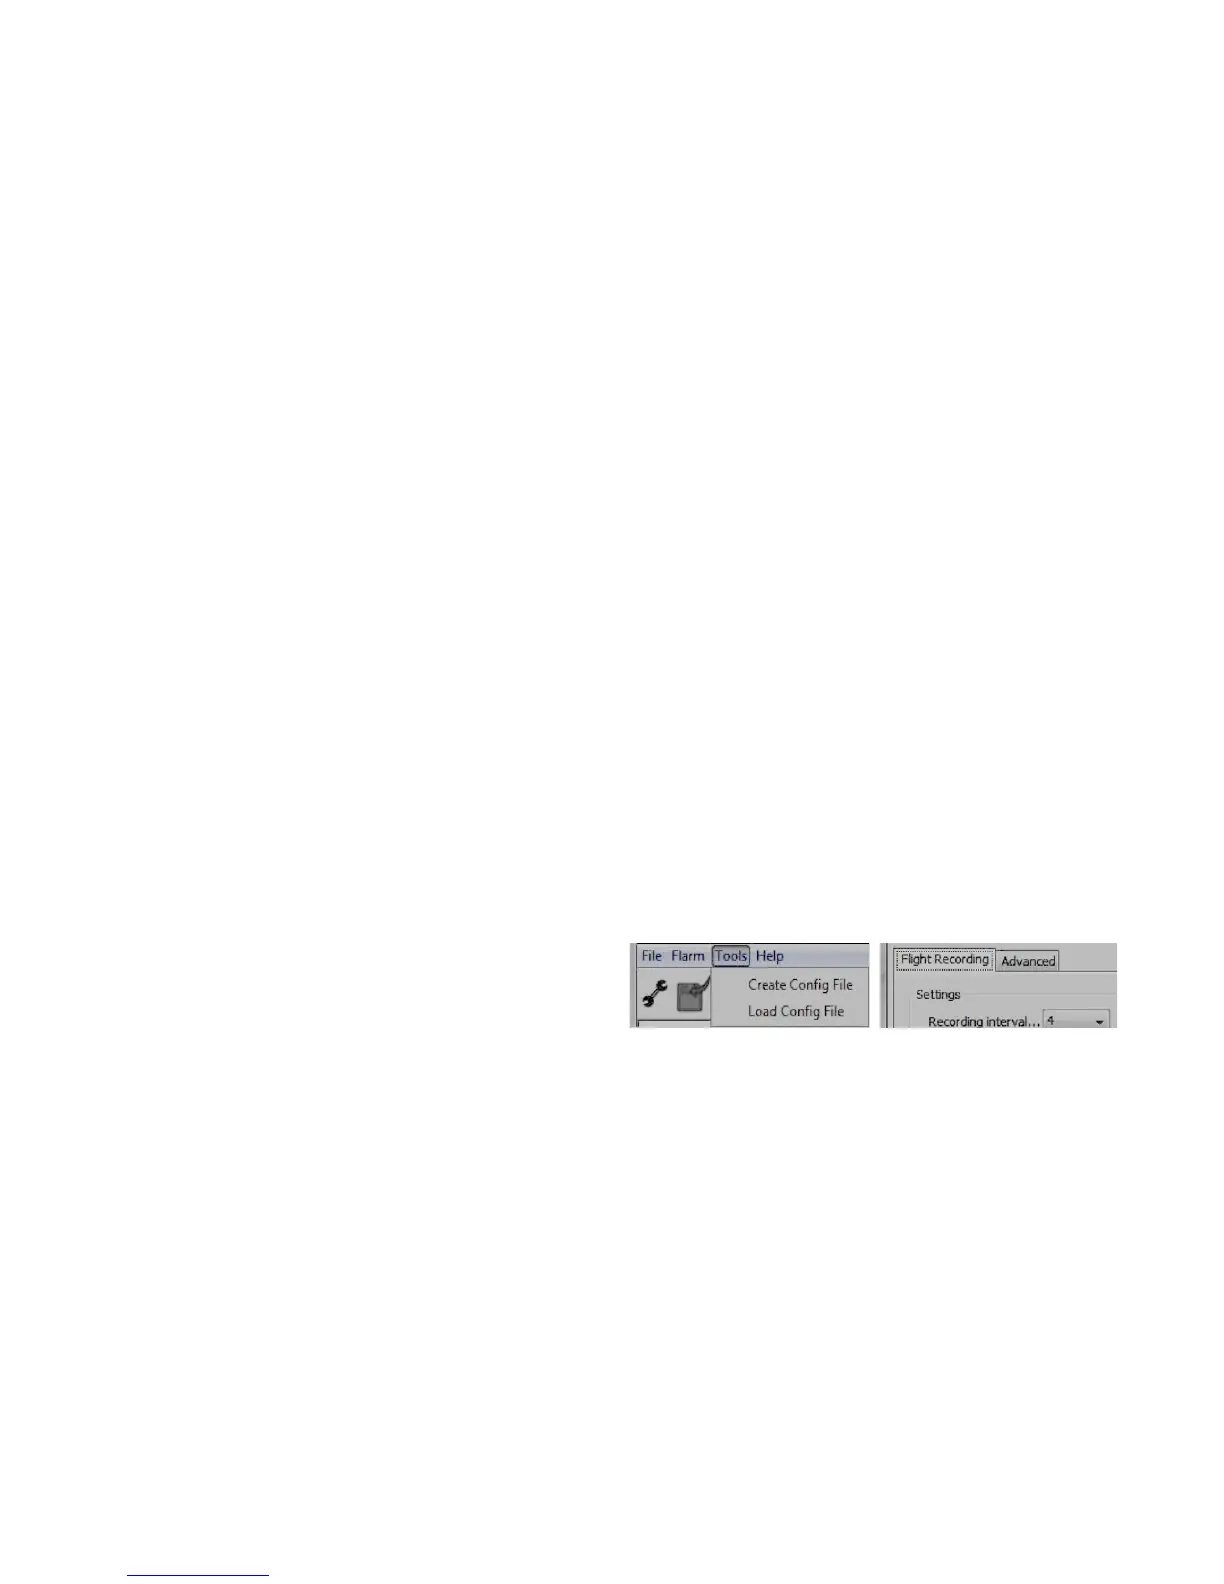
To create the cong le, open the latest version of
1
FLARM Tools program (www.arm.com). On the top
navigation bar go to option Tools/Create Cong File (le
picture). You are presented with Flight Recording and
Advanced subpages (right picture).
1
Latest FLARM Tools program - https://arm.com/wp-
content/uploads/man/FLARM_Tool_3_6_4_1f59603.exe