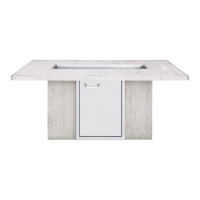
3 SEDONA by LYNX™ Ready to Finish Fire pit Assembly Instrucons
SEDONA by LYNX™ READY TO FINISH FIRE PIT ASSEMBLY INSTRUCTIONS
Congratulaons on your purchase of the SEDONA by LYNX™ Ready to Finish Fire pit. The
prefabricated unnished re pit can be assembled in no me at all. Minimal tools are
necessary for assembly. The re pit comes ready for you to add your own personal touch
in components, nishes and countertops.
Before you begin the re pit installaon you will need to plan ahead. Some things to consider:
Power Supply and Venng:
The Ready to Finish Fire pit is not pre drilled or cut for venng access. You will have to cut through the rear panel.
When creang a vent, we recommend 4” x 14” at the rear of tre pit. The vent should be near the top for natural
gas: closer to the boom if using LP gas. Cover vents with louvered stainless steel covers if desired.
Fire pit Orientaon:
While you have the opon of a le hand or right hand orientaon, consider posioning the re pit to take advantage
of natural wind breaks.
Leveling the Fire pit:
If the base is not level, adjust the legs before the top panels and tray are installed. If the re pit is not leveled
correctly the panels could be misaligned and cannot be adjusted once assembly is complete.
Assembling the Fire pit:
You will need a Philips head screwdriver to install the screws which hold the top panel in place.
If you have any quesons or comments please
contact Lynx Customer Care:
Lynx Professional Grills
7300 Flores Street.
Downey CA 90242
Lynx Customer Care 888.289.5969