Do you have a question about the Lynx SEDONA and is the answer not in the manual?
Key safety warnings including lifting, fuel storage, and setup assistance.
Alerts to the danger of lifting the fire pit alone, requiring assistance.
Emphasizes planning location and avoiding moving the fire pit after setup.
Illustrations of different fire pit orientations based on control side.
Guidance on cutting rear panel for venting access based on fuel type.
Advice on positioning the fire pit for optimal use and wind protection.
Importance of leveling the base before top panel installation for alignment.
Specifies a Philips head screwdriver is needed for top panel screws.
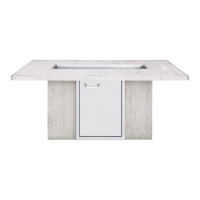
Diagram and list of main fire pit body parts and hardware.
Detailed visual breakdown of all fire pit components and their assembly points.
Comprehensive list of all parts with part numbers, descriptions, and quantities.
Shows electrical connections for the spark igniter module and battery.
Provides key physical measurements for the fire pit assembly.
Instructions for removing the fire pit and its components from packaging.
Guidance on placing the base and ensuring it is level before proceeding.
Steps for securing the two-part top panel to the fire pit base.
Procedure for installing the control panel and connecting the gas regulator.
Step-by-step guide for igniting the burner and adjusting temperature.
Details warranty coverage for fire pit frame panels against defects.
Outlines conditions, restrictions, and exclusions applicable to the warranty.
Lists specific costs and damages that Lynx is not responsible for under warranty.
| Brand | Lynx |
|---|---|
| Model | SEDONA |
| Category | Outdoor Fireplace |
| Language | English |