13
characters, etc.
The LED test ends (and the button test begins) when any button is
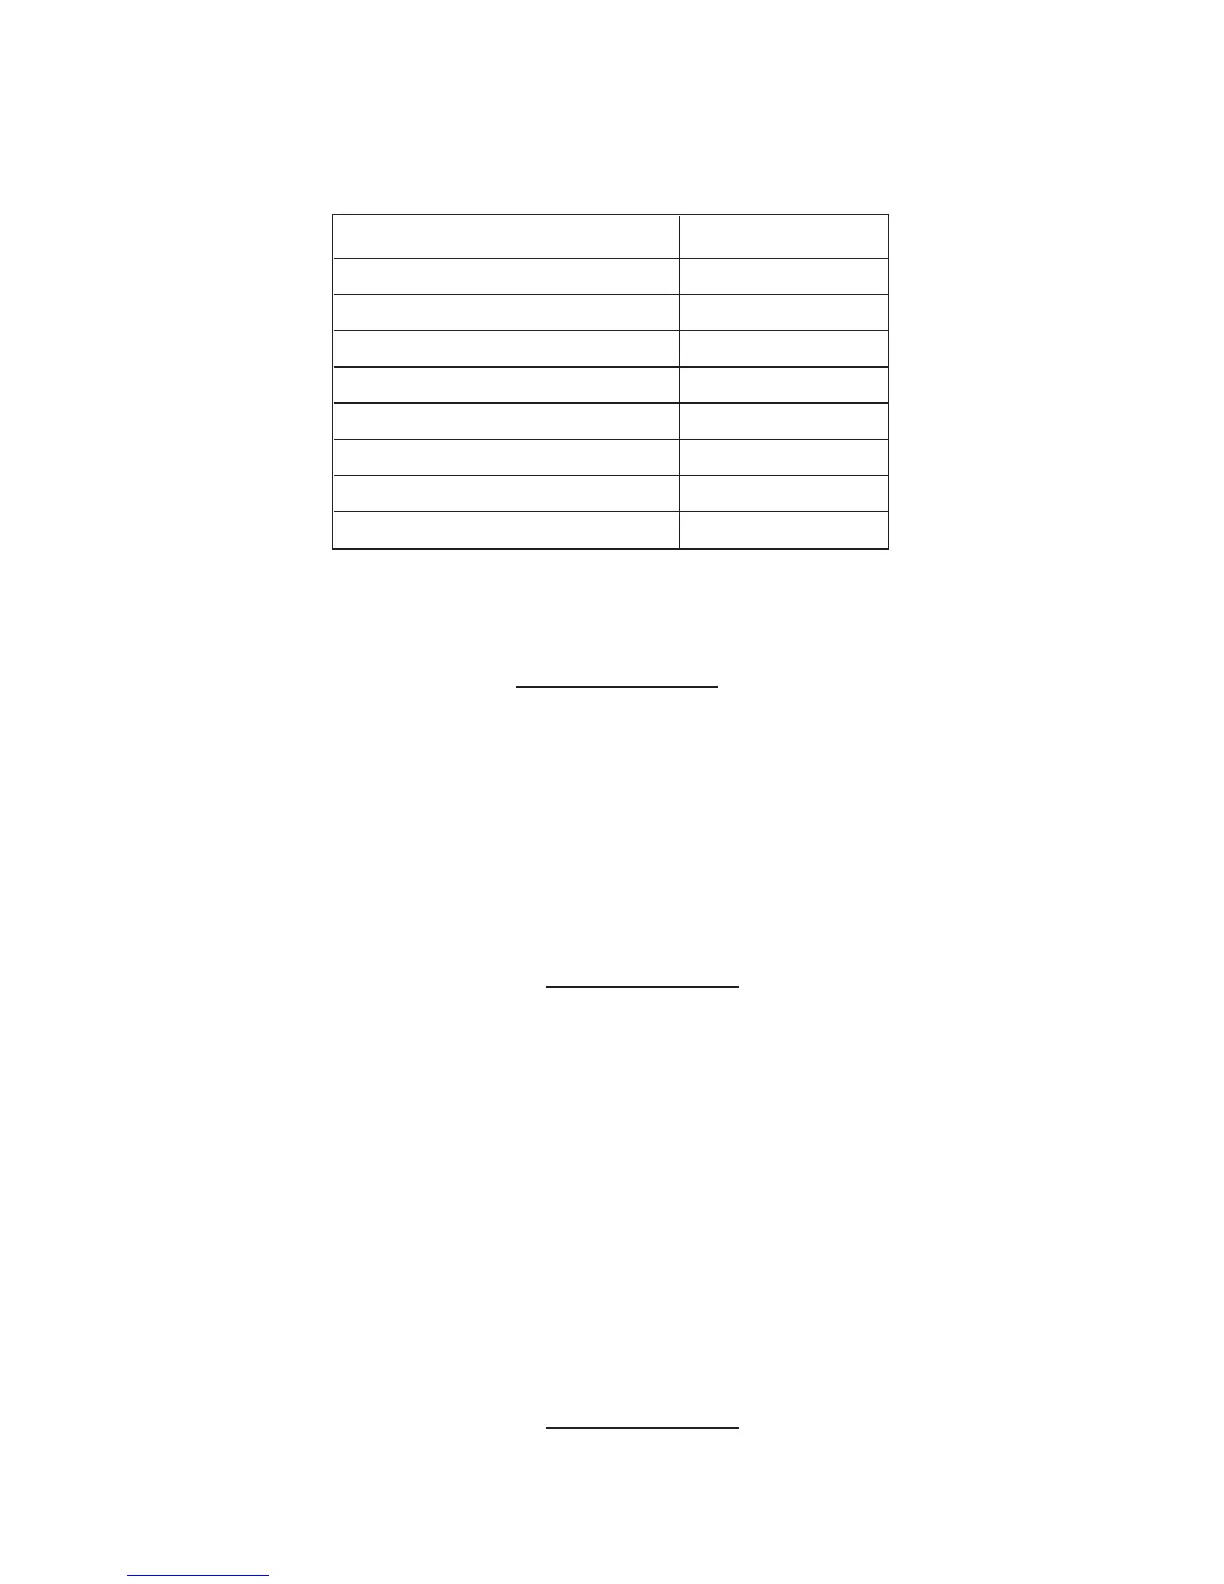
Button Number
PROG INC 1
TARGET INC 2
SOURCE INC 3
PROG DEC 4
TARGET DEC 5
SOURCE DEC 6
MIDI 7
STORE 8
pressed. Each button when pressed will display the following
numbers:
During the button test, the sour
ce indicator will display the corre-
sponding number for each button so long as it is held down (the dis-
play will be blank when no buttons are pressed).
EPROM Test (MIDI + Target ▲)
This test verifies proper operation of the DigiPatch’s internal
EPROM (code memory).
The result is displayed in the tar
get indicator as follows:
1 = success, 0 = failure
EEPROM Test (MIDI + Source ▲)
This test verifies proper operation of the DigiPatch’s internal EEP-
ROM (non-volatile memory).
Important: This test is destructive and will erase all programs,
MIDI settings, and edit buffer contents — so do NOT perform this
test unless you have saved your patch information by way of a
MIDI bulk data dump.
The result is displayed in the tar
get indicator as follows:
 Loading...