|
11
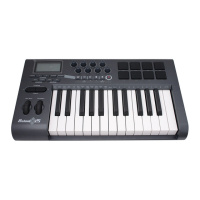
KeyRIg 49 User Guide
Channel
MIDIdatafromthekeyboardcanbesentonanyof16MIDIchannels.KeyRig49’sdefaultistotransmitMIDIdataonchannel
1.However,certainMIDIperformanceorrecordingscenariosmayrequirethekeyboardtosenddataonadifferentchannel.
You can change the channel on which data is sent using the following method:
1. PresstheEditModebutton.
2. Pressoneofthe16channelkeysfromD1toE3,whicheveronerepresentsthechannelyouneed.KeyRigwillexitEdit
mode as soon as a channel key has been pressed.
Forexample,ifadevicespeciesthatyouneedtosenddataonchannel10,presstheEditModebutton,andthenF2to
select channel 10. This channel is usually dedicated to drum sounds when working with GM compatible synthesizers and
sound modules.
ThechannelcanalsobeassignedtotheOctave“<”and“>”buttonsbypressingtheEditModebuttonandthenC#2.This
willallowtheOctave“<”and“>”buttonstoincrementordecrementthroughthechannels.Whenchannel16isreached
and“>”ispressed,channel1willbeselected.IftheOctave“<”and“>”buttonsareassignedtovarythechannel,thelights
abovethebuttonswillnotchange,sinceitisnotpossibletohaveachannelwithanegativevalue.Pressingboththe“<”and
“>”buttonstogetherwillrecallKeyRig49’sdefault,channel1.
Program Change
Program changes are used to change the instrument or voice you are controlling with your KeyRig 49. Program change
messagescanbebenecialwhenusingtheKeyRig49keyboardtocontrolMIDIsoundmodulesorsynthesizers.Somemusic
software applications support these messages, however, others do not. Check your software’s User Guide to find out if it can
process program change messages.
Inthisexample,wewilldemonstratehowtochangetheinstrumentonaGeneralMIDIsoundmoduletoacellosound.Todo
thisweneedtosendaprogramchangeof42,whichwillselectacellosoundfromtheGeneralMIDIInstrumentsstandardlist
(seeAppendixA).Therearetwomethodstosendtheprogramchange:
1) Increment/Decrement Program Change:
1. PresstheEditModebutton.
2. PresstheblackkeyaboveF1(F#1).NowtheOctave“<”and“>”buttonscanbeusedtochangetheprogram.
2) Quick Select Program Change
1. PresstheEditModebutton.
2. PresstheblackkeyaboveF4(F#4),representing“program.”
3. PresskeysD4,thenB3,thenC5.Thisentersthecombination:“4,”“2,”“ENTER.”
NowthekeyboardissettoplaytheGMcellosound42(fromtheGeneralMIDIInstrumentsstandardlist).Thefulllistof
GeneralMIDIprogramnumbersisgiveninAppendixAattheendofthismanual.
Method 1 is useful if you want to cycle through different instruments for the purpose of comparing and choosing which sound
works best in your song. Method 2 is more useful if you want to select a specific sound patch, as is the case here.
IftheOctave“<”and“>”buttonshavebeenassignedtocontroltheprogramnumber(Method1),thelightsabovethe
buttonswillnotchange,sinceitisnotpossibletohaveaprogramwithanegativevalue.Pressingboththe“<”and“>”
buttonstogetherwillrecallProgram0,whichselectstherstsoundpatchonanysynthesizercapableofprocessingMIDI
program changes.
 Loading...