EN
15
Getting
started...
MLM1841
by MacAllister
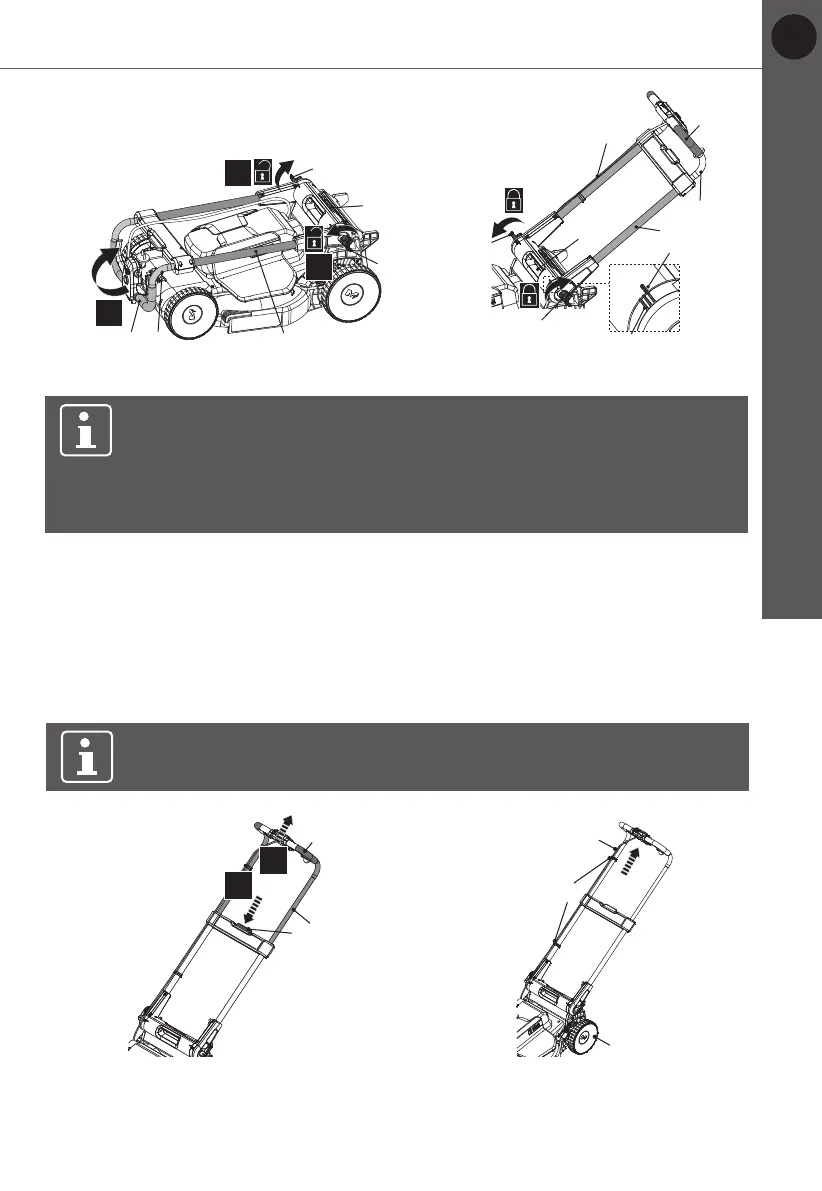
4. Press down the lock button (6) and hold it in positon (Fig. 3, step 1), then
grasp the grip handle (2) to pull out the upper handle bar (5) (Fig. 3, step 2).
5. Release the lock button (6) and continue to pull out the upper handle bar (5)
all the way until an audible click is heard.
6. Secure the inter-connection cord (18) with two wire clips (17) (Fig. 4). Pull
the inter-connection cord (18) to avoid contact with the rear wheel (12) if
necessary.
NOTE:
Make sure the clamp levers (10) are properly tightened before
using the product.
Before you start
NOTE:
For rst assembly, secure the handle assembly with the clamp
lever (10) in the middle position of the tilt adjustment mechanism by
aligning the indication line (8a) with the indicator (9a) of transport
handle (9). Ensure the handle assembly is assembled on the same
height level on both side.
10
10
9
8
2 5
2.
1.
1.
Fig. 1
8a
9a
8
5
2
18
10
10
9
Fig. 2
2
5
6
2.
1.
Fig. 3
18
17
12
Fig. 4
Fig. 1 Fig. 2
10
10
9
8
2 5
2.
1.
1.
Fig. 1
8a
9a
8
5
2
18
10
10
9
Fig. 2
2
5
6
2.
1.
Fig. 3
18
17
12
Fig. 4
Fig. 4Fig. 3