154
MAC 6000 Hydronic Heater
Riello Burner
2106 East Indiana Ave., Bismarck, ND 58504 U.S.A. • www.macheaters.com • +1-800-272-4604
2453
3
GB
INITIAL SET-UP
A) Remove burner and air tube from cartons. Check parts list (inside cover) to ensure all parts are present.
B) Remove burner cover by loosing the three screws securing it. Remove control box and air tube cover.
C) Remove drawer assembly from air tube, insert nozzle and set Turbulator adjustment for specific input required, then
set aside.
D) Mount air tube to burner chassis.
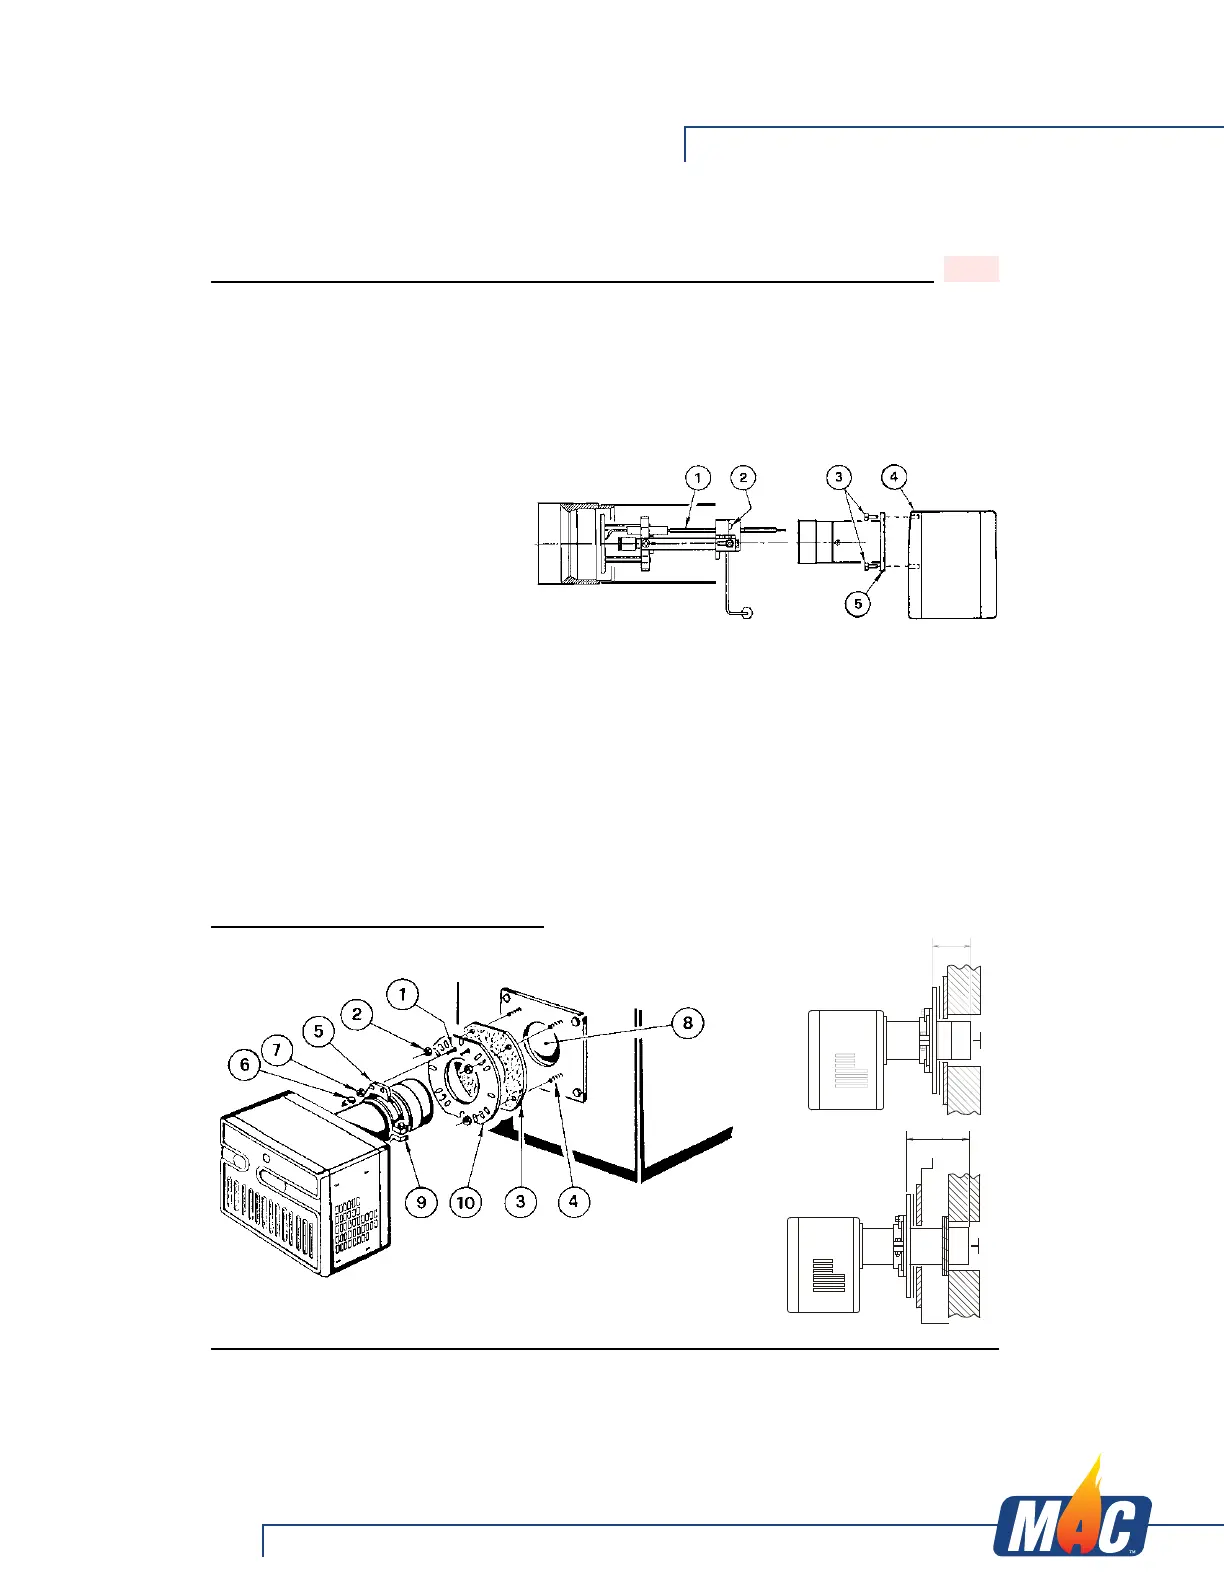
ASSEMBLY OF AIR TUBE TO BURNER CHASSIS
The air tube and drawer assembly are
shipped in a carton separate from the
burner chassis. Choose the proper air
tube length to obtain the tube insertion for
the specific installation.
A) Remove the AIR TUBE and B URNER
CHASSIS from their respective
cartons.
B) Remove the DRAWE R ASSEMBLY
(1) from inside the AIR T UBE by
loosening the screw (2). Carefully pull
the DRAWER ASSEMBLY out of the AIR TUBE, install the required nozzle (see page 7) and set aside.
C) Align the two holes on the AIR TUBE HOLDING PLATE (5) with the two holes left open on the BURNER
CHASSIS FRONT PLATE (4) with the BOLTS (3) removed.
Replace the BOLTS and finger tighten only. Re-install DRAWER ASSEMBLY into AIR TUBE. Tighten SCREW
(2) securely (see page 7).
D) Tighten the two bolts (3) securely.
MOUNTING THE BURNER TO THE BOILER OR FURNACE
There are three possible methods to mount the burner, depending on the individual application. These are:
1) Universal flange bolted to Boiler/Furnace unit.
2) Semi-flange collar bolted to Boiler/Furnace unit.
3) Universal flange mounted to optional Pedestal mount, where flange mounting direct to appliance is not possible.
Pedestal kit must be ordered separately.
METHOD 1 – UNIVERSAL MOUNTING FLANGE
S7445
S7439
A
B
A
B
DRY BASE
BOILER
D6013
D6014
COMBUSTION
CHAMBER