5
Owner’s Manual
Owner’s Manual
Hookup Diagrams
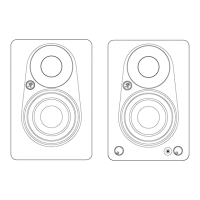
The illustration above shows a typical use for CR Series Reference Monitors. Everyone needs tunes
while working, right...or is it just me?
In this example, simply connect the (included) cable from the computer’s 1/8" output jack to the
L/R RCA inputs of the powered CR Series Reference Monitor. If you prefer to use 1/4" inputs instead
of RCA inputs, that option is available, too.
Next we’ll want to connect the passive speaker. The included black (–) and red (+) speaker wires
should be connected from the powered monitor’s ± spring clips to the passive monitor’s ± spring clips
as detailed by the dotted lines above:
Connect black (–) to black (–) and red (+) to red (+).
Almost there! Move the ‘Powered Speaker Position Select’ switch to either the “L” or “R” position
based on whether the powered reference monitor – the one with the volume knob – will be on
the left or right side.
Now position the monitors where you would like them. Play audio through the computer, making sure
that the volume of the computer and monitors are above “0”.
Last step: move the monitors around until the optimal sound has been achieved and adjust volume
to taste.
Optional: place the included acoustic isolation pads underneath the monitors to minimize boomy bass
build-up and provide up/down tilt control for more focused listening.