6
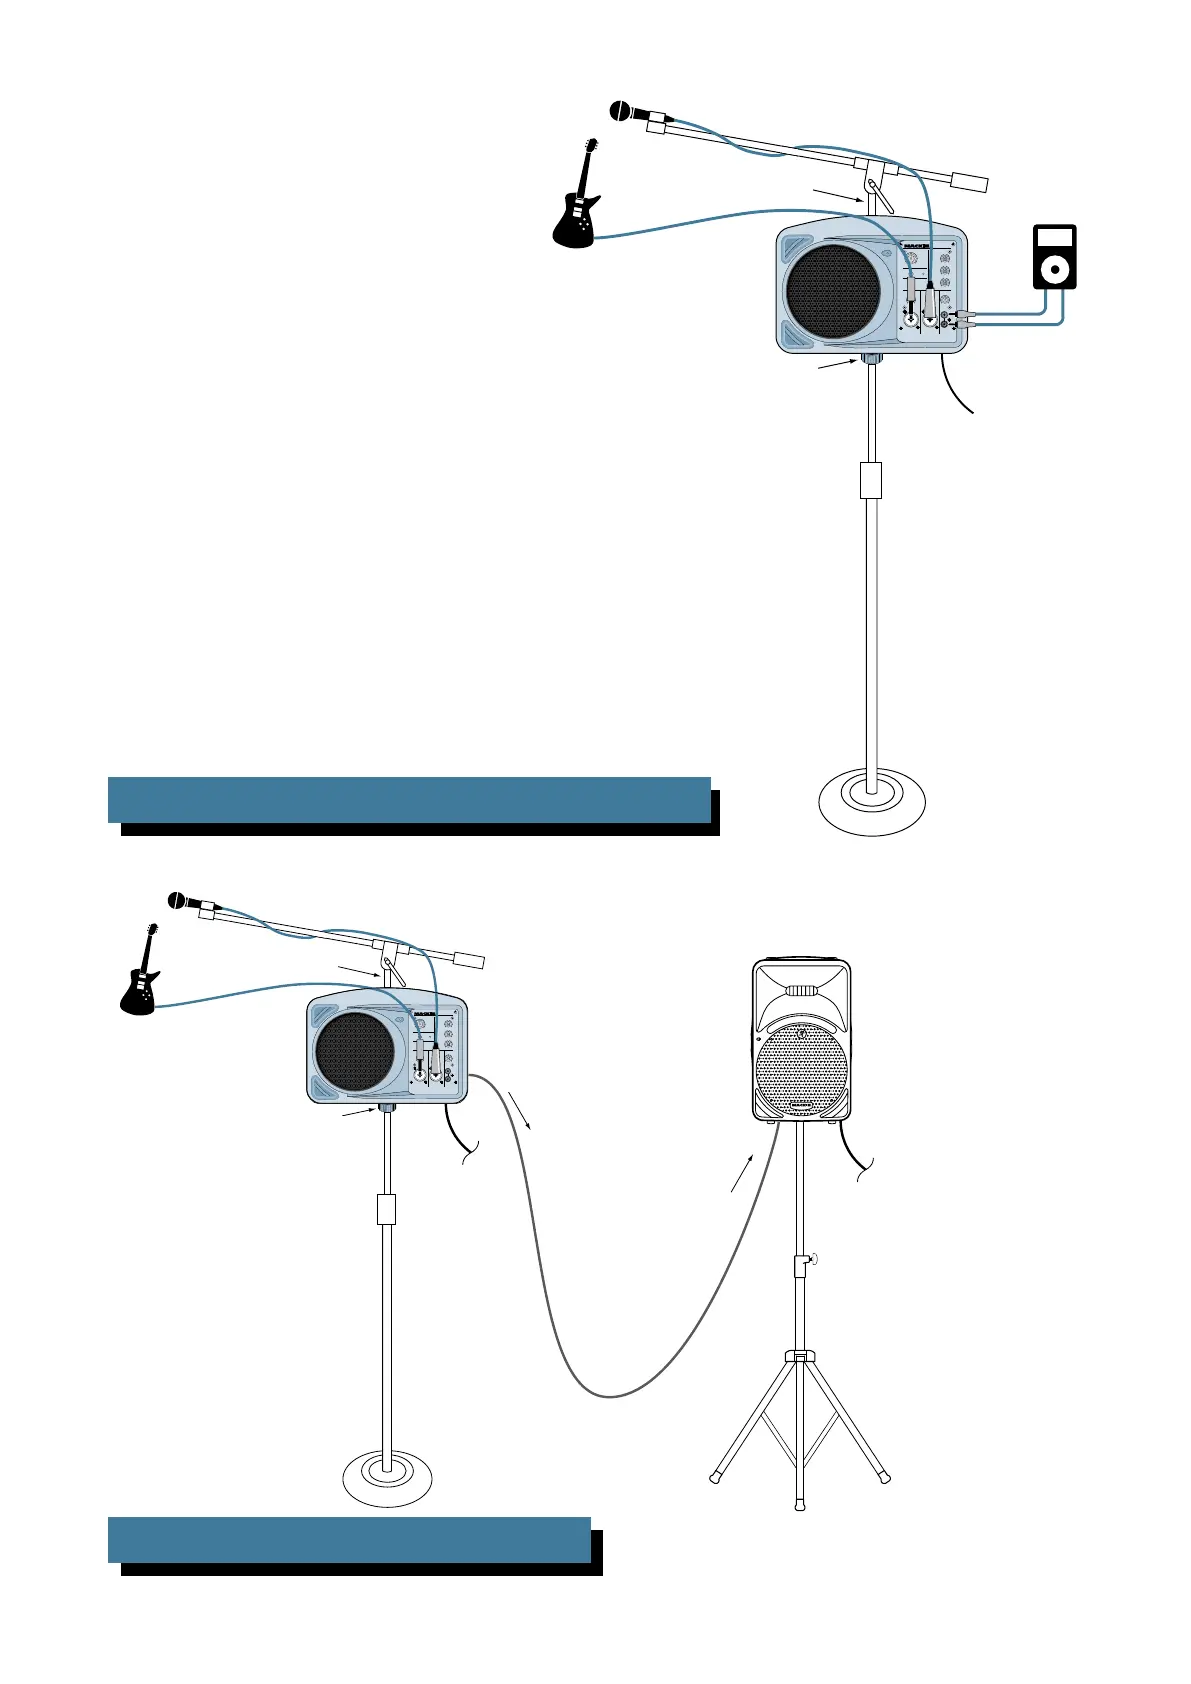
SRM150: SMALL CLUB SETUP WITH SRM450
HOOKUP DIAGRAMS
HIGH
12kHz
MID
2.5kHz
LOW
100Hz
MAXMIN
U
+15-15
U
+15-15
U
+15-15
MAXMINMAXMIN
SRM150
MAXOFF
LEVEL
EQ
MIC/LINE
MIC/LINE
1
2 3
L
R
PHANTOM POWER
MAIN
INSTRUMENT (CH 1)
48V
Boom Extender
(Included)
Mic Stand
Adapter
(Included)
Electric Guitar
Vocal Mic
SRM450
Power
Cord
THRU Out
To Input
Powe
Here the SRM150 is used
as a personal monitor and
the SRM450 is the main PA
speaker.
HIGH
12kHz
MID
2.5kHz
LOW
100Hz
MAXMIN
U
+15-15
U
+15-15
U
+15-15
MAXMINMAXMIN
SRM150
MAXOFF
LEVEL
EQ
MIC/LINE
MIC/LINE
1
2 3
L
R
PHANTOM POWER
MAIN
INSTRUMENT (CH 1)
48V
Power
Cord
Boom Extender
(Included)
Mic Stand
Adapter
(Included)
Electric Guitar
Vocal Mic
MP3 Player
This illustrates how to use the SRM150 as a per-
sonal monitor. Mount the SRM150 on a microphone
stand using the Mic Stand Mounting Bracket in-
cluded with the SRM150. Attach the Boom Extender
(also included) to the top of the SRM150 and use a
microphone boom to hold your microphone.
Connect the microphone and an instrument to the
SRM150 (Channels 1 and 2), and a playback device
like an MP3 player to Channel 3.
SRM150: PRACTICE SETUP USING MIC STAND AND BOOM