®
4
Instructions
UTILITY CARTS and ACCESSORIES
MB199UC / MB199UCFD UTILITY CARTS and ACCESSORIES - MANUAL - REV 1.0 - 2013
PN# 080106
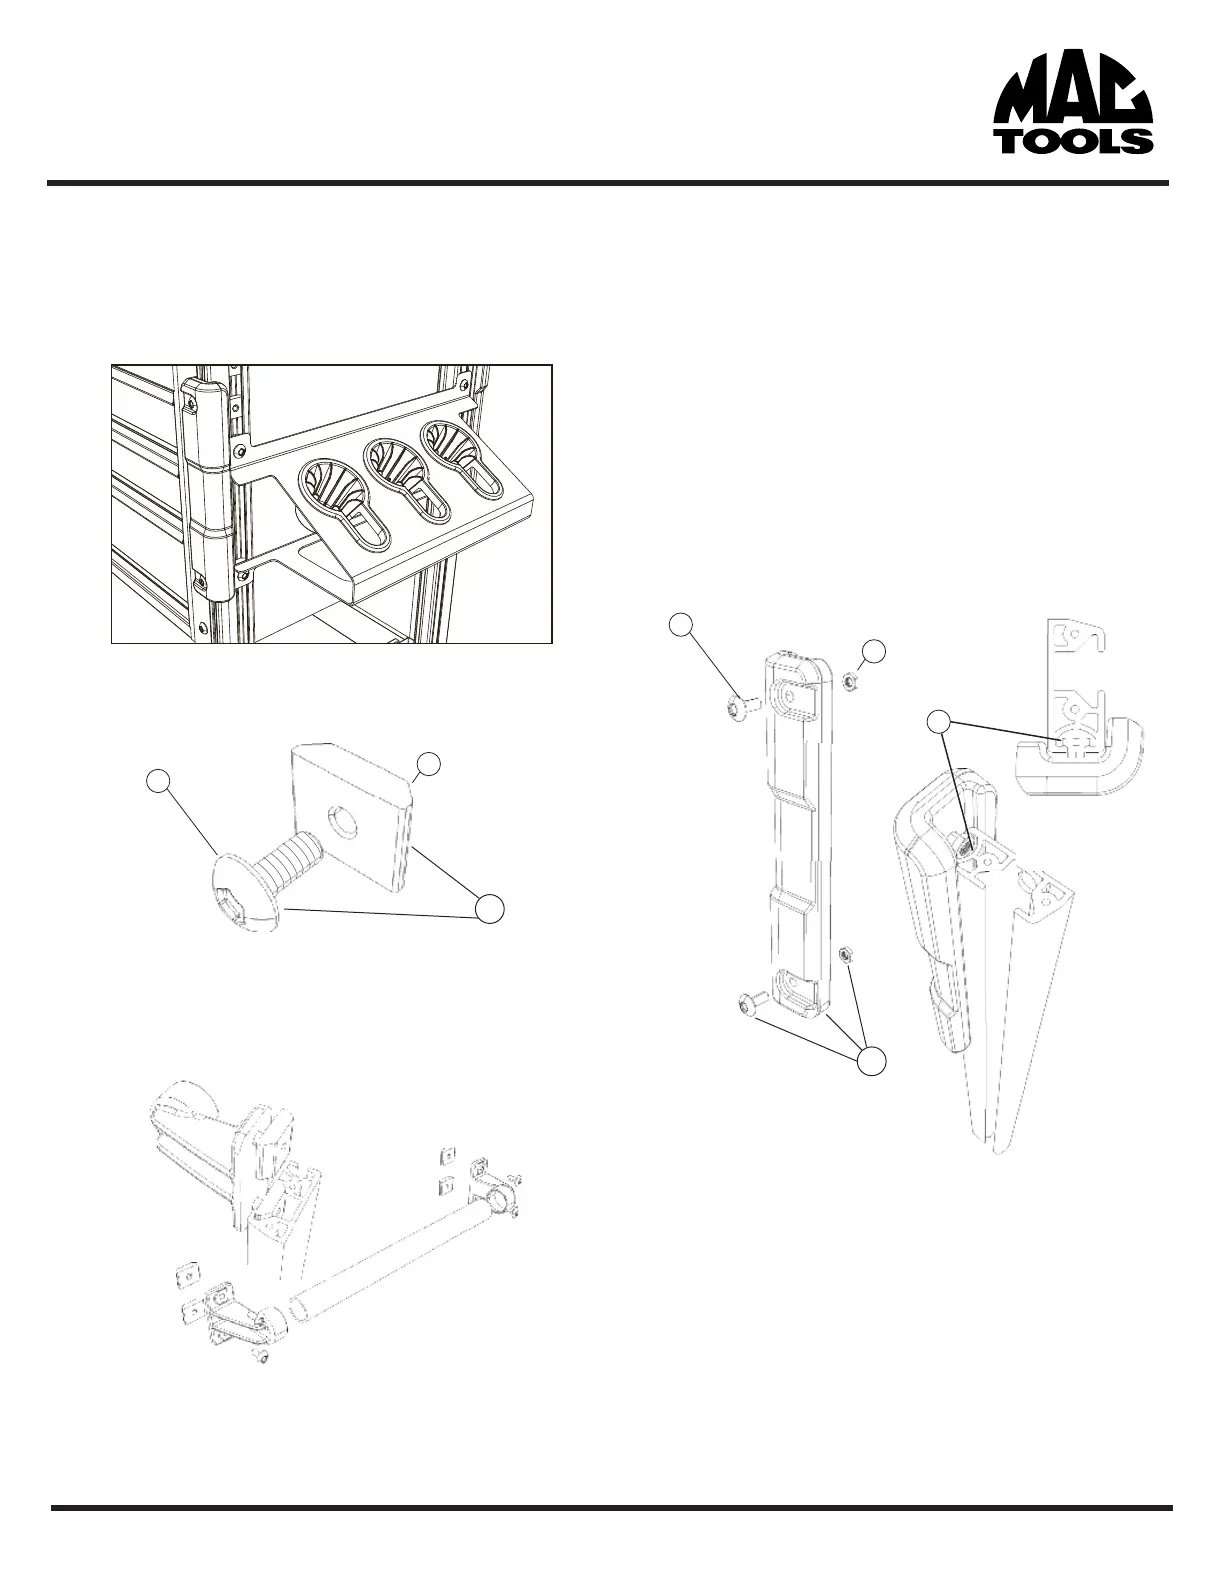
Attaching and relocating Side Handle and Bumpers
The MB199UC utility cart platform accepts a height adjustable side
handle that attaches using the same method as the accessories.
1. Using the supplied wedge nut (I.) and the button
head fastener (H.) insert the fastener through the
mounting holes on the handle bracket .
2. Once the fastener has been inserted into the handle
bracket, thread a small portion of the wedge nut (I.)
onto the fastener (H.) NOTE: leave enough slack in
the thread to easily maneuver the assembly into
place on the carts corner rail slots.
3. Attach all four threaded nut assemblies (J.) to both sides of
the accessory before placing in the slot of the corner rails.
4. Once the threaded nuts are inserted in the slot on the
corner rails, lower into desired position and fully tighten
to prev
ent the accessory from moving in use.
Attaching Bumpers
The MB199UC utility cart platform accepts a height adjustable
bumper to help protect both the cart and vehicles from damage.
1. Using the supplied hex nut (K.) and the button
head fastener (L.) insert the fastener through the
mounting holes on the bumper and partially thread
on the nut leaving plenty of slack.
2. Once both fasteners and hex nuts are connected to
the bumper, insert the hex nut into the smaller of the
two tracks (N.) on the carts corner rails. You may have
to twist the hex nut to align it with the track.
3. Once both nuts are inserted, slide into the desired
height and tighten the fastener. DO NOT over tighten
the fastener or you may damage the bumper.
I.
H.
J.
K.
M.
L.
N.
 Loading...