Switch the TV to the appropriate AV setting via
your Source or Input button [depends on
where you plugged it in on the back]
Switch the TV to the appropriate HDMI setting
via your Source or Input button [depends on
where you plugged it in on the back]
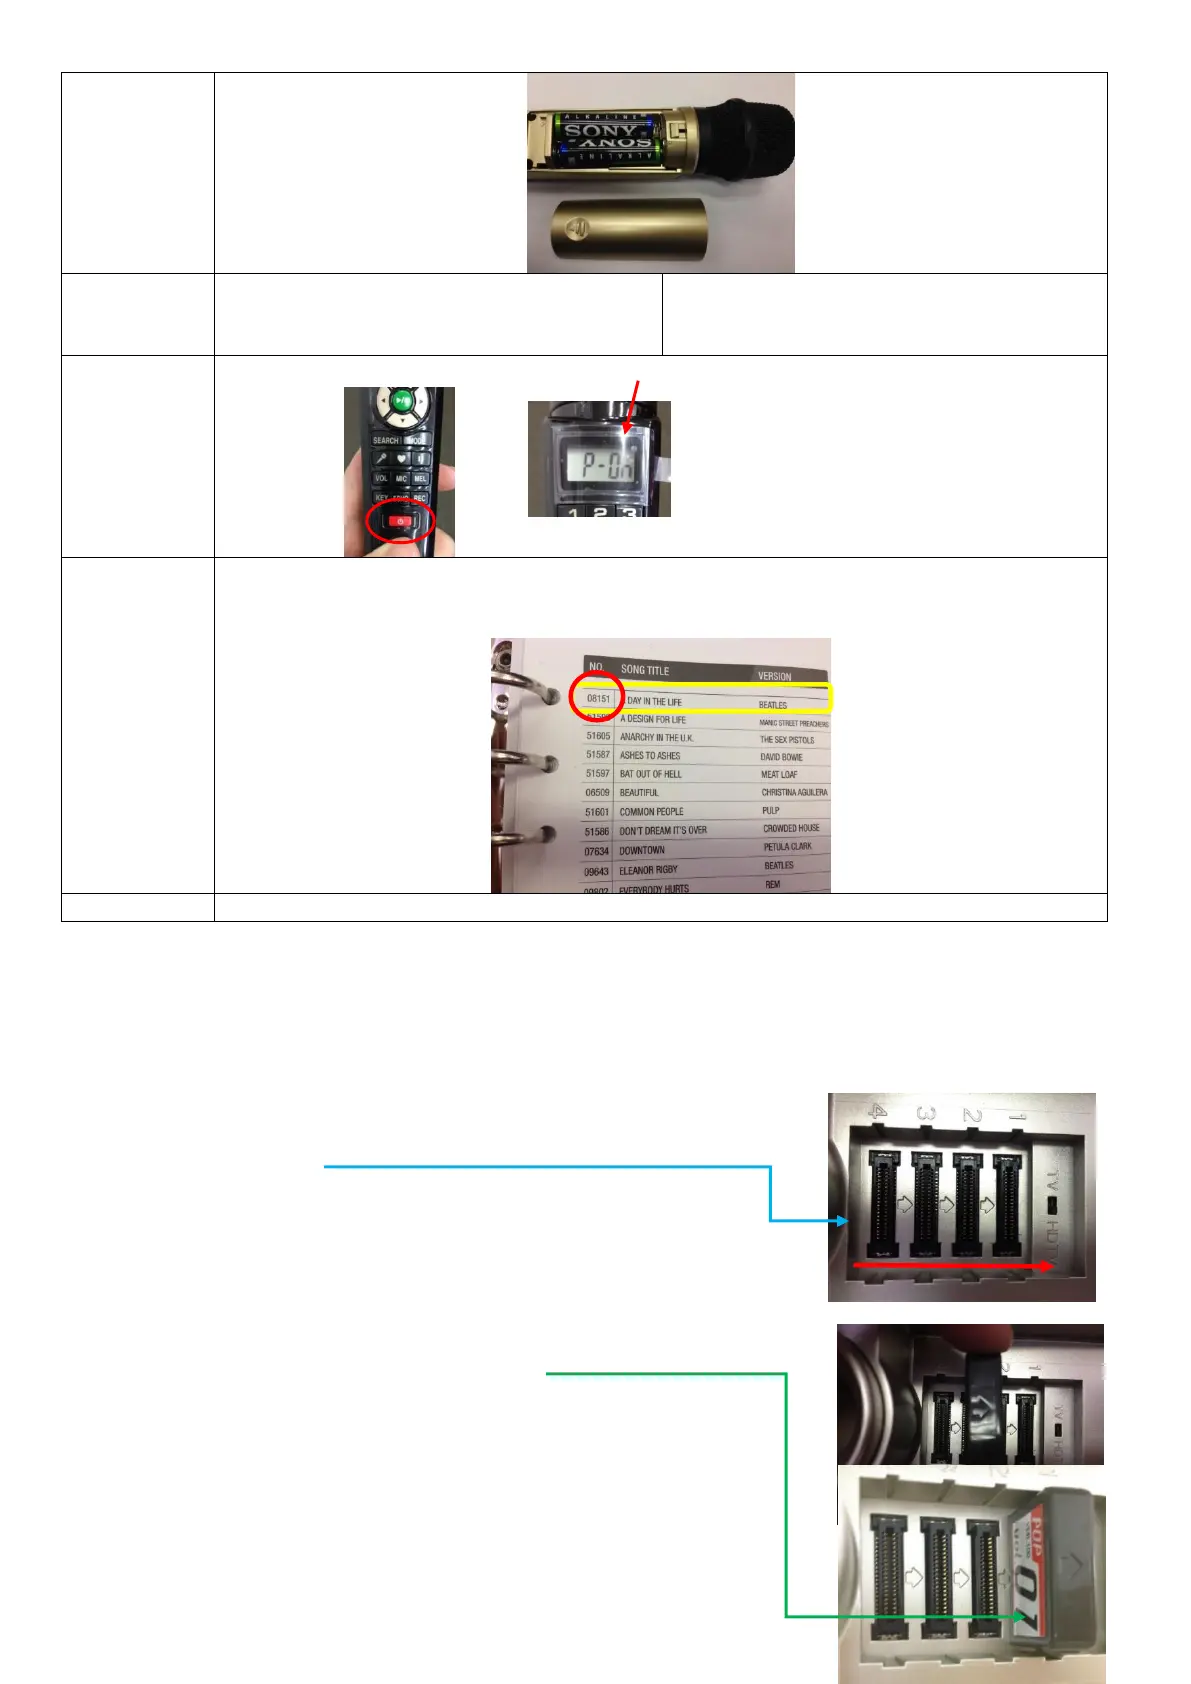
Open up your Magic Sing songbook, once you have decided on a song to sing from your Magic
Sing song book, type the song number (you will find it on the left hand side of the book, beside
the “Song Title”) and press the GREEN “Play/Stop” button in the centre of the microphone.
Insert & Remove Additional Song Chips
Step 1 Turn off the microphones AND base unit, using the relevant off switches – unit can remain plugged in but
MUST be switched off. Please Note: Failure to follow these steps can result in damage to your Magic Sing unit and
or song chips and will result your warranty being voided.
Step 2 Remove the case on the top of the base unit, revealing chip slots.
Step 3 Take note of the ARROWS on the plastic near the chip slots, and those
which are on your Magic Sing chip.
Step 4 Facing the arrows the same way as is on the base unit, carefully insert the
chip. It may take a little push to get it in properly so that the unit can pick up the
songs.
Step 5 In order for the chips to work, they must be left in the top of the base unit
as the unit does not have any additional memory within itself.
Step 6 Use the DOWN arrow on your microphone to scroll through and select a
song, or use track number selection, as per previous instructions.
 Loading...