Do you have a question about the Magnavox 20MC4304 and is the answer not in the manual?
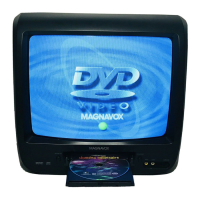
Brand name and tagline for the Magnavox product.
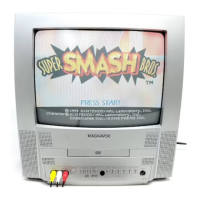
Model numbers for the Color TV with built-in VCR and DVD Player.
Information on how to get help quickly, including online and phone support.
Details on eligibility for warranty service, safety notifications, and additional benefits.
Explanation of warning symbols like 'Caution' and 'Warning' for safe operation.
Area for the customer to record model and serial numbers for future reference.
Warnings regarding fire and shock hazards, laser safety, and equipment exposure.
FCC warnings, Canadian ICES compliance, and copyright protection information.
Guideline for proper cable grounding connection to the building system.
Statement of compliance with electronic product standards.
Lists the various features available for TV/VCR and Disc playback.
Instructions for accessing DVD Disc menus and setup options.
Information regarding feature availability based on the specific DVD disc.
Details on supported discs like DVD, CD-R, CD-RW, MP3, and Video CDs.
Explanation of Region Codes, Color Systems (NTSC), and disc finalization.
Recommendations for VHS tape usage and HQ system compatibility.
Instructions for installing batteries and safety precautions for the remote control.
Method to protect videotape record tabs from accidental erasure.
Guidelines for using the remote and basic care for the TV/VCR/DVD unit.
Steps to connect a cable TV signal or outdoor antenna to the TV/VCR/DVD.
Instructions for connecting to an external receiver via RF or AV cables.
Steps for connecting an indoor antenna or 'rabbit ears' to the unit.
Linking camcorders, VCRs, or DVD players to view on the TV/VCR/DVD via AUX.
Connecting the unit to a stereo system for enhanced audio output.
Turning on the unit and selecting TV channels using buttons or remote.
Using the VOL. buttons to control the audio output.
Inserting tape, starting play, stopping, and rewinding a videotape.
Turning on the unit, selecting DVD mode, and opening the disc tray.
Placing a disc in the tray and initiating playback.
Buttons for power, mode selection (TV/VCR, DVD), and sleep timer.
Buttons for play, pause, stop, rewind, and fast forward search.
Buttons for starting recording and viewing status information.
Buttons for accessing titles, menus, and making selections.
Buttons for zoom, tape speed, reset, setup, and clear functions.
Buttons for mode selection, search, disc menus, angle, subtitle, and audio.
Controls for setting repeat playback modes.
Cassette and disc slots, plus status lights (DVD, VCR/TV, REC/OTR).
Channel, volume, power, source, and playback control buttons.
AV input jacks, headphone jack, and remote sensor location.
ANT. Jack for connecting antenna or cable TV signals.
Standard AC outlet connection for powering the unit.
AUDIO OUT COAXIAL Jack for connecting to a digital stereo system.
How to change the language of setup menus and on-screen displays.
Procedure for automatically scanning and memorizing available TV channels.
Customizing the channel list by adding or removing channels.
Step-by-step guide to manually set the unit's clock.
Finalizing the manual clock setting by entering day, year, hour, and minute.
Using PBS channel signals to automatically adjust the clock time.
Procedure to search for and select the PBS channel for auto-clock synchronization.
Setting the clock to automatically adjust for DST.
Displaying videotape counter, current time, or channel number.
Controls for brightness, sharpness, tint, color, and contrast.
Procedure for starting, pausing, and stopping a videotape recording.
Details on SP, LP, and SLP tape speeds and their recording times.
Steps to initiate an immediate timed recording from 30 minutes to 8 hours.
Ensuring clock and channels are set, and a tape is inserted.
Choosing channel, date, and program position for timer recording.
Specifying single, daily, or weekly recording schedules.
Entering the desired begin time for the recording.
Entering the desired end time for the recording.
Choosing between SP and SLP tape speeds for recording.
Adjusting start/end times or correcting recorded information.
Removing scheduled recordings from memory.
Viewing details of upcoming programmed recordings.
Setting the unit to rewind the tape to the beginning after recordings.
Steps for connecting a source unit (VCR/Camcorder) for tape copying.
Step-by-step guide to copying videotape content.
Configuring ALL or BLANK repeat playback for videotapes.
Activating a mode to improve picture quality for worn videotapes.
Resetting the videotape counter to zero for reference points.
Setting the unit to automatically shut off after a specified time.
Advancing the videotape to a specific point by entering elapsed time.
Quickly locating the start of recordings using index marks.
Playing videotape content in slow motion.
Forward/reverse searching and super high-speed searching.
Pausing playback and advancing the picture frame by frame.
Automatic rewind, eject, and power-off functions after playback/recording.
Unit automatically adjusts tracking for optimal picture quality.
Manually adjusting tracking for improved picture quality.
Choosing between CAPTION1, CAPTION2, TEXT1, TEXT2, or OFF.
Explanation of how V-Chip restricts access to programs based on ratings.
Procedure for entering the default or custom four-digit access code.
Selecting TV rating levels and understanding rating categories.
Choosing to VIEW or BLOCK content based on selected TV ratings.
Blocking specific elements like language or violence within ratings.
Re-entering the access code to manage subrating configurations.
Choosing a TV rating category to adjust its subratings.
Setting VIEW or BLOCK for subratings like Violence, Language, etc.
Specific subrating adjustments available for the TV-Y7 rating.
Subrating adjustments for TV-PG, TV-14, and TV-MA ratings.
Exiting the menu to save the configured V-Chip subrating settings.
Blocking content based on Motion Picture Association ratings.
Entering the access code to configure MPAA rating restrictions.
Selecting MPAA ratings and choosing blocking levels.
Definitions for MPAA rating categories like G, PG, R, NC-17, X.
Instructions for changing the existing V-Chip access code.
Steps to enter the current and new four-digit access codes.
How to interpret STEREO, SAP, and HIFI indicators on screen.
Setting the VCR audio mode for tape playback.
Steps to access and adjust VCR audio settings.
Choosing Stereo, SAP, or Mono for TV program reception/recording.
Steps to access and adjust TV audio settings.
Accessing and using menus for disc content and features.
Selecting specific titles or chapters from a DVD's title menu.
Using REW/FFWD buttons to search discs at various speeds.
Selecting specific titles or chapters for playback.
Jumping to a precise time within a track or title.
Ways to play specific tracks using number buttons, search mode, or skip buttons.
Freezing the picture and advancing frame by frame.
Returning playback to the last stopped point.
Configuring ALL or TRACK repeat for discs.
Playing a specific segment of a disc repeatedly.
Marking favorite points on DVDs, Audio CDs, or Video CDs.
Navigating back to previously marked locations on a disc.
Choosing the desired subtitle language from available options.
Switching between different camera angles recorded on the DVD.
Playing DVD or Video CD content in slow motion.
Enlarging the disc picture to 1.3x, 2x, or 4x.
Creating a four-digit password to restrict DVD viewing.
Modifying or resetting the existing four-digit parental password.
Explanation of how setting parental levels restricts DVD playback.
Entering the password to access parental level settings.
Choosing TV rating categories and understanding their definitions.
Choosing a specific rating level to block DVDs exceeding it.
Choosing the desired audio track language for DVD playback.
Selecting STEREO, L-CH, or R-CH for Audio CD or Video CD playback.
Playing tracks from Audio CDs, MP3s, or JPEGs in a random order.
Creating a custom playback order for tracks on discs.
Characteristics for recording MP3 tracks and JPEG files for playback.
Selecting and playing folders, tracks, or files from discs.
Selecting transition modes and rotating JPEG images.
Displaying current track name, number, and repeat status.
Customizing languages for DVD audio, subtitles, and menus.
Navigating the setup menu to the language selection screen.
Choosing desired languages for DVD features.
Choosing languages by selection or entering a four-digit language code.
A comprehensive list of language codes for selection.
Adjusting aspect ratio, still mode clarity, angle icon, and auto power off.
Navigating the setup menu to the display settings screen.
Choosing settings for TV MODE, STILL MODE, ANGLE ICON, and AUTO POWER OFF.
Selecting between 4:3 Letterbox and 4:3 Pan & Scan.
Configuring still image quality using AUTO, FIELD, or FRAME.
Enabling or disabling the angle icon for multi-camera angle scenes.
Setting the unit to automatically turn off after a period of inactivity.
Customizing audio settings based on equipment and disc features.
Navigating to the custom audio setup menu.
Configuring advanced audio features like dynamic range control and sampling rates.
Displays for chapter, title, BIT RATE, and repeat status during DVD play.
Displays for track, ALL, and repeat status during CD playback.
Brightening dark parts of the picture during DVD or Video CD playback.
Enhancing stereo sound for DVDs, CDs, or MP3s with compatible recordings.
Resetting DVD player setup menu items to their default settings.
Definitions of key terms used throughout the manual.
Guidelines for proper device placement and environmental conditions.
Precautions regarding handling power cords and avoiding electrical hazards.
Advice on preventing tape damage due to internal moisture.
Resolving problems with timer recording, power, and tape loading.
Resolving issues with discs not playing or poor picture quality.
Troubleshooting no sound, poor sound, or inaccessible DVD features.
Addressing poor tape playback and remote control operation issues.
Resolving poor channel reception and tape insertion problems.
Details on CRT size, video heads, tape speeds, and tuner channels.
Information on color system, power consumption, and unit dimensions.
Sound output, terminal types, operating temperature, and power requirements.
Information on 90-day labor, 1-year parts, and 1-year display warranty.
List of conditions not covered by the warranty.
Contact details for obtaining warranty service in the USA and Canada.
| Brand | Magnavox |
|---|---|
| Model | 20MC4304 |
| Category | TV DVD Combo |
| Language | English |