Do you have a question about the Makita 6041D and is the answer not in the manual?
Rules for maintaining a safe and clean work environment.
Safety precautions related to electrical components and battery usage.
Guidelines for personal protection and safe operation.
Proper methods for using and maintaining the tool.
Guidelines for tool service and repair by qualified personnel.
Process and precautions for charging the battery.
How to operate the tool's switch for different models.
How to change the direction of rotation for the tool.
Explanation of the overload protector feature for model 6176D.
Steps for attaching and detaching bits from the tool's chuck.
Guidance on how to perform screwdriving tasks with the tool.
Instructions and tips for drilling wood and metal.
Procedures and precautions for safely disposing of the tool and its battery.
Steps to remove the battery for disposal purposes.
Information on the proper recycling methods for Makita batteries.
Instructions for mailing the warranty certificate to Makita.
Section for recording purchase and service details.
Details of the limited one-year warranty coverage and exclusions.
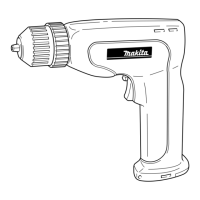
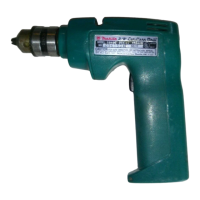
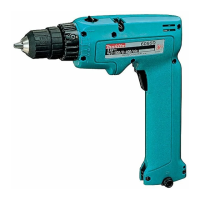
The Makita Cordless Driver Drill, available in models 6041D, 6076D, and 6176D, is a versatile power tool designed for screwdriving and drilling operations. This manual provides essential safety rules, operational guidelines, and maintenance instructions to ensure safe and effective use.
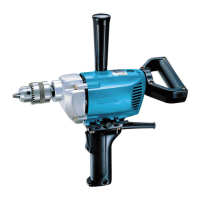
The cordless driver drill is primarily used for driving screws and drilling holes in various materials, including wood and metal. Its cordless design offers portability and convenience, allowing users to work without being tethered to an electrical outlet. The tool is powered by a rechargeable battery, which is integrated into the handle.
A key functional feature is the reversing switch, which allows the user to change the direction of rotation. This is crucial for both driving and removing screws, as well as for backing out stuck drill bits. The "FWD" position enables clockwise rotation for driving, while the "REV" position enables counter-clockwise rotation for removing. When the reversing switch is in the neutral position, the switch trigger is locked, preventing accidental starting.
For models 6041D and 6076D, the tool starts by simply pulling the switch trigger and stops when the trigger is released. The 6176D model offers variable speed control; the tool's speed increases with increasing pressure on the switch trigger, providing greater control over the operation. This model also includes an overload protector, which automatically cuts out the circuit during prolonged heavy work to prevent damage. After a brief pause (20-30 seconds), operation can be resumed.
Before using the tool, it is imperative to ensure the battery is charged. The battery in a new tool is not fully charged and requires an initial charge. Charging involves connecting the charging plug to the tool's charging connector and then plugging the charger into a power receptacle. A full charge typically takes 3 hours. It is important not to operate the tool during charging and to unplug the charger once charging is complete. Overcharging for more than two days can significantly shorten the battery's service life.
For screwdriving operations, the driver bit should be placed straight into the screw head, and pressure applied to the tool. The tool should be started slowly, gradually increasing speed. The trigger should be released just as the screw bottoms out to prevent stripping the hole or damaging the screw and/or bit. When driving wood screws, pre-drilling pilot holes is recommended to facilitate driving and prevent splitting the workpiece. The manual provides a chart recommending pilot hole sizes based on the nominal diameter of the wood screw.
For drilling operations, especially in wood, using wood drills equipped with a guide screw is recommended as it pulls the bit into the workpiece, making drilling easier. When drilling in metal, an indentation should be made with a center-punch and hammer at the drilling point to prevent the bit from slipping. A cutting lubricant should be used for drilling metals, with the exceptions of iron and brass, which should be drilled dry. It is important not to apply excessive pressure during drilling, as this can damage the bit, decrease tool performance, and shorten its service life. Users should also be aware of the tremendous force exerted on the tool/bit when the hole breaks through and hold the tool firmly.
Installing or removing driver bits or drill bits requires setting the reversing switch lever to the neutral position. The chuck jaws are opened by holding the ring and turning the sleeve counterclockwise. The bit is then placed into the chuck as far as it will go, and the chuck is tightened by holding the ring firmly and turning the sleeve clockwise. To remove a bit, the process is reversed.
Regular maintenance is crucial for the safety and reliability of the tool. All adjustments, repairs, or maintenance should be performed by Makita Authorized or Factory Service Centers using genuine Makita replacement parts. Before performing any inspection or maintenance, the tool must be switched off.
The tool contains a built-in Ni-Cd battery in the handle, which must be removed before disposing of the tool. The manual provides detailed instructions for removing the battery: push the cover in the direction of the arrow while pressing down on the "OPEN" portion, withdraw the battery halfway, disconnect the two lead wires from the battery terminals, and then fully remove the battery. To prevent a battery short-circuit, the terminals should be taped, or the battery placed in a plastics bag (never more than one battery per bag). It is critical never to incinerate the battery, even if severely damaged or worn out, as it can explode or leak toxic materials.
The manual also emphasizes the importance of keeping cutting tools sharp and clean, as properly maintained tools are less likely to bind and are easier to control. Users should periodically check for misalignment or binding of moving parts, breakage of parts, and any other conditions that might affect the tool's operation. Any damaged parts should be serviced before further use to prevent accidents.
For battery recycling, Makita provides specific instructions. The only way to dispose of a Makita battery is to recycle it, as other methods are prohibited by law. Users are instructed to remove the battery from the tool and take it to their nearest Makita Factory Service Center or an Authorized Service Center/Distributor designated for Makita battery recycling. Local Yellow Pages under "Tools-Electric" can help locate these centers.
The manual also lists recommended accessories and attachments, such as drill bits, screw bits, rubber pad assembly, wool bonnet, foam polishing pad, and plastic carrying case, advising users to only use accessories recommended by Makita for their specific model to avoid injury.
| Type | Cordless Drill |
|---|---|
| Voltage | 14.4V |
| Battery Type | Ni-Cd |
| Battery Capacity | 1.3 Ah |
| Chuck Size | 13mm |
| Speed | 2 speed |
| No Load Speed | 0-1300 rpm |