Do you have a question about the Makita 9500D and is the answer not in the manual?
Emphasizes staying alert, using PPE, preventing unintentional starting, and maintaining balance.
Covers intended use, reading instructions, avoiding polishing, using recommended accessories, speed matching, and size compatibility.
Defines kickback and provides precautions for maintaining grip, body positioning, and avoiding specific accessory types.
Focuses on using correct wheel types, guards, applications, flanges, and avoiding worn or oversized wheels.
Covers avoiding jamming, excessive pressure, proper body positioning, and handling binding or interruptions.
Covers reading manuals, avoiding disassembly, stopping if operation time shortens, and handling electrolyte exposure.
Details on covering terminals, avoiding shorting, and storing away from high temperatures or metal objects.
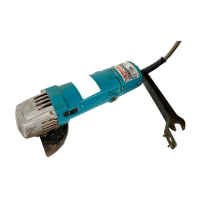
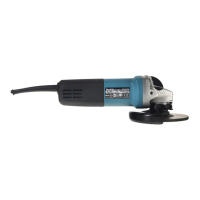
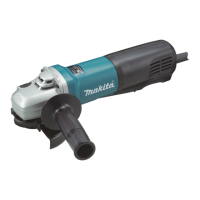
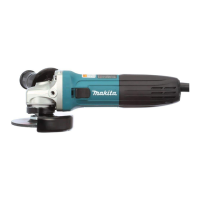
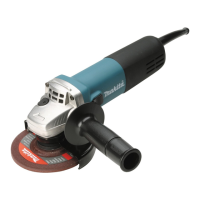
This document is an instruction manual for the Makita 9500D Cordless Grinder. It provides safety warnings, technical specifications, and operational guidance for the tool.
The Makita 9500D Cordless Grinder is designed for grinding ferrous materials. It can also function as a sander, wire brush, or cut-off tool, provided the appropriate accessories are used and safety precautions are followed. The tool is battery-operated, offering portability for various applications.
Battery Cartridge: The tool operates with a battery cartridge. To install, align the tongue on the cartridge with the groove in the housing and slide it into place, ensuring the set plate snaps back fully. To remove, pull out the set plate and grasp both sides of the cartridge while withdrawing it. It is crucial to ensure the battery cartridge is fully inserted and the set plate closed to prevent accidental detachment. Do not force the battery cartridge; if it doesn't slide in easily, it's not being inserted correctly.
Shaft Lock: The shaft lock is used to prevent spindle rotation when installing or removing accessories. It should never be actuated while the spindle is moving, as this can damage the tool.
Switch Action: The tool is started by pressing the switch button. Releasing it stops the tool. For continuous operation, the switch button can be pressed fully and then released to lock it in the "ON" position. To stop from the locked position, press the switch button fully again and then release it. Users are advised to maintain a firm grip when the tool is locked in the "ON" position.
Installing/Removing Depressed Center Wheel: To install a depressed center wheel, fit the wheel and outer flange onto the spindle and temporarily secure them with the screw. Press the shaft lock firmly to prevent spindle revolution, then use the hex wrench to securely tighten the screw clockwise. Removal follows the reverse procedure. Always ensure the tool is switched off and the battery cartridge is removed before performing this operation.
Hex Wrench Storage: The hex wrench can be stored on the tool when not in use to prevent it from being lost.
Sharpening with Depressed Center Wheel: When sharpening, hold the tool firmly, turn it on, and apply the wheel to the workpiece so that the wheel and blade angle are parallel. Move the wheel constantly in the direction shown in the figure to ensure even grinding. It is critical to replace the wheel if the tool is dropped while grinding and never to bang or hit the grinding disc or wheel onto the work. Forcing the tool or applying excessive pressure can cause dangerous wheel breakage.
General Maintenance: Before any inspection or maintenance, always ensure the tool is switched off and the battery cartridge is removed. For product safety and reliability, all repairs, maintenance, or adjustments should be performed by Makita Authorized Service Centers using genuine Makita replacement parts.
Battery Life Tips:
Cleaning: Regularly clean the power tool's air vents to prevent excessive accumulation of powdered metal, which can cause electrical hazards. When working in dusty conditions, ensure ventilation openings are kept clear. If dust needs to be cleared, first disconnect the tool from the mains supply (for corded tools, though this is a cordless model, the principle applies to battery removal) and use non-metallic objects to avoid damaging internal parts.
Wheel Inspection: Before each use, inspect accessories like abrasive wheels for chips and cracks, backing pads for cracks, tear or excess wear, and wire brushes for loose or cracked wires. If the power tool or accessory is dropped, inspect for damage and install an undamaged accessory. After inspection and installation, position yourself and bystanders away from the rotating accessory and run the tool at maximum no-load speed for one minute. Damaged accessories can break apart during this test.
Spindle, Flange, and Lock Nut Care: Be careful not to damage the spindle, the flange (especially the installing surface), or the lock nut, as damage to these parts can result in wheel breakage.
Pre-Operation Check: Before using the tool on an actual workpiece, let it run for a while. Watch for vibration or wobbling, which could indicate poor installation or a poorly balanced wheel. Ensure the wheel is not contacting the workpiece before the switch is turned on.
Workpiece Handling: Do not touch the workpiece immediately after operation, as it may be extremely hot and could cause burns.