P 5/ 7
Repair
[2] REPLACING
[2]-4. Sheet ring H, Leaf spring H, Wearing H (cont.)
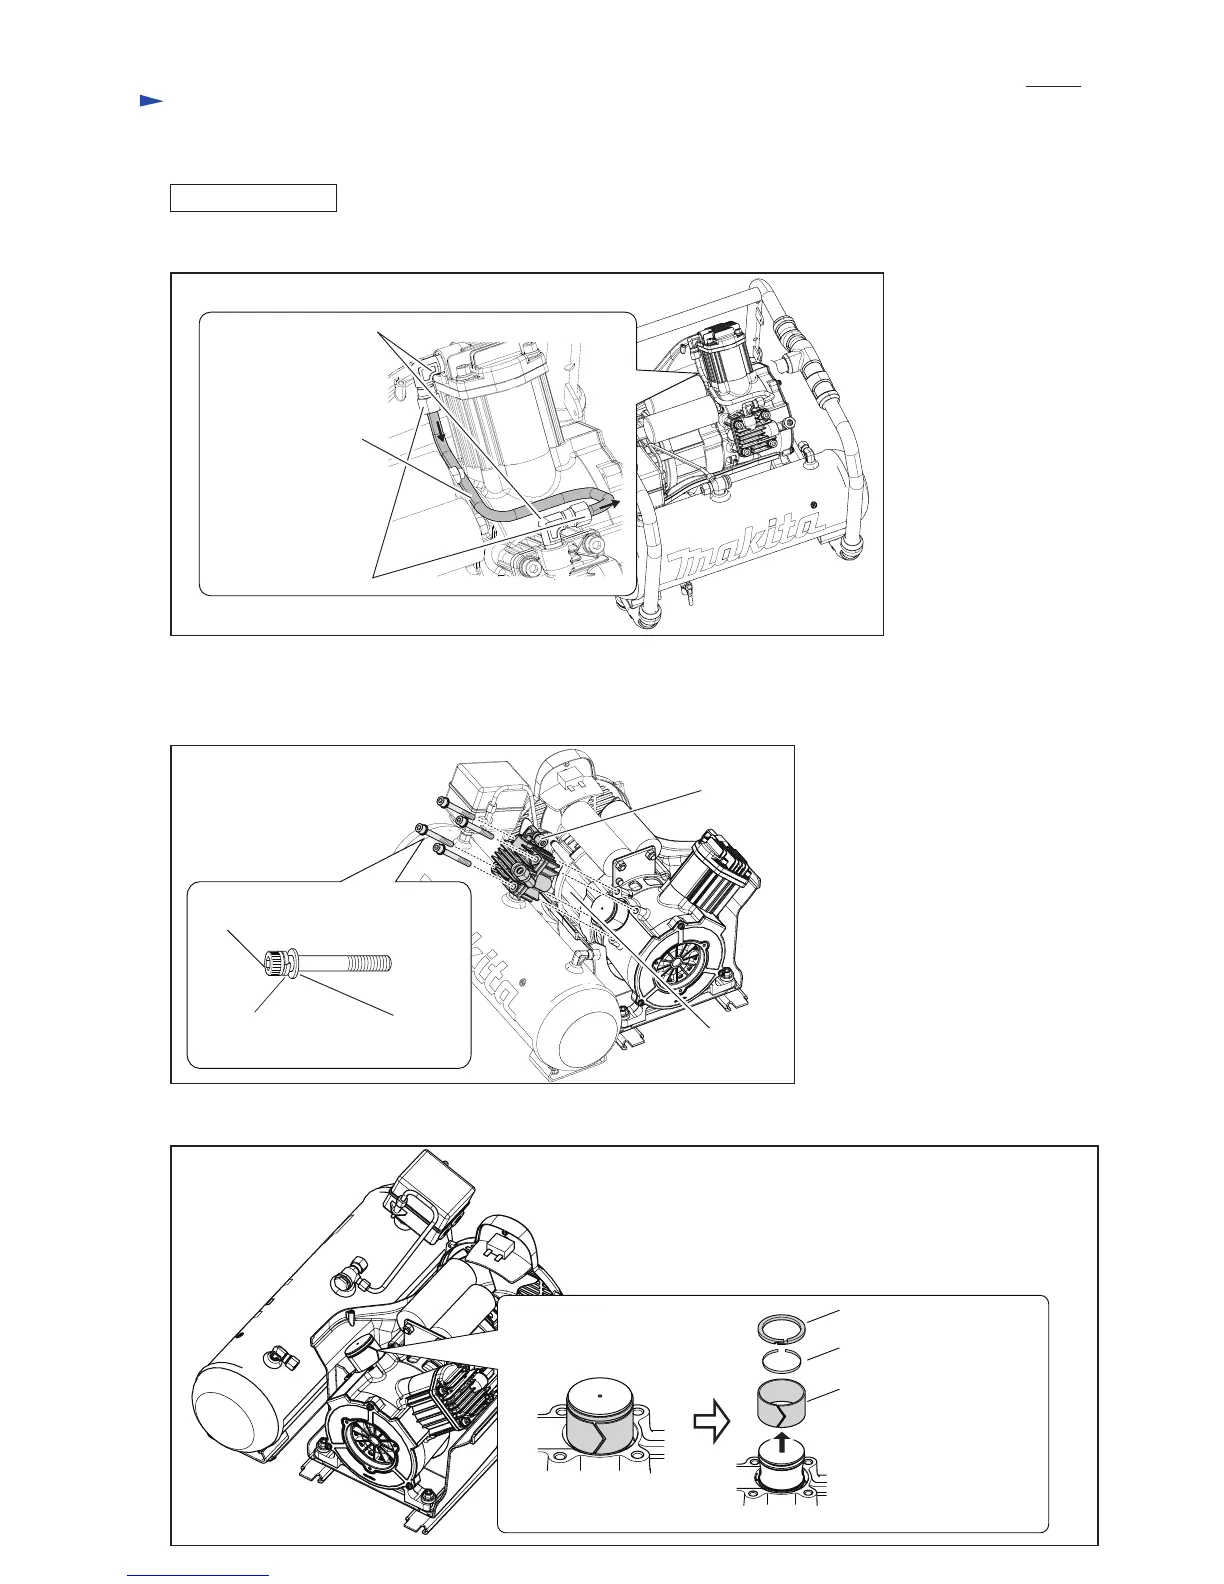
Fig. 12
Fig. 13
Fig. 14
4) Loosen two Ring nuts 8 with Spanner 17, then remove Pipe 8 from two Elbows 8-R1/4. (Fig. 12)
5) Loosen four M8x70 Hex socket head bolts with Hex wrench 9, then remove Cylinder H section from Crank case. (Fig. 13)
Note: When fastening Cylinder H section to Crank case, tighten M8x70 Hex socket head bolts to fastening torque 18 to
20 N.m.
6) Disassemble Connecting rod H assembly. Sheet ring H, Leaf spring H and Wearing H can be replaced. (Fig. 14)
Elbow 8-R1/4 (2pcs.)
Pipe 8
Ring nut 8 (2pcs.)
M8x70 Hex socket
head bolt (4pcs.)
Spring washer 8
(4pcs.)
Flat washer 8
(4pcs.)
Cylinder H section
Crank case
Connecting rod assembly
Sheet ring H
Leaf spring H
Wearing H
DISASSEMBLING
 Loading...