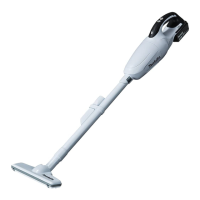
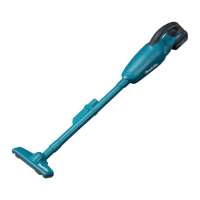
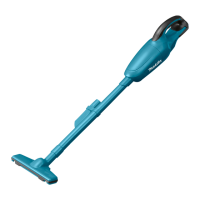
This document provides the instruction manual for the Makita Cordless Cleaner DCL181F, an appliance designed for collecting dry dust in household settings. It emphasizes safety, proper operation, and maintenance to ensure longevity and effective performance.
The cleaner is equipped with a battery protection system, specifically for Lithium-ion batteries with a star marking, which automatically cuts off power to the tool under certain conditions to extend battery life. These conditions include overloading, where the tool draws an abnormally high current, and low battery voltage, indicating the remaining battery capacity is too low for operation. In case of overload, the user is instructed to turn the tool off, stop the application causing the overload, and then restart. If the tool does not start, it suggests the battery is overheated and needs to cool down. For low battery voltage, the user must remove and recharge the battery.
The battery cartridge installation and removal process is straightforward. To remove, the user slides the cartridge from the tool while pressing the button on its front. For installation, the tongue on the battery cartridge must align with the groove in the housing, and it should be inserted until it locks in place with an audible click. A red indicator on the upper side of the button signifies incomplete locking. Users are cautioned to ensure the battery cartridge is fully inserted to prevent accidental detachment and potential injury, and to avoid forceful insertion if it doesn't slide in easily.
The cleaner features a simple switch action for operation. To start, the "HIGH/LOW" button is pressed. To switch off, the "OFF" button is used. The "HIGH/LOW" button also allows for changing the cleaner speed; the first press activates high speed, the second press activates low speed, and subsequent presses alternate between these two speeds. The cleaner also includes a lamp feature, which can be turned on by pressing the "HIGH/LOW" button and off by pressing the "OFF" button. A warning is issued against looking directly into the lamp's light to prevent eye damage.
For battery cartridges equipped with an indicator, the remaining battery capacity can be checked by pressing a dedicated button. Indicator lamps light up for a few seconds to display the charge level, ranging from 75% to 100%, 50% to 75%, 25% to 50%, 0% to 25% (indicating a need to charge), or a pattern suggesting a battery malfunction. It's noted that the indication may vary slightly depending on usage conditions and ambient temperature.
The manual details the assembly of different filter types: normal filter and high performance filter. For the normal filter, the components include a capsule, prefilter, and filter. For the high performance filter, it consists of a capsule and the high performance filter itself.
Disposing of dust is a critical maintenance task. For the normal filter, the user taps the capsule several times to dislodge dust from the filter, then points the suction inlet downwards, twists the capsule in the direction of an arrow, and slowly disconnects it. Accumulated dust is then removed from inside the capsule and off the prefilter. The prefilter is twisted to unfasten its securing lip from the cleaner unit and then pulled off. Fine dust is cleaned from the prefilter, and the filter is removed and lightly tapped to dislodge dust. For the high performance filter, the process is similar: tapping the capsule, pointing the suction inlet downwards, twisting and disconnecting the capsule, removing accumulated dust, and then twisting the high performance filter to unfasten its securing lip and pulling it off. Fine dust is then cleaned from the high performance filter. Users are cautioned to empty the cleaner before it becomes too full to prevent weakened suction force, and to ensure all dust is emptied to avoid clogging the filter or damaging the motor.
Reassembly instructions are provided for both normal and high performance filters. For the normal filter, the filter is put into position until fully seated, ensuring it is straight and not peeled back to prevent dust from entering the motor housing. The prefilter is then connected, twisted to firmly lock its securing lip into the cleaner unit. Finally, the capsule is connected by aligning its O mark with the O mark on the handle and firmly twisting it in the direction of the arrow until secured. For the high performance filter, it is connected and twisted to firmly lock its securing lip into the cleaner unit, and then the capsule is connected by aligning the O marks and twisting until secured. The manual emphasizes checking that both the filter and prefilter (or high performance filter) are loaded correctly before use, as incorrect loading can lead to dust entering the motor housing and causing motor failure. Examples of incorrect filter loading are provided to help users identify and rectify problems.
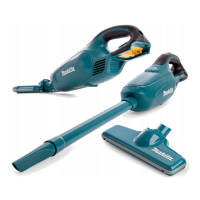
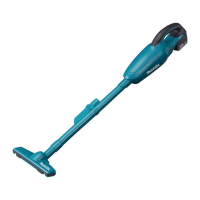
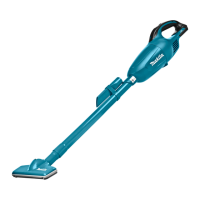
The cleaner offers various attachments for different cleaning tasks. The nozzle attaches to clean tables, desks, and furniture. The extension wand (straight pipe) can be used with the nozzle for cleaning floors in a standing position. A corner nozzle is available for cleaning corners and crevices in cars or furniture. The corner nozzle can also be combined with the extension wand for tight quarters or high-reach areas. The cleaner can also be used without any nozzle to pick up powder and dust.
After use, users are advised not to lean the cleaner against a wall without other support, as it may fall and be damaged.
Cleaning the cleaner itself involves wiping the outside with a cloth dampened in soapy water and cleaning the suction opening and filter mounting area. Filters should be washed in soapy water when clogged and thoroughly dried before reuse. Insufficiently dried filters can cause poor suction and shorten motor life. It is crucial to re-install all filters (filters and sponge filter) before using the cleaner, as operating without them can lead to dust entering the motor housing and causing malfunction. Users are warned against using gasoline, benzine, thinner, alcohol, or similar substances for cleaning, as these can cause discoloration, deformation, or cracks. Blowing dust off the cleaner and filters with an air duster is also discouraged, as it can introduce dust into the housing and cause failure.
The manual also describes how to clean the sponge filter: remove the filter, pull out the sponge filter from between the pillars, clean it by tapping or washing, and then reinsert it, ensuring its bottom edges are held down by the pillars and there is no gap between the sponge filter and suction opening.
An optional accessory, a wall mount for the cordless cleaner, is mentioned. Users need to prepare a suitable screw for mounting it to a hard wooden wall, beam, or column. It is important to ensure the wall mount is securely attached before hanging the cleaner and to avoid hanging it violently or hanging other appliances on it.
Troubleshooting guidance is provided for common issues like weak suction power (check for full capsule or clogged filter) and the cleaner not working (check for exhausted battery cartridge). Users are explicitly cautioned against attempting to repair the cleaner themselves and are directed to Makita Authorized or Factory Service Centers for repairs, emphasizing the use of genuine Makita replacement parts to maintain product safety and reliability.
Finally, a list of optional accessories is provided, including an extension wand, various nozzles (for carpet, shelf, corner, round, free), flexible hose, filter, prefilter, high performance filter, wall mount, and Makita genuine battery and charger. Users are advised to use only accessories or attachments recommended by Makita for this specific tool to avoid injury and to contact their local Makita Service Center for assistance with accessories. Some items on the list may be included as standard accessories and may vary by country.