3-10. Disassembling/Assembling Carburetor (cont.)
10/ 20
1) Remove Diaphragm cover and Diaphragm gasket set
by unscrewing four Pan head screws.
Note: If Gasket is sticking, carefully remove it
because it is easily broken.
2) Replace Metering diaphragm if it shows any sign of
wear, wrinkles, curling or tears.
3) Controller set can be removed by unscrewing
M3x4 (+) Screw. (Fig. 35)
4) Controller set includes Control lever, Inlet needle,
Spring and Hinge pin. When repairing Controller set,
replace the four parts at a time. (Fig. 35)
Fig. 35
DISASSEMBLING & CLEANING
Control lever Spring
Inlet needle
M3x4 (+) Screw
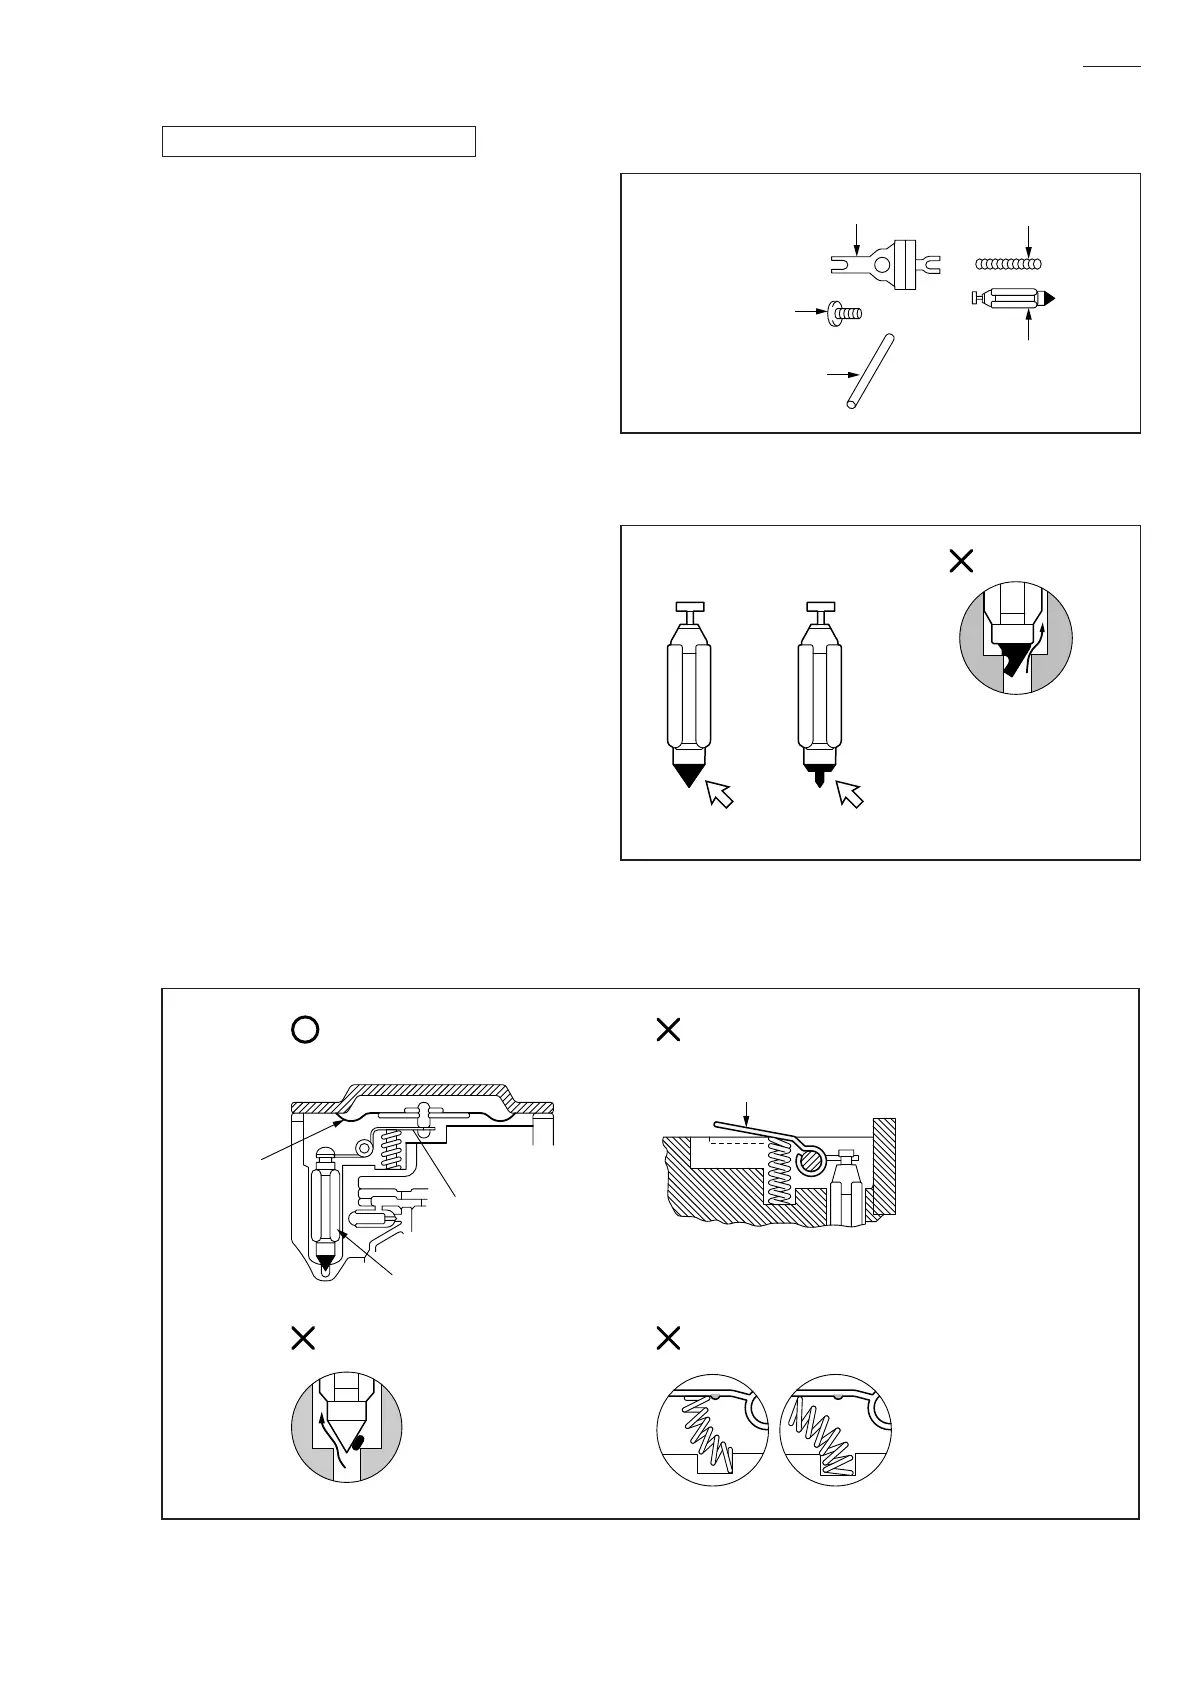
5) Before assembling Controller set, be sure to check
Inlet needle for wear or deformation. (Fig. 36)
Hinge pin
Fig. 36
6) When installing Control lever, make sure that the upper end of Spring is correctly placed over the protrusion of
Control lever. (Fig. 37)
[Inlet needle]
GOOD WORN DOWN
Use of worn-down
Inlet needle will
result in air pressure
leakage.
Fig. 37
Control lever
[WRONG]
Metering
diaphragm
Inlet needle
Control lever
[CORRECT]
[WRONG] [WRONG]
Dust or debris on the
valve seat will result in
air pressure leakage.
The upper end of Spring
is not placed over the
protrusion of Control lever.
[WRONG]
 Loading...