P 9/ 12
Repair
[3] DISASSEMBLY/ASSEMBLY
[3] -5. Switch Block
[3] -6. Switch
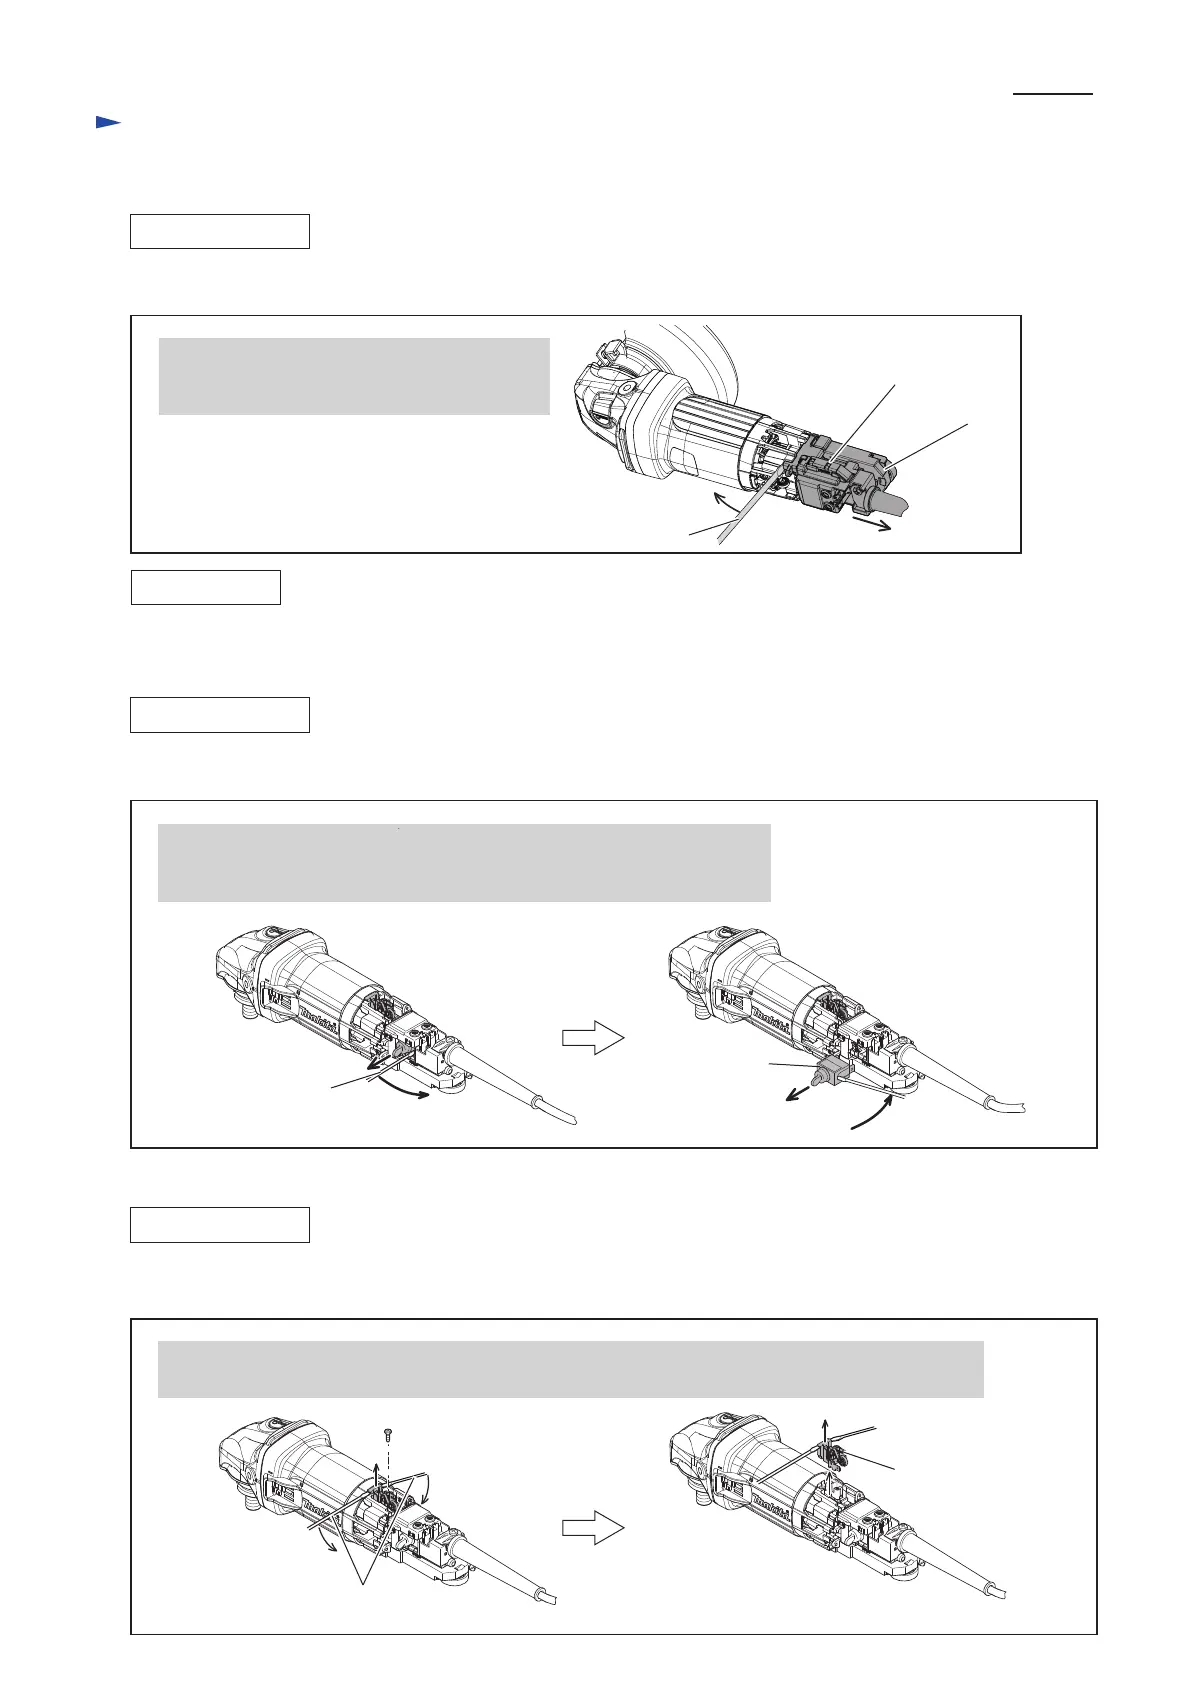
DISASSEMBLING
After removing Switch Lever (Refer to Fig. 9), separate Switch block from Motor housing as drawn in Fig. 11.
After removing Switch lever (Refer to Fig. 9), remove Switch from Switch block as drawn in Fig. 12.
Fig. 11
Insert Slotted screwdriver into the gap between
Switch block and Motor housing, remove
Switch block from Motor housing.
Fig. 12
Fig. 13
Switch block
Controller
ASSEMBLING
Connect Switch block as drawn in Fig. D-3.
DISASSEMBLING
[3] -7. Brush Holder
DISASSEMBLING
Insert Slotted screwdriver into the gap between Switch and Switch block.
While fitting the tip of the screwdriver to the side groove of Switch,
remove Switch by levering it up.
Remove 3x10 Tapping screw. Then, insert Slotted screwdrivers into the gap between Motor housing
and Brush holder’s plastic portion. And then, disassemble Brush holder by levering them up.
Brush holders can be disassembled as drawn in Fig. 13.
Brush holder
Slotted screwdriver
Switch
Slotted screwdrivers
Slotted screwdriver
 Loading...