EasyManua.ls Logo

Makita HS7610 - User Manual

Makita HS7610
12 pages
Print Icon
To Next Page IconTo Next Page
Loading...
INSTRUCTION MANUAL
Circular Saw
HS7010 / HS7610
ENGLISH: Original instructions
DOUBLE INSULATION
Read before use.
Question and Answer IconNeed help?

Do you have a question about the Makita HS7610 and is the answer not in the manual?

Summary

SPECIFICATIONS

Symbols

Intended use

Power supply

SAFETY WARNINGS

General power tool safety warnings

General precautions to prevent electric shock, fire, and serious injury when using power tools.

Personal Safety

Details essential personal safety measures, including protective equipment and situational awareness.

Power tool use and care

Guidance on the correct usage, maintenance, and safe handling of power tools.

Circular saw safety warnings

Specific safety precautions and warnings related to the operation of circular saws.

Cutting procedures

Instructions and safety guidelines for performing various cutting operations with the saw.

Kickback causes and related warnings

Explains kickback phenomena and provides warnings and prevention methods.

Lower guard function

Details the operation, inspection, and safety aspects of the saw's lower guard.

Additional safety warnings

Further safety advice for specific situations and material handling.

FUNCTIONAL DESCRIPTION

Adjusting depth of cut

Instructions on how to set and adjust the cutting depth for optimal results.

Sighting

Guidance on how to align the saw for straight and bevel cuts.

Bevel cutting

Steps for setting and performing cuts at various bevel angles.

Switch action

Describes how to operate the power switch and lock-off button for safe use.

ASSEMBLY

Removing or installing circular saw blade

Step-by-step instructions for changing the saw blade.

Blade mounting

Installation variations

Explains mounting procedures for blades with and without rings, and inner flange use.

Blade guard cleaning

Hex wrench storage

Instructions on properly storing the hex wrench to prevent loss.

Connecting a vacuum cleaner

Guidance on attaching a vacuum cleaner for dust extraction.

OPERATION

MAINTENANCE

Adjusting the parallelism

Steps to adjust the saw's parallelism for accurate cuts.

Adjusting 0°-cut accuracy

Procedure for ensuring the saw makes accurate 0° cuts.

Replacing carbon brushes

Instructions on how to inspect and replace worn carbon brushes.

OPTIONAL ACCESSORIES

Overview

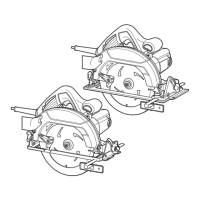
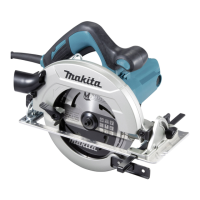
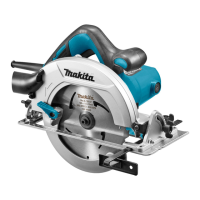
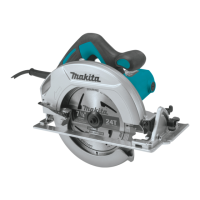
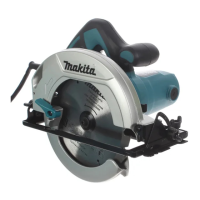
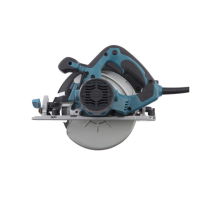
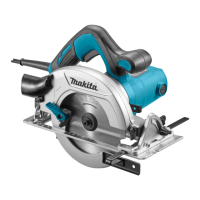
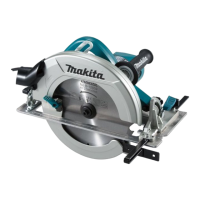
This document is an instruction manual for Makita Circular Saws, specifically models HS7010 and HS7610. It provides essential information for safe operation, maintenance, and functional description of the tool.

Function Description

The Makita Circular Saw is designed for performing lengthways and cross-ways straight cuts and mitre cuts with angles in wood. With appropriate Makita genuine saw blades, it can also be used to saw other materials. The tool is double-insulated, allowing it to be used from sockets without an earth wire. It features a lower guard that covers the blade, which should close freely and instantly. The saw is equipped with a switch trigger for operation, and some models include a lock button for continuous use or a lock-off button to prevent accidental starting. The saw also allows for adjustment of cutting depth and bevel angle. An optional rip fence (guide rule) can be used for extra-accurate straight cuts and repeated cuts of uniform width. For clean cutting operations, a dust nozzle can be connected to a Makita vacuum cleaner.

Important Technical Specifications

The manual details specifications for both HS7010 and HS7610 models:

  • Blade diameter: 185 - 190 mm for both models.
  • Max. Cutting depth:
    • At 0°: 65 - 67 mm for HS7010, 63 - 65 mm for HS7610.
    • At 45° bevel: 44 - 45 mm for both models.
  • No load speed: 5,500 min⁻¹ for both models.
  • Overall length: 300 mm for HS7010, 311 mm for HS7610.
  • Net weight: 4.0 kg for HS7010, 3.9 kg for HS7610.
  • Safety class: Double Insulation (indicated by the square within a square symbol).

The specifications are subject to change without notice due to Makita's continuous research and development program. Specifications may also differ by country. Weight is measured according to EPTA-Procedure 01/2014.

Usage Features

  • Adjusting Depth of Cut: To adjust the cutting depth, loosen the lever on the depth guide, move the base up or down to the desired depth, and then secure the base by tightening the lever. For cleaner and safer cuts, the cut depth should be set so that no more than one blade tooth projects below the workpiece.
  • Bevel Cutting: For bevel cuts, loosen the front and rear clamping screws, tilt the tool to the desired angle (0° - 45°), and then tighten the clamping screws securely.
  • Sighting: For straight cuts, align the 0° position on the front of the base with the cutting line. For 45° bevel cuts, align the 45° position with the cutting line.
  • Switch Action:
    • For tools with a lock button: Pull the switch trigger to start, release to stop. For continuous operation, pull the trigger, push in the lock button, then release the trigger. To stop from the locked position, pull the trigger fully, then release.
    • For tools with a lock-off button: Press the lock-off button and pull the switch trigger to start. Release the switch trigger to stop.
  • Removing/Installing Circular Saw Blade: To remove the blade, press the shaft lock fully and use the hex wrench to loosen the hex bolt counter-clockwise. Remove the hex bolt and outer flange, then turn the lever to open the blade guard. Installation is the reverse process. Ensure the blade is installed with teeth pointing up at the front of the tool and that the hex bolt is tightened securely. For blades with different hole diameters, the inner flange has a specific protrusion that must fit perfectly into the saw blade hole.
  • Rip Fence (Guide Rule): An optional accessory that slides snugly against the side of the workpiece and is secured with a clamping screw for accurate straight cuts and uniform width.
  • Connecting a Vacuum Cleaner: An optional dust nozzle can be installed to connect a Makita vacuum cleaner for clean cutting operations. If the saw has a long lever, it may need to be replaced with a short lever (supplied with the dust nozzle) to allow for proper lower guard movement.

Maintenance Features

  • General Maintenance: Always ensure the tool is switched off and unplugged before performing any inspection or maintenance. Never use gasoline, benzine, thinner, alcohol, or similar substances, as they can cause discoloration, deformation, or cracks.
  • Blade Guard Cleaning: When changing the circular saw blade, clean the upper and lower blade guards of accumulated sawdust and chips. Compressed air is recommended for this, with proper eye and breathing protection. This cleaning helps ensure the guarding system operates properly.
  • Adjusting Parallelism (HS7610): If the parallelism is off, slightly loosen the illustrated screw, open the lower guard, move the rear of the base until distances A and B are equal, then tighten the screws and perform a test cut.
  • Adjusting 0°-cut Accuracy (HS7610): If the 0°-cut accuracy is off, slightly loosen the front and rear clamping screws, use a triangular or square rule to make the base perpendicular to the blade by turning the adjusting screw, then tighten the clamping screws and perform a test cut.
  • Replacing Carbon Brushes: Check carbon brushes regularly and replace them when they wear down to the limit mark. Both brushes should be replaced at the same time with identical carbon brushes. Use a screwdriver to remove brush holder caps, insert new brushes, and secure the caps.
  • Service: For product safety and reliability, all repairs, maintenance, or adjustments should be performed by Makita Authorized or Factory Service Centers using genuine Makita replacement parts.

Makita HS7610 Specifications

General IconGeneral
Blade Diameter190 mm
Max Cutting Depth at 90°66 mm
Max Cutting Depth at 45°46 mm
Max Cutting Capacity at 0°66 mm
Max Cutting Capacity at 45°46 mm
No Load Speed5200 rpm
Input Power1200 W
Power SourceCorded
Weight4.0 kg

Related product manuals