P 6 / 12
Repair
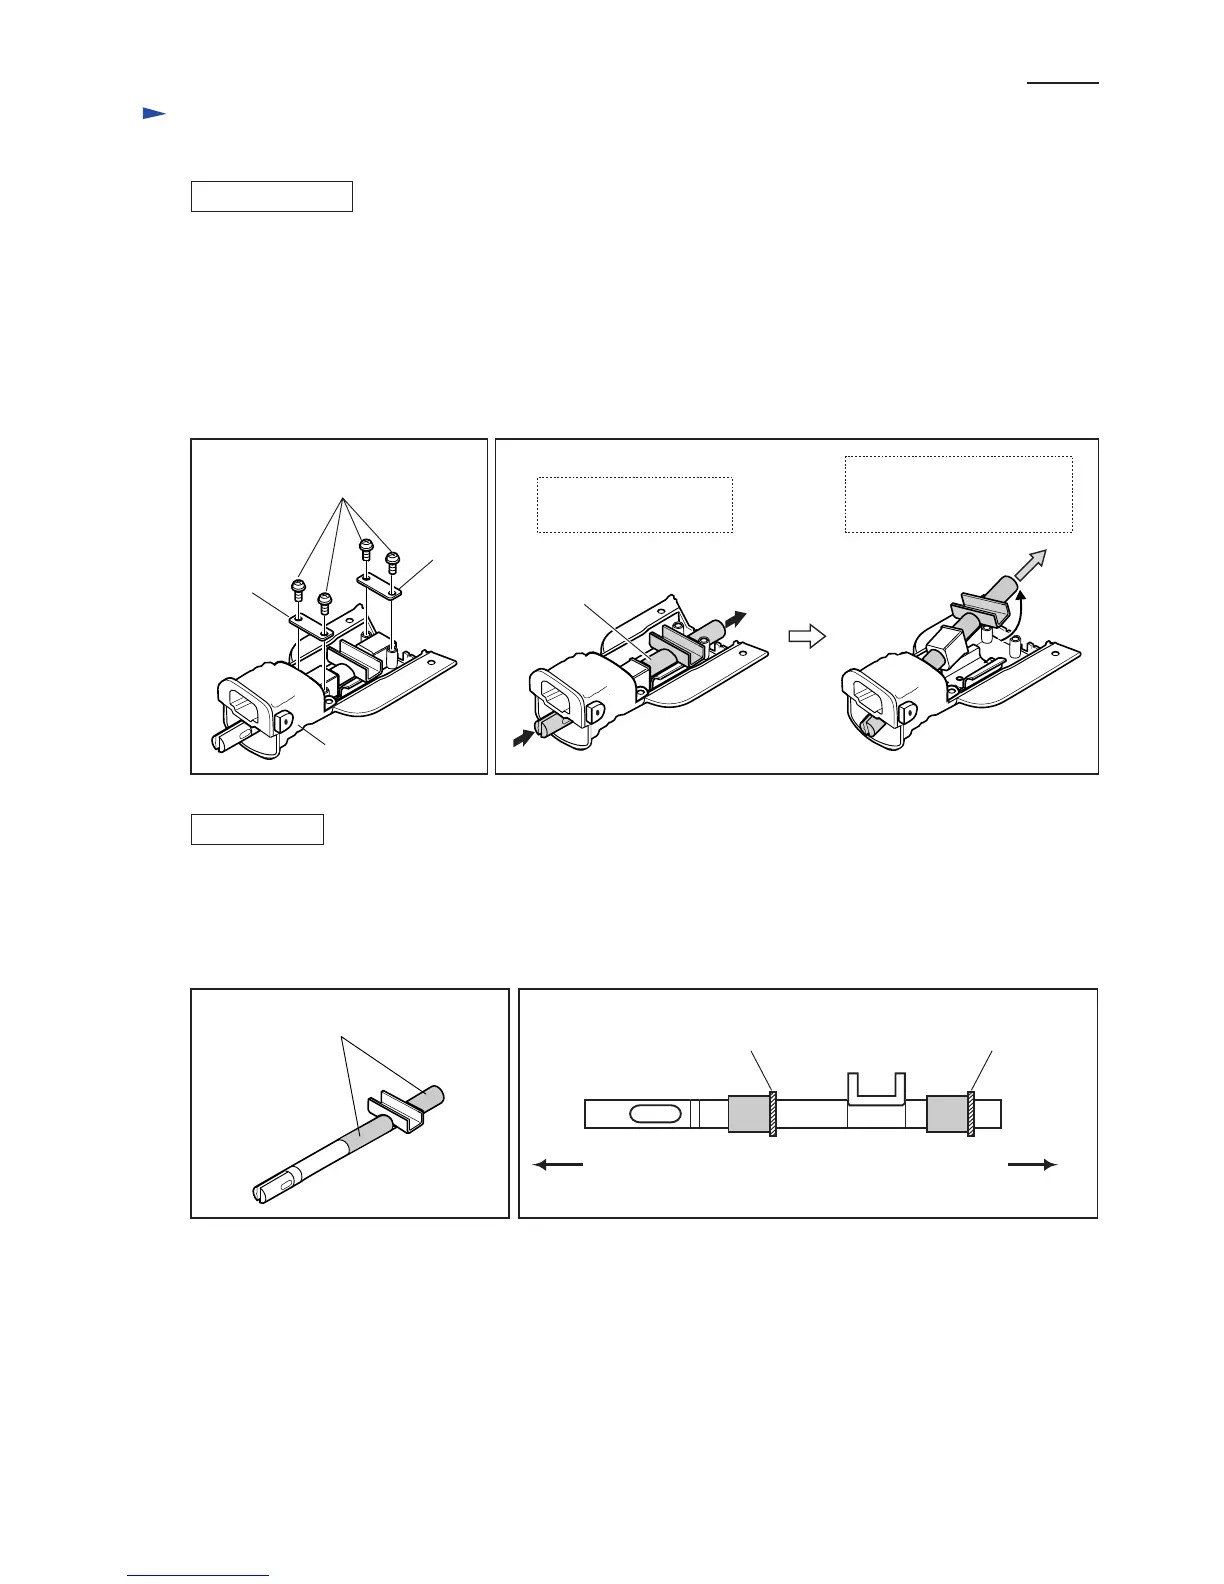
[3] -3. Disassembling/ Assembling Slider
Fig. 13 Fig. 14
1) Remove shoe and insulation cover.
2) Remove the blade clamp section. (Refer to [3] -1.)
3) Separate gear housing cover from gear housing by removing two M5x25 pan head screws
and two M5x35 pan head screws.
4) Remove two plates from gear housing cover by unscrewing four M5x16 pan head screws. (Fig. 13)
5) From slider, remove the plane bearing 14 on the motor housing side.
6) Move slider towards the motor housing side. Then remove slider from gear housing cover by pulling in the direction
designated by the gray arrow. (Fig. 14)
DISASSEMBLING
ASSEMBLING
Do the reverse of the disassembling steps.
1) Apply Makita grease N No.1 to slider as illustrated in Fig. 15 in order to lubricate X ring 14 and plane bearings 14.
2) Plane bearings 14 are not reversible when assembled to slider. Be sure to install them as illustrated in Fig. 16.
3) Do not forget to install seal ring when assembling gear housing cover to gear housing.
Notes:
Pan head screw M5x16
(adhesive-coated type)
Plate
Gear housing cover
Plate
Slider
While lifting up slider,
pull it off from gear housing
cover.
Fig. 15 Fig. 16
Apply Makita grease N No. 1 here.
(Blade side) (Motor housing side)
brim brim
Move slider towards
the motor housing side.
 Loading...