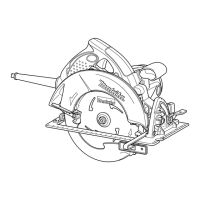
This document provides an instruction manual for the Makita Circular Saw, Model 5007MG, emphasizing safety, operation, and maintenance.
General Safety Rules
The manual begins with a comprehensive set of general safety rules, applicable to all power tools, whether mains-operated (corded) or battery-operated (cordless). These rules are categorized into work area safety, electrical safety, personal safety, and power tool use and care.
- Work Area Safety: Users are advised to keep their work area clean and well-lit to prevent accidents. Operating power tools in explosive atmospheres (flammable liquids, gases, or dust) is prohibited due to the risk of sparks causing ignition. Children and bystanders should be kept away from the operating area to avoid distractions and loss of control.
- Electrical Safety: Power tool plugs must match the outlet, and no modifications should be made to the plug. Adapter plugs with earthed (grounded) power tools are not to be used. Contact with earthed or grounded surfaces (pipes, radiators, ranges, refrigerators) should be avoided to reduce the risk of electric shock. Power tools should not be exposed to rain or wet conditions. The power cord should not be abused (carried, pulled, or unplugged by the cord) and must be kept away from heat, oil, sharp edges, or moving parts. When operating outdoors, an extension cord suitable for outdoor use must be used.
- Personal Safety: Users are instructed to stay alert, watch what they are doing, and use common sense. Operating the tool while tired or under the influence of drugs, alcohol, or medication is dangerous. Safety equipment, including eye protection, dust mask, non-skid safety shoes, hard hat, or hearing protection, should always be worn. Accidental starting must be avoided by ensuring the switch is in the off-position before plugging in. Any adjusting key or wrench must be removed before turning the power tool on. Users should not overreach, maintaining proper footing and balance. Loose clothing, jewelry, hair, and gloves should be kept away from moving parts. If dust extraction and collection facilities are provided, they must be connected and properly used.
- Power Tool Use and Care: The power tool should not be forced; the correct tool for the application should be used. If the switch does not turn the tool on and off, it must be repaired. Before making adjustments, changing accessories, or storing the tool, the plug must be disconnected from the power source and/or the battery pack. Idle power tools should be stored out of reach of children and untrained persons. Power tools must be maintained, checking for misalignment, binding, breakage, or any other condition affecting operation. Cutting tools should be kept sharp and clean. The power tool, accessories, and tool bits must be used in accordance with instructions and for their intended purpose.
- Service: The power tool should be serviced by a qualified repair person using identical replacement parts. Instructions for lubricating and changing accessories must be followed. Handles should be kept dry, clean, and free from oil and grease.
Specific Safety Rules for Circular Saws
The manual provides specific safety rules for circular saws, emphasizing the prevention of serious personal injury.
- Hand Placement: Hands must be kept away from the cutting area and the blade. The second hand should be placed on the auxiliary handle or motor housing. Both hands on the saw prevent cuts from the blade.
- Workpiece Handling: Do not reach underneath the workpiece, as the guard cannot protect from the blade below. Do not attempt to remove cut material while the blade is moving. Blades coast after turn off, so wait until the blade stops before grasping cut material.
- Cutting Depth: Adjust the cutting depth so that no more than a full tooth of the blade teeth is visible below the workpiece.
- Workpiece Support: Never hold the piece being cut in hands or across legs. Secure the workpiece to a stable platform to minimize body exposure, blade binding, or loss of control.
- Insulated Gripping Surfaces: Hold the power tool by insulated gripping surfaces when performing operations where the cutting tool may contact hidden wiring or its own cord.
- Rip Fence/Straight Edge Guide: Always use a rip fence or straight edge guide when ripping to improve accuracy and reduce blade binding.
- Blade Compatibility: Always use blades with the correct size and shape of arbor holes. Damaged or incorrect blade washers or bolts should never be used.
- Kickback Prevention: Kickback is a sudden reaction to a pinched, bound, or misaligned saw blade. To prevent kickback, maintain a firm grip with both hands, position arms to resist forces, and keep the body to either side of the blade, not in line with it. If the blade binds or a cut is interrupted, release the trigger and hold the saw motionless until the blade stops. When restarting, center the blade in the kerf and ensure teeth are not engaged. Support large panels to minimize blade pinching and kickback, placing supports on both sides near the cut line and edge. When resting the saw on the workpiece, rest it on the larger portion and cut off the smaller piece.
- Blade Condition: Do not use dull or damaged blades. Keep blades sharp and clean, removing gum and wood pitch.
- Adjustments: Blade depth and bevel adjusting locking levers must be tight and secure before making a cut.
- Plunge Cuts: Use extra caution when making "plunge cuts" into existing walls or blind areas, retracting the lower guard with the retracting handle.
- Tool Grip: ALWAYS hold the tool firmly with both hands. NEVER place hands or fingers behind the saw.
- Forcing the Saw: Never force the saw; forcing can cause uneven cuts, loss of accuracy, and kickback. Push the saw forward at a speed that allows the blade to cut without slowing.
- Lower Guard Check: Check the lower guard for proper closing before each use. Do not operate if it does not move freely and close instantly. Never clamp or tie the lower guard open. Manually retract the lower guard only for special cuts (plunge or compound cuts), releasing it as soon as the blade enters the material.
- Blade Coverage: Always observe that the lower guard covers the blade before placing the saw down. Wait for the blade to stop before setting the tool down.
- Cutting Conditions: Use extra caution when cutting damp wood, pressure-treated lumber, or wood containing knots. Adjust speed to maintain smooth advancement.
- Nail Avoidance: Inspect and remove all nails from lumber before cutting.
- Workpiece Support (Base Placement): Place the wider portion of the saw base on the solidly supported part of the workpiece, not on the section that will fall off. Clamp down short or small pieces.
- Tool Orientation: Never attempt to saw with the circular saw held upside down in a vise.
- Material Chemicals: Some materials contain toxic chemicals; take caution to prevent dust inhalation and skin contact. Follow material supplier safety data.
- Blade Stopping: Do not stop the blades by lateral pressure on the saw blade.
- Blade Type: Always use blades recommended in this manual; do not use abrasive wheels.
- Personal Protective Equipment: Wear a dust mask and hearing protection when using the tool.
Functional Description
The manual details the functional aspects of the circular saw, including switch action, lamp lighting, depth adjustment, bevel cutting, and sighting.
- Switch Action: Before plugging in, ensure the switch trigger actuates properly and returns to the "OFF" position. To start, pull the switch trigger; release to stop.
- Lighting the Lamp: The lamp lights up when the tool is plugged in and stays lit until unplugged. Users are warned not to apply impact to the lamp or look directly at the light source. A dry cloth should be used to wipe dirt off the lens, being careful not to scratch it.
- Adjusting Depth of Cut: Loosen the lever on the depth guide, move the base up or down to the desired depth, and secure by tightening the lever. For cleaner, safer cuts, set the depth so no more than one blade tooth projects below the workpiece, which helps reduce kickback.
- Bevel Cutting:
- Positive Stopper: Turn the positive stopper to one of three positions (22.5°, 45°, 56°). Tilt the tool base until it stops and secure with the lever to achieve the corresponding angle.
- Setting Bevel Angle: Loosen the lever and tentatively set the base at 0° bevel angle, then tighten the lever. Turn the positive stopper to an angle equal to or greater than the desired bevel angle. Loosen the lever again, tilt, and secure the base at the desired angle.
- Note: When changing the positive stopper's position, loosening the lever and tilting the bevel angle to less than the desired stopper position number allows for change. The bevel angle can be adjusted from 0° to 22.5° when the stopper points to 22.5°, from 0° to 45° when it points to 45°, and from 0° to 56° when it points to 56°.
- Sighting: For straight cuts, align position A on the front of the base with the cutting line. For 45° bevel cuts, align position B.
Assembly
The manual describes the storage of the hex wrench and the process of installing and removing the saw blade.
- Hex Wrench Storage: The hex wrench is stored on the tool. To remove, rotate it toward yourself and pull it out. To install, place it on the handle and turn it until it contacts the protrusion.
- Removing or Installing Saw Blade:
- Caution: Ensure the blade is installed with teeth pointing up at the front of the tool. Use only the Makita wrench.
- To remove, press the shaft lock, use the hex wrench to loosen the hex bolt counterclockwise, then remove the hex bolt, outer flange, and blade.
- To install, follow the removal procedure in reverse, ensuring the hex bolt is tightened clockwise securely.
- When changing the blade, clean the upper and lower blade guards of accumulated sawdust.
Operation
The manual provides instructions for operating the circular saw, including proper tool movement and the use of a rip fence.
- Tool Movement: Move the tool forward in a straight line gently. Forcing or twisting the tool can cause overheating and kickback.
- Grip: Always use both the front grip and rear handle, holding the tool firmly.
- Starting a Cut: Set the base on the workpiece without blade contact. Turn the tool on and wait for the blade to reach full speed. Move the tool forward over the workpiece surface, keeping it flat and advancing smoothly.
- Maintaining Cut Quality: Keep the sawing line straight and speed of advance uniform for clean cuts. If the cut deviates, do not attempt to turn or force the tool back; release the switch, wait for the blade to stop, withdraw the tool, realign, and restart.
- Chip and Dust Avoidance: Avoid positioning that exposes the operator to chips and wood dust. Use eye protection.
- Rip Fence (Guide Rule) (Accessory): The rip fence allows for accurate straight cuts. Slide it snugly against the workpiece side and secure it with the screw on the front of the base. It also enables repeated cuts of uniform width.
Maintenance
The manual outlines maintenance procedures for the circular saw, including adjusting the 90° cut accuracy and replacing carbon brushes.
- Caution: Always ensure the tool is switched off and unplugged before performing inspection or maintenance.
- Adjusting for Accuracy of 90° Cut (Vertical Cut): This adjustment is factory-set. If it is off, adjust the adjusting screw with a hex wrench while squaring the blade with the base using a triangular rule or try square.
- Replacing Carbon Brushes: Remove and check carbon brushes regularly. Replace them when they wear down to the limit mark. Keep them clean and free to slip in the holders. Both carbon brushes should be replaced at the same time with identical carbon brushes. Use a screwdriver to remove the brush holder caps, take out worn brushes, insert new ones, and secure the caps.
- Product Safety and Reliability: Repairs, maintenance, or adjustments should be performed by Makita Authorized or Factory Service Centers, using Makita replacement parts.
Accessories
The manual lists recommended accessories for the circular saw.
- Caution: Only use accessories or attachments recommended in this manual to avoid injury.
- Steel & Carbide-Tipped Saw Blades:
- Combination: General purpose blade for fast and smooth rip, crosscuts, and miters.
- Pressure Treated/Wet Lumber: Designed for fast cutting of pressure-treated and wet lumber.
- Fine Cross Cuts: For sand-free cuts cleanly against the grain.
- Rip Fence (Guide Rule)
- Hex Wrench