Do you have a question about the Makita 5008MG and is the answer not in the manual?
General safety guidelines for maintaining a clean, well-lit, and distraction-free work environment to prevent accidents.
Precautions for safe use of electrical tools, including proper plugs, grounding, and protection against moisture and damaged cords.
Guidelines for operator alertness, use of PPE, and preventing unintentional starting to ensure personal safety during tool operation.
Recommendations for professional servicing and using identical replacement parts to maintain tool safety and reliability.
Essential safety instructions for performing cuts with a circular saw, including blade handling, workpiece support, and avoiding kickback.
Steps for adjusting the cutting depth of the circular saw to ensure optimal performance and reduce kickback risks.
Instructions on how to perform bevel cuts, including using positive stoppers and setting the desired bevel angle accurately.
Information on how the hex wrench is stored on the tool and how to remove or install it for adjustments.
Step-by-step guide on how to safely remove and install the saw blade using the hex wrench and shaft lock.
Details on using the rip fence accessory for accurate straight cuts and achieving uniform width for repeated cuts.
Procedure for adjusting the 90° cut accuracy using the adjusting screw and a triangular rule if factory setting is off.
Instructions for checking and replacing worn carbon brushes to ensure the tool's safety, reliability, and performance.
List and description of recommended optional accessories, advising against the use of non-specified attachments.
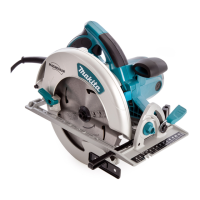
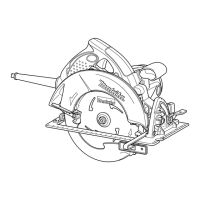
This document provides comprehensive instructions for the Makita 5008MG Circular Saw, covering its function, usage, and maintenance.
The Makita 5008MG Circular Saw is designed for performing lengthways, crossways, and mitre cuts in wood. It is intended for use in firm contact with the workpiece. The tool features double insulation, allowing it to be used from sockets without an earth wire. It is equipped with a lighting lamp that illuminates when the tool is plugged in, remaining lit until unplugged. The saw also includes a lower guard for safety, which should close freely and instantly.
Starting and Stopping: To start the tool, simply pull the switch trigger. Releasing the switch trigger will stop the tool. Before plugging in, always ensure the switch trigger actuates properly and returns to the "OFF" position when released.
Adjusting Depth of Cut: The depth of cut can be adjusted by loosening a lever on the depth guide and moving the base up or down. Once the desired depth is set, the lever must be securely tightened. For cleaner and safer cuts, the depth should be set so that no more than one blade tooth projects below the workpiece, which helps reduce the potential for dangerous kickbacks.
Bevel Cutting: The tool allows for bevel cuts. To set a bevel angle, loosen the lever and tentatively set the tool base at the 0° bevel angle, then tighten the lever securely. The positive stopper can be turned so its arrow points to one of three positions (22.5°, 45°, 50°). After setting the positive stopper, tilt the tool base until it stops and secure it with the lever to achieve the corresponding angle. If a different angle is desired, loosen the lever again, turn the positive stopper to an angle equal to or greater than the desired bevel angle, then tilt and secure the tool base at the precise desired angle. When changing the positive stopper's position, loosening the lever and tilting the bevel angle to less than the desired stopper position number allows for the change. For example, if the arrow points to 22.5, the bevel angle can be adjusted from 0° to 22.5°; if it points to 45, it can be adjusted from 0° to 45°; and if it points to 50, it can be adjusted from 0° to 50°.
Sighting for Cuts: For straight cuts, align the 'A' position on the front of the base with your cutting line. For 45° bevel cuts, align the 'B' position.
Blade Installation and Removal: To remove the blade, press the shaft lock to prevent the blade from revolving, and use the hex wrench to loosen the hex bolt counterclockwise. Then, remove the hex bolt, outer flange, and blade. When installing the blade, reverse the removal procedure, ensuring the blade teeth point up at the front of the tool. The hex bolt must be tightened clockwise securely using only the Makita wrench.
Connecting a Vacuum Cleaner: For clean cutting operations, a Makita vacuum cleaner can be connected to the tool. Install the joint on the tool using screws, then connect the vacuum cleaner hose to the joint.
Operating the Saw: Always use both the front grip and rear handle, holding the tool firmly during operation. The tool is provided with both grips to ensure both hands are holding the saw, preventing them from being cut by the blade. Place the base on the workpiece without the blade making contact, then turn on the tool and wait until the blade reaches full speed. Move the tool forward smoothly over the workpiece surface, keeping it flat until the cut is completed. To achieve clean cuts, maintain a straight sawing line and uniform advance speed. If the cut deviates from the intended line, do not attempt to turn or force the tool back; release the switch, wait for the blade to stop, withdraw the tool, realign, and restart the cut. Eye protection is recommended to avoid injury from chips and wood dust.
Rip Fence (Guide Rule): The rip fence, available as an accessory, allows for extra-accurate straight cuts and repeated cuts of uniform width. To use it, slide the rip fence snugly against the side of the workpiece and secure it with the screw on the front of the base.
Safety Precautions During Use:
General Maintenance: Always ensure the tool is switched off and unplugged before performing any inspection or maintenance. Do not use gasoline, benzine, thinner, alcohol, or similar substances, as they can cause discoloration, deformation, or cracks.
Adjusting for Accuracy of 90° Cut (Vertical Cut): This adjustment is factory-set. If it is off, adjust the adjusting screw with a hex wrench while squaring the blade with the base using a triangular rule or try square.
Replacing Carbon Brushes: Regularly remove and check the carbon brushes. Replace them when they wear down to the limit mark. Keep the carbon brushes clean and free to slip in their holders. Both carbon brushes should be replaced at the same time, using only identical carbon brushes. To replace them, use a screwdriver to remove the brush holder caps, take out the worn brushes, insert the new ones, and secure the brush holder caps.
Blade Maintenance: Keep the blade sharp and clean. Gum and wood pitch hardened on blades can slow the saw and increase the potential for kickback. Clean the blade by first removing it from the tool, then cleaning it with gum and pitch remover, hot water, or kerosene. Never use gasoline for cleaning.
Lower Guard Maintenance: When changing the blade, also clean the upper and lower blade guards of accumulated sawdust. This does not replace the need to check lower guard operation before each use. If the lower guard or its spring is not operating properly, it must be serviced.
Tool Safety and Reliability: To maintain product safety and reliability, all repairs, maintenance, or adjustments should be performed by Makita Authorized Service Centers, using only Makita replacement parts.
| Blade Diameter | 8-1/4 inches |
|---|---|
| Arbor | 5/8 inches |
| No Load Speed | 5, 800 RPM |
| Amperage | 15 Amps |
| Weight | 11.1 lbs |
| Power Source | Corded Electric |
| Motor Type | Brushed |
| Electric Brake | Yes |
| Dust Port | Yes |
| Bevel Capacity | 0° - 50° |
| Max Cutting Capacity at 90° | 2-3/4 inches |