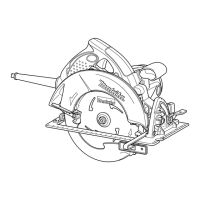
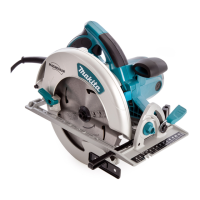
The Makita Circular Saw, available in models 5007F and 5007FA, is a powerful tool designed for various cutting applications. The 5007FA model is additionally equipped with an electric blade brake for enhanced safety. This manual provides essential instructions for safe operation, maintenance, and optimal use of the tool.
Function Description
The circular saw is primarily used for making straight cuts in various materials, particularly wood. Its design allows for precise depth and bevel adjustments, making it versatile for different cutting requirements. The tool features a motor that drives a circular saw blade, which rotates at high speed to cut through workpieces. The lower guard automatically covers the blade when the tool is not in use, retracting as the blade enters the material during a cut. For specific cuts like "Pocket Cuts" or "Compound Cuts," the lower guard can be manually retracted using a lever.
The saw is designed for two-hand operation, with a front grip and a rear handle to ensure a firm hold and better control during use. This two-hand grip is crucial for maintaining stability and resisting kickback forces. The tool also includes a switch trigger to activate the motor and a lamp switch for illuminating the cutting area, improving visibility in dimly lit conditions.
Usage Features
- Depth of Cut Adjustment: The depth of cut can be easily adjusted by loosening a lever on the depth guide and moving the base up or down. For optimal safety and cleaner cuts, it is recommended to set the cut depth so that no more than one blade tooth projects below the workpiece. This minimizes the potential for dangerous kickbacks. After adjustment, the lever must be securely tightened.
- Bevel Cutting: The saw allows for bevel cuts at angles from 0° to 45°. This adjustment is made by loosening a clamping screw on the bevel scale plate, tilting the saw to the desired angle, and then securely tightening the screw.
- Sighting for Cuts: For straight cuts, the "A" position on the front of the base should be aligned with the cutting line. For 45° bevel cuts, the "B" position is used for alignment, ensuring accuracy.
- Rip Fence (Guide Rule): A rip fence is provided for making extra-accurate straight cuts and repeated cuts of uniform width. It slides snugly against the side of the workpiece and is secured with a screw on the front of the base.
- Blade Installation and Removal: The saw blade is installed with the teeth pointing upwards at the front of the tool. A shaft lock is used to prevent the blade from revolving, allowing the hex bolt to be loosened counterclockwise with the provided Makita wrench for removal. Installation follows the reverse procedure, ensuring the hex bolt is tightened clockwise securely.
- Operating Procedure: To operate, the tool should be held firmly with both hands, with the base resting on the workpiece without the blade making contact. The tool is then turned on, and once the blade reaches full speed, it is moved forward smoothly over the workpiece surface, keeping the base flat. Maintaining a straight sawing line and uniform advance speed is crucial for clean cuts and to prevent blade binding or kickback. If the cut deviates from the intended line, the switch should be released, and the tool withdrawn after the blade stops, then realigned before restarting the cut.
- Safety Features: The tool is double insulated, eliminating the need for a grounded power cord. It is equipped with a lower guard that automatically covers the blade, and an electric blade brake (on model 5007FA) to quickly stop the blade after the switch is released, reducing the risk of accidental contact. The manual emphasizes the importance of proper workpiece support, firm gripping, and avoiding forcing or twisting the tool to prevent kickback.
Maintenance Features
- Regular Cleaning: When changing the blade, it is important to clean the upper and lower blade guards of accumulated sawdust to ensure proper operation.
- Blade Care: Dull or damaged blades should not be used as they can cause excessive friction, binding, and kickback. Blades should be kept sharp and clean. Gum and wood pitch hardened on blades can slow the saw and increase kickback potential. Blades should be cleaned by first removing them from the tool, then using a gum and pitch remover, hot water, or kerosene. Gasoline should never be used for cleaning.
- Checking Guard Operation: Before each use, the lower guard should be checked for proper closing and free movement. If the guard or its spring is not operating correctly, it must be serviced. The retracting lever should also be checked to ensure it does not touch the tool housing.
- Adjusting for 90° Cut Accuracy: Although factory-adjusted, the accuracy of a 90° (vertical) cut can be fine-tuned if needed. This involves adjusting a screw with a hex wrench while squaring the blade with the base using a triangular rule or try square.
- Carbon Brush Replacement: The carbon brushes should be removed and checked regularly. They need to be replaced when they wear down to the limit mark. Both carbon brushes should be replaced simultaneously with identical Makita carbon brushes. To access them, the brush holder caps are removed with a screwdriver.
- General Maintenance: All adjustments, changes, and storage should be performed with the tool unplugged from the power source to prevent accidental starting. The blade depth and bevel adjusting locking levers must be tight and secure before making any cut to prevent binding and kickback.
- Service and Repair: To maintain product safety and reliability, all repairs, maintenance, or adjustments should be performed by Makita Authorized or Factory Service Centers, using only genuine Makita replacement parts. Unauthorized parts or improper service can lead to electric shock or injury.