Do you have a question about the Makita LS0816F and is the answer not in the manual?
Read all safety warnings, instructions, illustrations and specifications provided with this power tool.
Keep work area clean and well lit. Cluttered or dark areas invite accidents.
Follow electrical safety guidelines to reduce the risk of electric shock and fire.
Maintain awareness, use PPE, and ensure proper tool handling for personal safety.
Proper use, maintenance, and storage of power tools to ensure safe operation.
Have power tools serviced by qualified personnel using identical replacement parts.
Guidelines on the proper applications and limitations of the power tool.
Further instructions for safe operation and tool handling.
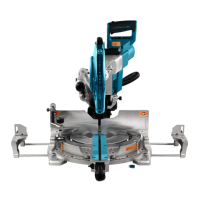
Securely fix the miter saw base to a level and stable surface to prevent tipping.
Instructions on how to lock and unlock the handle for safe storage and operation.
How to lock and unlock the carriage for sliding movement control.
Importance and correct usage of the blade guard for user protection.
Procedures for cleaning the saw blade guard and other parts.
Adjusting kerf boards to minimize workpiece tear-out.
Steps to accurately set the miter angle for cuts.
Utilizing pre-set positive stops for common miter angles.
Steps to accurately set the bevel angle for cuts.
How to tilt the saw blade to the left for cuts between 0 and 45 degrees.
Procedures for tilting the saw blade to angles beyond the standard 0°-45° range.
Specific instructions for tilting the saw blade to a 47° left angle.
Proper operation of the trigger switch and lock-off button for safe use.
Using the LED lamp to cast a cutting line for accurate cuts.
Proper storage of the hex wrench to prevent loss.
Step-by-step guide for changing the circular saw blade.
Essential steps before installing or removing the circular saw blade.
Detailed instructions for correctly installing a new saw blade.
Detailed instructions for safely removing the circular saw blade.
How to connect a vacuum cleaner for dust collection.
Instructions for attaching and emptying the dust bag.
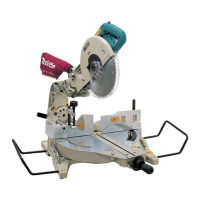
Methods for properly securing the workpiece for safe and accurate cuts.
Proper use and securing of guide fences for stable cutting.
Using sub bases for supporting long workpieces horizontally.
Instructions for installing and using the vertical vise to secure workpieces.
How to perform a straight cut with the carriage locked.
Techniques for cutting wider workpieces using the sliding carriage.
Refer to miter angle adjustment section for performing miter cuts.
Safety precautions and procedures for making bevel cuts.
How to perform cuts that involve both miter and bevel angles.
Techniques for cutting molding profiles using the miter saw.
How to measure and prepare moldings for accurate cutting.
Tables and guidance for setting miter and bevel angles for crown molding.
Specific angle settings for 52°/38° crown molding based on wall angle.
Specific angle settings for 45° crown molding based on wall angle.
Safe practices for cutting aluminum extrusions.
How to perform groove cuts safely, avoiding kickback.
Using the set plate for cutting multiple pieces of the same length.
Proper procedures for safely carrying the miter saw.
How to re-align cutting angles if they become inaccurate.
Steps to adjust the miter angle for precise cuts.
Steps to adjust the bevel angle for precise cuts.
How to set the bevel angle precisely to 0 degrees.
How to set the bevel angle precisely to 45 degrees.
Procedure for replacing worn carbon brushes for optimal performance.
Routine cleaning and lubrication after operating the tool.
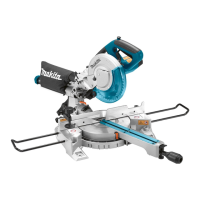
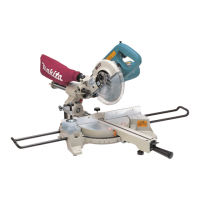
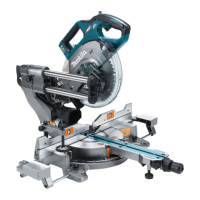
| Type | Sliding Compound Miter Saw |
|---|---|
| Motor Power | 10.5 AMP |
| Motor Type | Brushless |
| Voltage | 120V |
| Blade Diameter | 8-1/2 inches |
| Arbor Size | 5/8 inches |
| Max. Cutting Capacity (90°) | 300 mm |
| Max Cutting Depth at 90° | 70 mm |
| No Load Speed | 5000 RPM |
| Power Source | Electric |
| Amperage | 10.5 A |