This document provides an instruction manual for the Makita Rechargeable Green Multi Line Laser, models SK312GD and SK209GD. It covers the device's function, usage, and maintenance.
Function Description
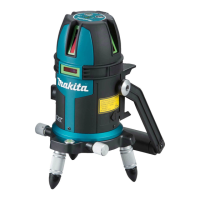
The Makita Rechargeable Green Multi Line Laser is a measuring tool designed for leveling jobs. It emits horizontal lines, vertical lines, and a plumb point, making it suitable for various alignment and leveling tasks. The device features a green semiconductor laser for line beams and a red semiconductor laser for the lower dot beam. It operates with an automatic vertical line indication by a gimbal mechanism, ensuring stability and accuracy. The laser beam selection allows for different configurations, including horizontal line, horizontal/vertical line, and multiple vertical lines with a horizontal line, depending on the model. The brightness of the emitted line beam can be adjusted through three modes: Bright, Normal, and Eco, offering flexibility based on working conditions and battery life considerations. The device is controlled by a magnet damper method, contributing to its precision.
Usage Features
Power On/Off and Mode Selection:
To operate the device, turn the power switch to the "I/ON" side. The laser beam will be emitted in the mode that was active when the product was last turned OFF. To power off, turn the switch to the "O/OFF" side, which also locks the internal pendulum. After turning off, it's recommended to disconnect the battery or DC jack.
Brightness Adjustment:
The laser offers three brightness modes:
- Bright: Provides the brightest line beam.
- Normal: Offers a balanced brightness between Eco and Bright modes, ideal when using a receiver.
- Eco: Extends battery life by operating at a lower brightness.
The brightness can be selected using the brightness selection switch on the operation panel. When powered ON, the laser beam defaults to the Bright mode.
Line Beam Mode Selection:
The device allows users to select different line beam emission modes via a dedicated switch on the operation panel. Models SK312GD and SK209GD have different loopback switch systems for selecting vertical and horizontal lines. The device will emit the laser beam in the same mode that was last turned OFF.
Installation and Adjustment:
For accurate operation, the device should be placed on a level surface. The adjustment screw legs allow for precise leveling until the bubble in the circular level is centered within the red circle. When using a tripod (an optional accessory), first set up the tripod, then mount the line laser. Extend or retract the tripod legs to ensure the bubble in the level is centered.
USB Adapter (Optional Accessory):
The device can be powered using an optional USB adapter. To use it, ensure the product is OFF, remove the DC jack cover, and connect the DC jack plug of the power supply cable to the DC jack. Then, connect the battery to the USB adapter. Turn on the power switch on the USB adapter, followed by the power switch on the laser device. If using the USB adapter with a tripod, install the hand strap (optional accessory) on the adapter and hook it onto the firmly fixed tripod screw to prevent accidental falls. Note that the USB adapter does not charge the battery.
Accuracy Checking:
Regular accuracy checks are crucial to ensure reliable performance.
- Horizontal Line Check: Place the laser in the center of a room with approximately 5m walls. Level the device, mark the horizontal laser line (A) on a wall, rotate the laser 180°, and mark the new position (B). Move the laser 1m away from the wall, re-level, and repeat the marking process (B' and A'). The difference between A-A' and B-B' should be within 1mm. Additionally, rotate the laser horizontally and measure the maximum deviation of the horizontal line from A'; it should be within 1mm.
- Plumbing Point and Vertical Line Check: Set a plumb point on a wall approximately 3m above the floor. Place the laser 3-5m away, level it, and set the "vertical line" or "2-vertical line" mode. Rotate the laser while observing the plumbing point on the ceiling; it should move only within the width of the laser line. Rotate the laser horizontally and align the vertical laser line with a plumb string. The alignment can be adjusted using the rotation fine adjustment knob. The result is normal if the vertical laser line and plumb string are aligned.
- 180° Vertical Line Check: Mark a point on the floor near the center of a room with 4-6m walls. Emit the vertical line beam. Mark points A (right wall), B (front wall, 90° vertical line), and C (left wall, 180° vertical line). Rotate the laser 180° while keeping its original position, align the right side vertical line with C, and mark D near the center of the left side vertical line. The difference between A and D should be within 1mm.
- 90° Vertical Line Check: Mark a point on the floor near the center of a room with 4-6m walls. Emit all vertical line beams. Mark points A (right wall), B (front wall, 90° vertical line), and C (left wall, 180° vertical line). Rotate the laser 90° while keeping its original position, align the right side vertical line with B, and mark C' near the center of the 90° vertical line on the left wall. The difference between C and C' should be within 1mm. For SK209GD, mark B and C on the front and left walls respectively. Align the vertical line on the front with C and mark D on the rear wall. Mark A and B'. The difference between B and B' should be within 3mm.
General Precautions:
- Avoid heavy shakes or impacts, as this can degrade performance. If an impact occurs, perform an accuracy check.
- Always lock the product by turning the power OFF before moving or after finishing work.
- If the laser is not emitted after turning ON, lightly shake the product a few times. If the issue persists, contact a service center.
- When the power is ON, keep the laser beam away from your eyes.
- Avoid using the product if condensation is present; allow it to dissipate naturally.
- Do not use the laser receiver near where laser lines cross.
- Always store and transport the product in its case, away from heat, moisture, vibration, and dust.
- Clean the laser beam exit glass with a soft cloth. For general cleaning, use a soft, dry cloth; for stubborn dirt, use a firmly wrung, water-moistened cloth, then wipe dry. Avoid alcohol, benzene, paint thinner, or other volatile solvents. Do not wash the product.
- Never modify or retrofit the product.
- Remove the battery if the product will not be used for a long time.
- Users must understand the nature and danger of laser beams.
- The product is not intended for use by children or individuals with reduced physical, sensory, or mental capabilities without supervision.
Maintenance Features
General Maintenance:
Always ensure the tool is switched off and the battery cartridge is removed before performing any inspection or maintenance. To maintain the product's safety and reliability, all repairs, maintenance, or adjustments should be carried out by Makita Authorized or Factory Service Centers, using only genuine Makita replacement parts.
Battery Cartridge Safety and Care:
- Read all instructions and cautionary markings on the battery charger, battery, and product before use.
- Do not disassemble the battery cartridge.
- If operating time significantly shortens, stop use immediately to prevent overheating, burns, or explosion.
- If electrolyte gets into eyes, rinse with clear water and seek medical attention immediately.
- Avoid short-circuiting battery terminals by not touching them with conductive materials or storing the battery with other metal objects.
- Do not expose the battery cartridge to water or rain.
- Do not store the tool and battery cartridge in locations where the temperature exceeds 50°C (122°F).
- Do not incinerate the battery cartridge, even if severely damaged or worn out, as it can explode.
- Avoid dropping or striking the battery.
- Use only Makita battery cartridges with Makita-specified products.
Battery Protection System:
The battery protection system automatically turns off the power output to extend battery life. This is a normal function, not a malfunction. The battery indicator on the operation panel shows the battery status. If the indicator lights flash, the laser beam will go out, indicating low battery. The battery indicator may also show remaining capacity based on usage, air temperature, and other factors.
Tips for Maximizing Battery Life:
- Charge the battery cartridge completely before use.
- Never recharge a fully charged battery cartridge.
- Overcharging shortens battery service life.
- Charge the battery cartridge at room temperature (10°C - 40°C / 50°F - 104°F). Allow a hot battery cartridge to cool down before charging.
- Use only genuine Makita batteries and chargers.
Rubber Foot Caps:
Rubber foot caps are supplied to prevent floor scratches or provide stability on slippery surfaces. They can be removed for use on uneven surfaces like concrete floors.