Do you have a question about the Makita TD090D and is the answer not in the manual?
Describes the primary purpose of the tool for screw driving.
Guidelines for maintaining a safe work environment.
Precautions related to power source and tool connections.
Measures to ensure operator safety during use.
Precautions for handling, storage, and short-circuit prevention.
Instructions on how to hold and operate the tool for fastening.
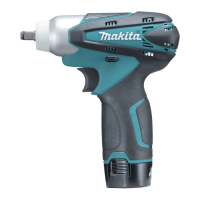
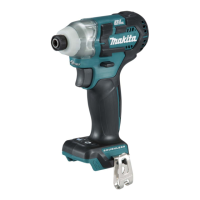
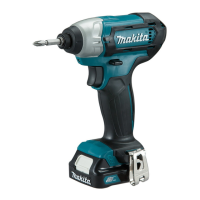
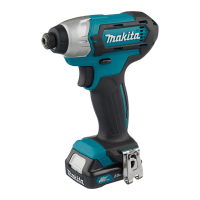
This document is an instruction manual for the Makita Cordless Impact Driver, model TD090D. It provides comprehensive safety warnings, operational guidelines, and maintenance instructions to ensure safe and effective use of the tool.
The Makita Cordless Impact Driver TD090D is a portable power tool designed for fastening screws and bolts. It operates on a battery pack, offering cordless convenience for various applications. The tool features an impact mechanism that delivers high torque, making it suitable for driving fasteners into tough materials. It is equipped with a switch trigger that controls the tool's speed, allowing for precise control over the fastening process. The impact driver also includes a front lamp to illuminate the work area, enhancing visibility in dimly lit conditions. The tool's design incorporates a reversing switch, enabling both clockwise and counterclockwise rotation for driving and removing fasteners.
Battery Cartridge Installation and Removal: To install the battery cartridge, align its front shape with the tool's opening and slide it in until it locks with a click. Ensure it is fully inserted to prevent accidental detachment. Do not force the cartridge; if it doesn't slide easily, it may not be aligned correctly. To remove, press the buttons on both sides of the cartridge and withdraw it from the tool. Always switch off the tool before installing or removing the battery.
Switch Action and Speed Control: The tool is activated by pulling the switch trigger. The speed of the tool increases with greater pressure on the switch trigger, allowing for variable speed control. Releasing the trigger stops the tool. Before starting, always check that the switch trigger actuates properly and returns to the "OFF" position when released.
Front Lamp Operation: Pulling the switch trigger also activates the front lamp, which illuminates the work area. The lamp remains on while the trigger is pulled and turns off approximately 10-15 seconds after the trigger is released. Avoid looking directly into the light source to prevent eye strain.
Reversing Switch: The impact driver features a reversing switch lever to change the direction of rotation. Depress the lever from the 'A' side for clockwise rotation (driving fasteners) and from the 'B' side for counterclockwise rotation (removing fasteners). When the lever is in the neutral position, the switch trigger cannot be pulled, acting as a safety mechanism. Always check the direction of rotation before operation and ensure the tool comes to a complete stop before changing the direction of rotation to prevent damage.
Driver Bit and Socket Bit Installation: For specific bit types (e.g., A=12mm, B=9mm for European/North American/Australian/New Zealand models), pull the sleeve in the direction of the arrow, insert the bit fully into the sleeve, and then release the sleeve to secure it. For other bit types (e.g., A=17mm, B=14mm), a bit-piece may be required. In this case, insert the bit-piece with its pointed end facing in, followed by the bit, then release the sleeve. Ensure the bit is inserted deep enough for the sleeve to return to its original position and secure the bit. To remove a bit, pull the sleeve and firmly pull the bit out. Only use bits with the specified inserting portion.
Fastening Operation: Hold the tool firmly and place the driver bit point in the screw head. Apply forward pressure to the tool to prevent the bit from slipping off the screw. Turn the tool on by pulling the switch trigger to begin operation. The proper fastening torque depends on the screw/bolt type and size, workpiece material, and battery charge level. When fastening smaller screws (M8 or smaller), carefully adjust trigger pressure to avoid damaging the screw. Always hold the tool straight at the screw. Over-tightening can damage the screw or the driver bit. It is recommended to perform a test operation to determine the proper fastening time for your specific screw. After fastening, always verify the torque with a torque wrench.
Using the Holster: The holster allows for convenient carrying of the tool. Thread a waist belt through the holster holder, place the tool in the holster, and lock it with the holster button. The holster can also retain two bits at the front. Always turn off the tool and wait for it to come to a complete stop before placing it in the holster. Ensure the holster is securely closed to hold the tool firmly. Do not use the holster for tools with a drill bit installed.
General Maintenance: Always ensure the tool is switched off and the battery cartridge is removed before performing any inspection or maintenance. To maintain the product's safety and reliability, all repairs, maintenance, or adjustments should be performed by Makita Authorized Service Centers, using only genuine Makita replacement parts.
Battery Care: To maximize battery life, charge the battery cartridge before it is completely discharged. Stop tool operation and recharge the battery when you notice reduced power. Avoid recharging a fully charged battery cartridge, as overcharging shortens its service life. Charge the battery cartridge at room temperature (10°C - 40°C / 50°F - 104°F). Allow a hot battery cartridge to cool down before charging.
Tool and Handle Care: Keep the tool handles dry, clean, and free from oil and grease to maintain a secure grip. Use a dry cloth to wipe dirt off the lamp lens, being careful not to scratch it, as this may reduce illumination.
Accessory Usage: Only use accessories or attachments recommended by Makita for this specific tool. Using unapproved accessories may pose a risk of injury. If assistance is needed regarding accessories, contact your local Makita Service Center. Recommended accessories include screw bits, socket bits, bit pieces, holsters, plastic carrying cases, and various types of Makita genuine batteries and chargers.
| Voltage | 10.8V |
|---|---|
| Max Torque | 90 Nm |
| No Load Speed | 0-2, 400 RPM |
| Impacts Per Minute | 0-3, 000 IPM |
| Battery Type | Lithium-Ion |
| Weight | 0.92 kg |
| Drive Shank | 1/4" Hex |
| Length | 155 mm |