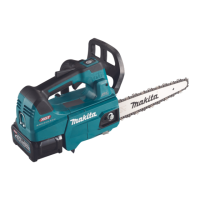
This document describes the Makita UC007G Cordless Chain Saw, a power tool designed for cutting branches, pruning trees, and general tree service. It features a D.C. 36V - 40V max rated voltage and a net weight ranging from 2.6 kg (without saw chain, guide bar, guide bar cover, oil, and battery cartridge) to 3.9 - 4.7 kg (lightest and heaviest combination of weight, including attachments and battery cartridge(s)). The overall length without the guide bar and battery is 266 mm.
Technical Specifications:
The saw supports a recommended guide bar length of 250 - 350 mm with 91PX saw chain type. The standard sprocket has 6 teeth and a 3/8" pitch. The chain speed ranges from 0 to 24.8 m/s (0 to 1,490 m/min). It has a chain oil tank volume of 200 cm³ and an IPX4 protection degree. The tool is compatible with BL4020, BL4025*, BL4040*, and BL4050F battery cartridges, and DC40RA, DC40RB, and DC40RC chargers. Users are warned to only use specified Makita battery cartridges and chargers to avoid injury or fire. The manual recommends using the recommended batteries for optimal performance.
Saw Chain, Guide Bar, and Sprocket Combinations:
For the 91PX saw chain type, various combinations are supported:
- Number of drive links: 40, 46, 52
- Guide bar length: 250 mm, 300 mm, 350 mm
- Cutting length: 225 mm, 281 mm, 337 mm
- Pitch: 3/8"
- Gauge: 1.3 mm
- Type: Sprocket nose bar
- Sprocket number of teeth: 6
- Sprocket pitch: 3/8"
An appropriate combination of guide bar and saw chain is crucial to prevent personal injury.
Symbols and Safety Warnings:
The manual includes various symbols indicating important safety information:
- Read instruction manual
- Wear safety glasses
- Wear ear protection
- Wear helmet, goggles, and ear protection
- Use appropriate protection for foot-leg and hand-arm
- This saw is to be used by properly trained operators only
- Do not expose to moisture
- Maximum permissible cut length
- Always use two hands when operating the chain saw
- Beware of chain saw kickback and avoid contact with bar tip
- Direction of chain travel
- Saw chain oil adjustment
- For EU countries, the crossed-out wheeled bin symbol indicates that electrical and electronic equipment, accumulators, and batteries should not be disposed of with household waste.
- Guaranteed sound power level according to EU Outdoor Noise Directive and Australia NSW Noise Control Regulation.
General power tool safety warnings emphasize keeping the work area clean, avoiding explosive atmospheres, keeping children away, electrical safety (matching plugs to outlets, avoiding body contact with earthed surfaces, not exposing to rain, not abusing the cord, using outdoor-suitable extension cords, and using an RCD protected supply in damp locations). Personal safety includes staying alert, using personal protective equipment (eye protection, hard hat, hearing protection, foot-leg and hand-arm protection), preventing unintentional starting, removing adjusting keys/wrenches before turning on, not overreaching, dressing properly, connecting dust extraction facilities, and not becoming complacent with frequent use.
- Recharge only with the specified charger.
- Use power tools only with specifically designated battery packs.
- Keep battery packs away from other metal objects when not in use to prevent shorting.
- Avoid contact with liquid ejected from the battery under abusive conditions; seek medical help if contact occurs.
- Do not use damaged or modified battery packs.
- Do not expose battery packs to fire or excessive temperature.
- Follow all charging instructions and do not charge outside the specified temperature range.
- Never service damaged battery packs.
- Do not disassemble or tamper with the battery cartridge.
- Stop operating immediately if the operating time becomes excessively shorter.
- Do not short the battery cartridge terminals.
- Do not store and use the tool and battery cartridge in locations where the temperature may reach or exceed 50 °C (122 °F).
- Do not incinerate the battery cartridge.
- Do not nail, cut, crush, throw, drop, or hit the battery cartridge.
- Do not use a damaged battery.
- Lithium-ion batteries are subject to Dangerous Goods Legislation requirements for commercial transport.
- Remove and dispose of battery cartridges safely according to local regulations.
- Use batteries only with Makita-specified products.
- Remove the battery from the tool if not used for a long period.
- Handle hot battery cartridges with care.
- Avoid touching tool terminals immediately after use.
- Prevent chips, dust, or soil from sticking into battery cartridge terminals, holes, and grooves.
- Do not use the battery cartridge near high-voltage electrical power lines unless the tool supports it.
- Keep the battery away from children.
Only genuine Makita batteries should be used to avoid fire, personal injury, and voiding the warranty.
Tips for Maintaining Maximum Battery Life:
- Charge the battery cartridge before it is completely discharged.
- Never recharge a fully charged battery cartridge.
- Charge at room temperature (10 °C - 40 °C).
- Remove the battery cartridge from the tool or charger when not in use.
- Charge the battery cartridge if not used for a long period (more than six months).
Functional Description:
The tool is equipped with a lock-off lever to prevent unintended starting. To start, depress the lock-off lever and pull the switch trigger. Speed increases with pressure on the trigger.
The main power switch turns the tool on (green lamp) and off. The main power lamp blinks green if the switch trigger is pulled under unoperatable conditions (e.g., chain brake applied). An auto power-off function shuts down the main power switch if the trigger is not pulled for a certain period.
The tool has a protection system that automatically cuts off power to the motor to extend tool and battery life under certain conditions:
- Overload protection: Tool stops and main power lamp blinks green if abnormally high current is drawn. Turn off, stop the application, then restart.
- Overheat protection: Tool stops and main power lamp lights red if tool or battery overheats. Let cool down before restarting.
- Overdischarge protection: Tool stops and main power lamp blinks red if battery capacity is insufficient. Remove and charge the battery.
- Protections against other causes: If the tool stops due to other causes, turn off/on, charge/replace battery, or let cool down. If issues persist, contact a Makita Service Center.
Checking the Chain Brake:
Hold the chain saw with both hands, switch on, and push the front hand guard forward. The saw chain should stop immediately. If not, the saw should not be used, and a service center must be consulted.
Checking the Run-Down Brake:
Run the chain saw, then release the switch trigger completely. The saw chain must come to a standstill within two seconds. If not, stop using the saw and consult a service center.
Adjusting the Chain Lubrication:
The oil pump feed rate can be adjusted in 3 steps using the adjusting screw with a universal wrench. Open the cap to access the screw.
Carabiner (Rope Attachment Point):
The tool can be hung by attaching a rope to the carabiner. Pull up the carabiner and tie it with the rope.
Spike Bumper:
The tool comes with a spike bumper as standard. For replacement, contact Makita Authorized Service Centers. When cutting, engage the spike bumper with the trunk and use it as a lever.
Electronic Function:
The tool is equipped with an electric brake. If the tool consistently fails to stop quickly after the switch trigger is released, it requires servicing at a Makita service center.
Assembly:
Always ensure the tool is switched off and the battery cartridge is removed before any work. Wear gloves when handling the saw chain.
Installing or Removing Saw Chain:
- Ensure the saw chain and guide bar are cool before handling.
- Perform the procedure in a clean, sawdust-free area.
Installation Steps:
- Release the chain brake.
- Loosen the chain adjusting screw and retaining nut.
- Remove the sprocket cover.
- Check saw chain direction against the mark on the saw body.
- Fit one end of the saw chain on the top of the guide bar.
- Fit the other end around the sprocket, then attach the guide bar to the saw body, aligning the hole on the guide bar with the pin on the saw body.
- Insert the protrusion and pin on the sprocket cover to the saw body, then close the cover.
- Tighten the retaining nut to secure the sprocket cover, then loosen it slightly for tension adjustment.
After installation, adjust chain tension.
Removing Steps:
- Release the chain brake.
- Loosen the chain adjusting screw and retaining nut.
- Remove the sprocket cover, saw chain, and guide bar.
Adjusting Saw Chain Tension:
- Do not overtighten the saw chain to prevent breakage or guide bar wear.
- A loose chain can jump off the bar and cause injury.
- Check tension periodically, as the chain may loosen after use.
Adjustment Steps:
- Release the chain brake.
- Loosen the retaining nut slightly.
- Lift the guide bar tip slightly and turn the chain adjusting screw clockwise to tighten, counterclockwise to loosen. Tighten until the lower side of the saw chain fits in the guide bar rail.
- Keep holding the guide bar lightly and tighten the sprocket cover. Ensure the chain does not loosen at the lower side.
- Tighten the retaining nut.
Operation - Lubrication:
- When filling the chain oil for the first time or refilling an empty tank, add oil up to the bottom edge of the filler neck to avoid impaired oil delivery.
- Use only Makita chain saw oil or equivalent.
- Never use oil with dust, particles, or volatile oil.
- Use botanical oil for pruning trees; mineral oil may harm trees.
- Ensure the oil tank cap is screwed in place before cutting.
The saw chain is automatically lubricated during operation. Check oil level periodically through the oil inspection window. To refill, lay the saw on its side, press the oil tank cap button until the other side stands up, then remove the cap by turning it. The proper amount is 200 ml. Tighten the cap securely after refilling. If difficult to remove, use a box wrench in the cap slot. After refilling, hold the saw away from the tree, start it, and wait for adequate lubrication.
Working with the Chain Saw:
- First-time users should practice cutting logs on a saw-horse or cradle.
- Use safe supports for precut timber; do not steady with your foot or allow others to hold it.
- Secure round pieces against rotation.
- Keep all body parts away from the saw chain when the motor is operating.
- Hold the chain saw firmly with both hands when the motor is running.
- Do not overreach; maintain proper footing and balance.
- Do not toss or drop the tool.
- Do not cover the tool's vents.
Pruning Trees:
Bring the saw body into contact with the branch before switching on to avoid guide bar wobble. Saw by moving it down using the saw's weight. If a single stroke is insufficient, apply light pressure and draw the saw back slightly. For thick branches, make a shallow undercut first, then the finish cut from the top. Cutting from the bottom without an undercut can pinch the chain; cutting from the top without an undercut can splinter the branch.
Bucking:
Rest the saw body on the wood. With the chain running, saw into the wood using the top handle to raise and the front one to guide. Continue by applying slight pressure to the top handle, easing the saw back slightly. Switch off the saw between multiple cuts.
Limbing:
Limbing should only be performed by trained persons due to kickback risk. Support the saw on the trunk if possible. Do not cut with the bar tip. Pay attention to branches under tension. Do not cut unsupported branches from below. Do not stand on the felled trunk.
Before carrying, apply the chain brake, remove the battery cartridge, and fit the guide bar cover. Also cover the battery cartridge with its cover.
Maintenance:
Always ensure the tool is switched off and the battery cartridge is removed before inspection or maintenance. Wear gloves. Never use gasoline, benzine, thinner, alcohol, or similar substances to avoid discoloration, deformation, or cracks. Repairs and adjustments should be performed by Makita Authorized Service Centers using genuine replacement parts.
Sharpening the Saw Chain:
Sharpen when:
- Mealy sawdust is produced when damp wood is cut.
- The chain penetrates wood with difficulty.
- The cutting edge is damaged.
- The saw pulls left or right due to uneven sharpening.
Sharpen frequently but lightly (2-3 strokes with a file). For multiple resharpenings, have it professionally sharpened.
Sharpening Criteria:
- Excessive distance between cutting edge and depth gauge increases kickback risk.
- All cutter lengths must be equal (minimum 3 mm). Replace chain if shorter.
- Chip thickness is determined by the distance between the depth gauge (round nose) and the cutting edge. Optimal cutting results are obtained with a 0.65 mm distance for 91PX chain.
- Sharpening angle of 30° must be consistent across all cutters.
- Use a suitable round file (55° for 91PX chain) to maintain the correct sharpening angle.
- Use a special round file (optional accessory) for saw chains (4.0 mm for 91PX chain).
- File only on the forward stroke; lift on the return stroke.
- Sharpen the shortest cutter first, then use its length as the standard for others.
- A file holder (optional accessory) can guide the file more easily, with markings for a 30° angle and depth penetration (4/5 of file diameter).
- After sharpening, check depth gauge height with a chain gauge tool (optional accessory).
- Remove any projecting material with a special flat file, then round off the front of the depth gauge again.
Cleaning the Guide Bar:
Chips and sawdust accumulate in the guide bar groove, clogging it and impairing oil flow. Clean it every time you sharpen or replace the saw chain.
Cleaning the Sprocket Cover:
Chips and sawdust accumulate inside the sprocket cover. Remove the cover and saw chain, then clean.
Cleaning the Oil Discharge Hole:
Small dust or particles can build up in the oil discharge hole, impairing oil flow and lubrication. To clean:
- Remove the sprocket cover and saw chain.
- Remove small dust/particles with a slotted screwdriver.
- Insert the battery cartridge, pull the switch trigger to discharge chain oil and clear the hole.
- Remove the battery, reinstall the sprocket cover and saw chain.
Replacing the Sprocket:
- A worn sprocket will damage a new saw chain; replace it.
- Check sprocket condition before fitting a new saw chain.
- Always fit a new locking ring when replacing the sprocket.
- Ensure the sprocket is installed as shown in the figure.
- Clean the tool before storing. Remove chips and sawdust after removing the sprocket cover.
- After cleaning, run it under no load to lubricate the saw chain and guide bar.
- Cover the guide bar with the guide bar cover.
- Empty the oil tank.
Periodic Maintenance Instructions:
A table outlines regular maintenance tasks:
- Chain saw: Inspection (before operation, annually, before storage), cleaning (everyday), check at authorized service center (annually).
- Saw chain: Inspection (before operation), sharpening if necessary (before storage).
- Guide bar: Inspection (before operation), remove from chain saw (before storage).
- Chain brake: Check function (before operation), inspect regularly at authorized service center (every 3 months).
- Chain lubrication: Check oil feed rate (before operation).
- Switch trigger: Inspection (before operation).
- Lock-off lever: Inspection (before operation).
- Oil tank cap: Check tightness (before operation).
- Chain catcher: Inspection (every week).
- Screws and nuts: Inspection (every week).
Troubleshooting:
A table provides common malfunction statuses, their causes, and recommended actions:
- Chain saw does not start: Battery not installed (install charged battery), low voltage (recharge/replace battery), main power switch off (turn on switch).
- Saw chain does not run: Chain brake activated (release brake).
- Motor stops after little use: Low battery charge (recharge/replace battery).
- No oil on chain: Empty oil tank (fill tank), dirty oil guide groove (clean groove), poor oil delivery (adjust screw).
- Chain saw does not reach maximum RPM: Battery installed improperly (install correctly), battery power dropping (recharge/replace battery), drive system malfunction (ask service center).
- Main power lamp blinks green: Switch trigger pulled under unoperatable condition (pull trigger after main power switch on and chain brake released).
- Chain does not stop when brake activated: Worn brake band (ask service center).
- Abnormal vibration: Loose guide bar or saw chain (adjust tension), tool malfunction (ask service center).
- Saw chain cannot be installed: Incorrect saw chain and sprocket combination (use correct combination).
Optional Accessories:
Recommended accessories include:
- Saw chain
- Guide bar
- Guide bar cover
- Sprocket
- File
- Makita genuine battery and charger
If a guide bar of different length is purchased, a suitable guide bar cover that fully covers the guide bar on the chain saw must also be purchased. Some items may be included as standard accessories depending on the country.