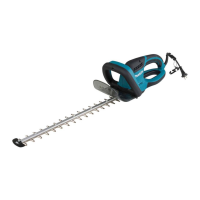
This document is an instruction manual for Makita Hedge Trimmers, models UH5580, UH6580, and UH7580. It provides specifications, safety warnings, operational instructions, and maintenance guidelines for these tools.
Function Description
The Makita Hedge Trimmer is an electric power tool designed for trimming hedges. It features a triple switching system for safety, requiring two out of three triggers (A, B, and C) to be pressed simultaneously to operate the tool. Releasing either of the two pressed triggers will turn the tool off. The tool can be used for various cutting styles, including straight cuts, vertical cuts, and trimming far areas. An optional chip receiver accessory can be attached to collect cut-off leaves, preventing them from being thrown away.
Important Technical Specifications
The hedge trimmers come in three models with varying blade lengths:
- UH5580: 550 mm blade length
- UH6580: 650 mm blade length
- UH7580: 750 mm blade length
All models share the following specifications:
- Strokes per minute (min⁻¹): 1,500
- Overall length:
- UH5580: 970 mm
- UH6580: 1,049 mm
- UH7580: 1,157 mm
- Net weight: 4.3 - 4.5 kg (for all models)
- Safety class: Double Insulation (indicated by the square within a square symbol)
- Power supply: Single-phase AC supply, same voltage as indicated on the nameplate. Double-insulated, usable from sockets without earth wire.
- Noise levels (A-weighted, according to EN60745-2-15):
- Sound pressure level (LPA): 86.5 dB (A)
- Sound power level (LWA): 94.5 dB (A)
- Uncertainty (K): 0.7 dB (A)
- Vibration total value (tri-axial vector sum, according to EN60745-2-15):
- Work mode: hedge trimming
- Vibration emission (ah): 4.4 m/s²
- Uncertainty (K): 1.5 m/s²
The manual emphasizes that specifications are subject to change due to ongoing research and development and may differ by country. Weight is according to EPTA-Procedure 01/2014.
Usage Features
The hedge trimmer is designed for user safety and efficiency.
- Switch Action: The triple switching system requires simultaneous activation of two specific triggers for different cutting operations:
- Straight cut: Pull triggers A and B.
- Vertical cut: Pull triggers B and C, moving the tool upwards in front of the body.
- Far area cut: Pull triggers A and C, using both hands to trim hedges in distant areas.
- Extension Cord Management: The tool includes a "hook complete" accessory to secure the extension cord to the tool's cord, preventing unintentional disconnection. This hook should be attached 100-200 mm from the extension cord connector.
- Waist Cord Hook (Accessory): This accessory helps minimize the risk of cutting the extension cord by keeping it secured. One hook of the "hook complete" attaches to the tool's cord, and the other to the extension cord. The waist cord hook itself attaches around the user's waist, with the extension cord passed through its holder.
- Arm Cord Hook (Accessory): Similar to the waist cord hook, this accessory helps manage the extension cord by securing it around the user's arm, passing the cord through its holder. The band length is adjustable.
- Cutting Technique:
- For basic operation, the blades should be tilted towards the trimming direction and moved calmly and slowly at a rate of 3-4 seconds per meter.
- For an even hedge top, tying a string at the desired height and trimming along it as a reference line is recommended.
- For hedge sides, cutting from the bottom upwards is suggested for a nice appearance.
- The tool should not be used to cut branches thicker than 10 mm in diameter. Thicker branches should be cut with branch cutters 10 cm lower than the desired cutting height before using the trimmer.
- Avoid contact with metal fences or other hard objects to prevent blade breakage and injury.
- Do not overreach, especially from a ladder, and avoid working from unstable positions.
- Do not cut dead trees or similar hard objects, as this may damage the tool.
- Chip Receiver (Accessory): This attachment collects cut-off leaves, reducing cleanup. It is pressed onto the shear blades, ensuring its slits overlap with the nuts on the shear blades and that it does not contact the branch catcher. The hooks of the chip receiver must fit into the grooves of the shear blade unit. To remove, press the levers on both sides to unlock the hooks. The blade cover cannot be installed with the chip receiver attached.
Maintenance Features
Regular maintenance is crucial for the tool's safety and longevity.
- General Cleaning: The tool should be cleaned by wiping off dust with a dry or soap-dipped rag. Solvents like gasoline, benzine, thinner, or alcohol should not be used as they can cause discoloration, deformation, or cracks.
- Blade Maintenance:
- The blades should be smeared with machine oil or similar lubricant before and once per hour during operation.
- After use, remove dust from both sides of the blade with a wire brush, wipe with a rag, and apply low-viscosity oil or spray-type lubricating oil.
- Do not wash the blades in water, as this can cause rust or damage.
- If parts other than the shear blades (e.g., the crank) are worn, contact a Makita Authorized Service Center for replacement or repair.
- Removing/Installing Shear Blade:
- Always ensure the tool is switched off and unplugged before performing this task.
- Wear gloves when handling the shear blade to avoid direct contact with the blade and prevent injury.
- To remove the shear blades, reverse the tool and loosen four screws, then take out the shear blade unit.
- To install new shear blades, first remove the blade cover from the old blades and fit it onto the new ones.
- Adjust the crank position as shown in the manual, applying grease provided with the new shear blades to the crank's periphery.
- Overlap the oval hole in the upper blade with that in the lower one.
- Place the new shear blades on the tool, aligning the oval holes with the crank and the screw holes. Secure with two screws.
- Check the crank for smooth turning with a slotted bit screwdriver.
- Install the gear housing and under cover, tightening the screws firmly.
- Remove the blade cover and turn on the tool to check for proper movement. If the blades do not operate properly, it indicates a poor fit between the blades and crank, and the installation process should be redone.
- Do not wipe off grease from the gear and crank, as this may damage the tool.
- Storage:
- Always install the blade cover on the shear blades to prevent exposure.
- Store the tool out of reach of children, and in a place not exposed to water and rain.
- The hook hole at the bottom of the blade cover can be used to hang the tool from a nail or screw on the wall.
- For product safety and reliability, all repairs, carbon brush inspection, and replacement, as well as any other maintenance or adjustment, should be performed by Makita Authorized Service Centers using Makita replacement parts.
Optional Accessories
The manual lists several optional accessories recommended for use with the Makita hedge trimmer:
- Blade cover
- Hook complete
- Shear blade assembly
- Waist cord hook
- Arm cord hook
It notes that some items may be included as standard accessories depending on the country. Users needing assistance with these accessories should contact their local Makita Service Center.